Calamares dual-boot installation
- Firmware
- Checklist
- Boot mode
- Windows preparation
- Linux Installation
- Revisions
Firmware
The firmware is a crucial part of your system as it controls aspects on how the Linux kernel will interact with your the hardware. Some system firmware is setup in such a way that a Linux system does not recognize disk devices.
Checklist
- Use latest available firmware (check your vendor’s support section)
- Disable Intel Optane memory (incompatible with Linux)
- Disable Fake RAID option (or check archlinux wiki)
- Enable AHCI
- Disable Secure Boot (or check archlinux wiki)
- Disable Windows Fast Boot, Windows hibernation and/or Windows hybrid sleep.
- System boot method (BIOS or UEFI)
Some systems require the user to set a firmware password before more advanced options becomes available.
Boot mode UEFI vs BIOS
Computers with preinstalled Windows (Windows 10) is computers using UEFI firmware.
However your system may be configured to allow BIOS boot also labeled as Legacy, CSM(Compatibility Mode) or BIOS/MBR.
The main difference is partition layout schema used.
Partition schema
This is the original schema which has limitations on modern systems. The most notable limitation is the number of partitions which is 4 primary partitions compared to GPT which allows for 128 partitions.
- UEFI does not work with MBR partition schema
An EFI based system uses GPT partition schema and using GRUB boot loader it is also possible to use GPT while still using the older BIOS boot method.
It is very important to choose the correct combination - otherwise Calamares installer will fail in the end when reaching the boot loader stage of the installation.
Installing in EFI mode
This requires a separate partition flagged as boot and is the default installation mode for EndeavourOS. The partition is formatted using FAT32 and usually mounted to /boot/efi.
Installing in BIOS mode
If you choose to install a system using BIOS boot mechanism you must boot the system in BIOS mode you must select manual partitioning in Calamares. Besides the usual root and possibly home you must create 32MB unformatted partition - which must be flagged as bios-boot - do not format the partition. When asked for the boot loader location - select this unformatted partition as target for the bootloader.
Windows preparation
The next parts of this section is all executed inside your current Windows installation.
Filesystem check
Linux is picky when it comes the Windows filesystem. Any inconsistencies in the filesystem and Linux will mount the filesystem read-only. The Windows command to fix the file system is
chkdsk c: /F
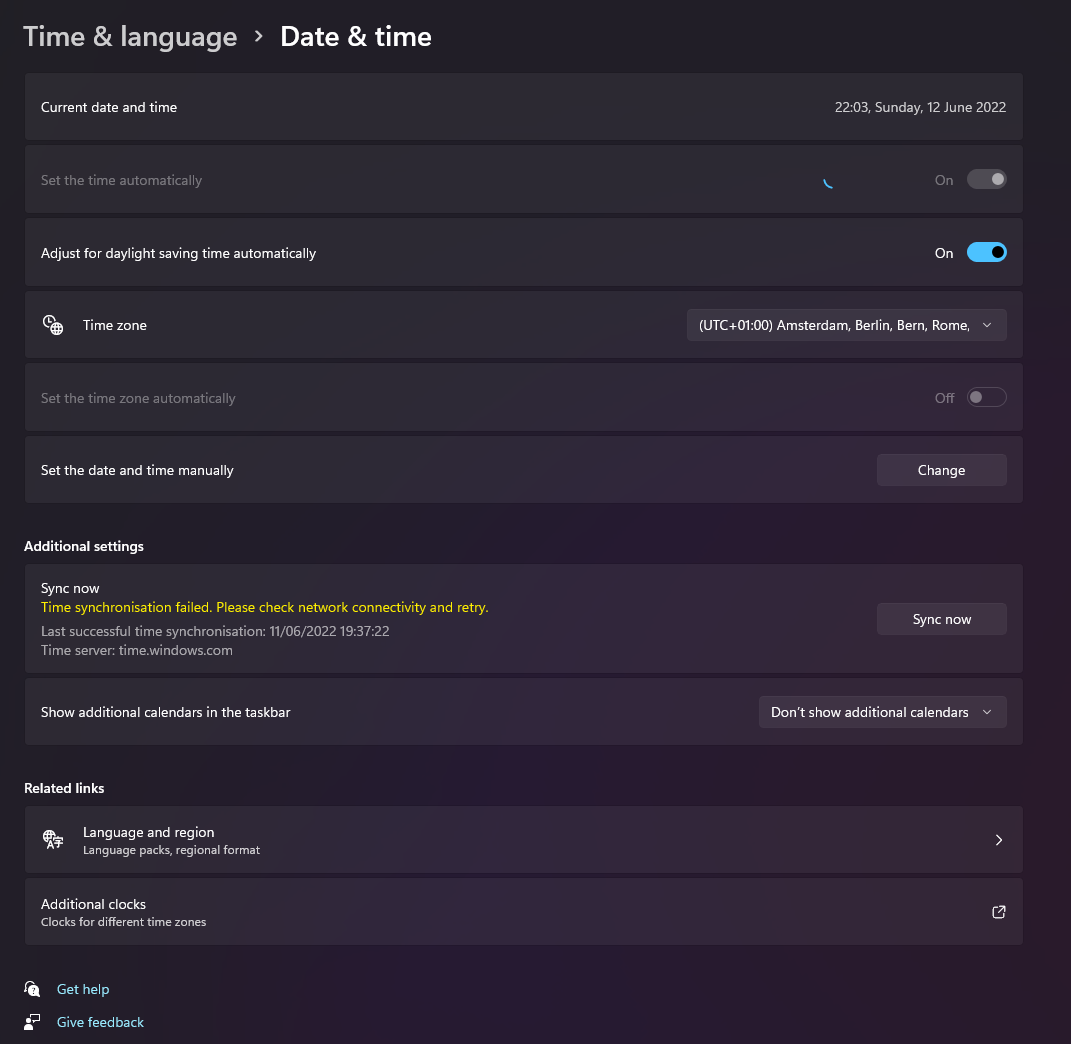
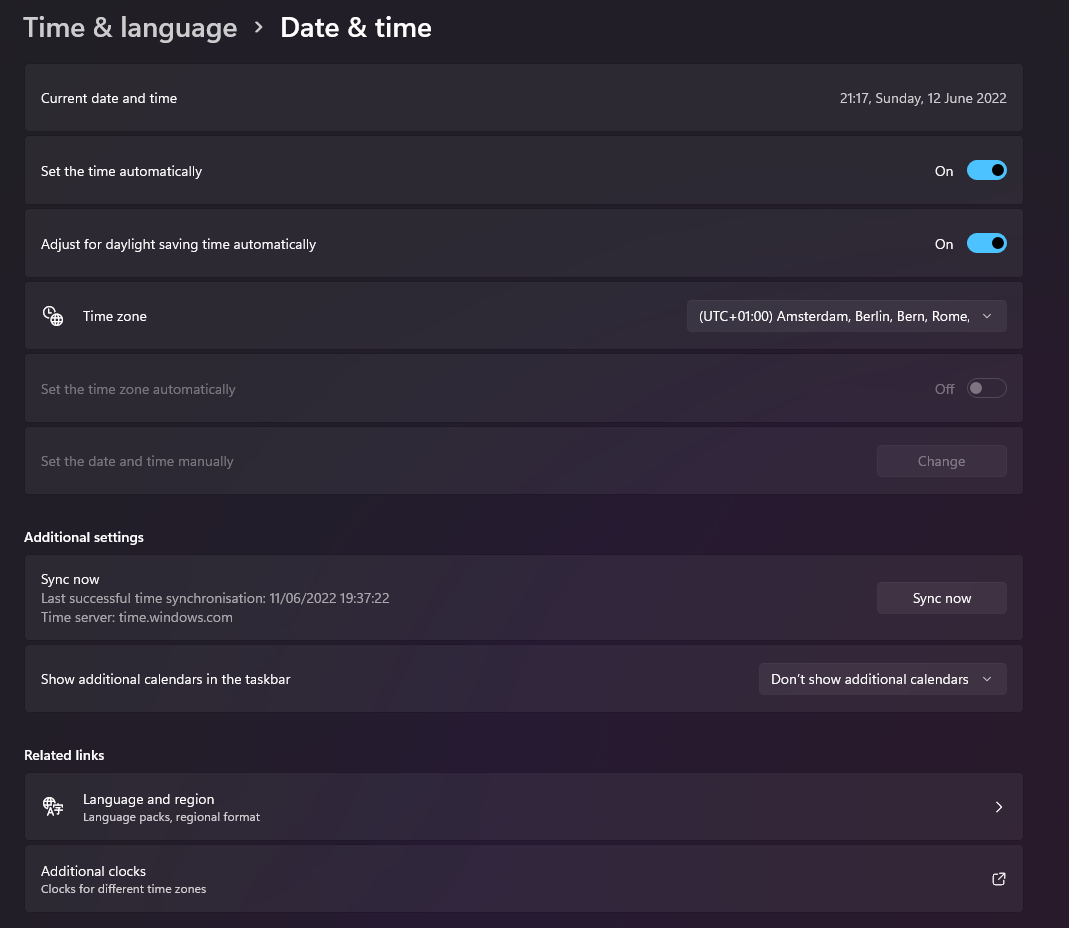
System clock
Configure your Windows installation to use UTC. This is done best with a registry import file.
Create a new file using Notepad with this content (e.g. utc.txt)
Windows Registry Editor Version 5.00

[HKEY_LOCAL_MACHINE\SYSTEM\CurrentControlSet\Control\TimeZoneInformation]
"RealTimeIsUniversal"=dword:00000001
[HKEY_LOCAL_MACHINE\SYSTEM\CurrentControlSet\Services\W32Time\TimeProviders\NtpClient]
"Enabled"=dword:00000000
Open a command prompt and navigate to your desktop folder and rename the file to utc.reg
C:\Users\**username**> cd Desktop
C:\Users\**username**\Desktop> move utc.txt utc.reg
You can now import the file into the registry by double clicking the filename - accept the disclaimer to import the keys.
Disable Windows features
Do you plan on doing read/write on your Windows partition? Disable Windows options like
- Fast Startup
- Hybrid Sleep
Windows Hybrid Sleep defaults to enabled on desktop computers and disabled for laptop computers.
Why should I do that? When Windows uses the above options the filesystem is tainted which causes the system to mount the file system read-only, effectively blocking you from making changes to your files on the Windows partition. To disable Windows Fast Startup you need to access the Windows Control Panel. You find it by clicking on Windows Start button → type control → select Control Panel desktop app.
In the Control Panel app
- Click on System and Security
- Click on Power Options
- Click on Choose what power buttons do
a. Click on Change settings that are currently unavailable
b. Uncheck the option Turn on fast startup - Click on Save Changes
If for any reason you want to turn off hibernation completely
- Open command prompt as Administrator
- Input powercfg /h off and press Enter
Clean your Windows system
If you are like most users, your system came with Windows and your system has since been upgraded to Windows 10 (which leaves the old system behind). Major version upgrades - like 1804 - also leaves the old system behind and therefore a tremendous amount of dead data on your system that needs to be cleaned.
- Open Windows Explorer File manager and select My Computer.
- Right click on you local drive C: → Properties
- Click on Disk Cleanup button → wait
- Click on the Cleanup Systemfiles → wait
- check all items in the list (including the old Windows installation) → OK
- Wait → wait until finished.
- Close all windows
Backup your documents
This should be an obvious step. Backup any data you might want to keep to an external location of any kind.
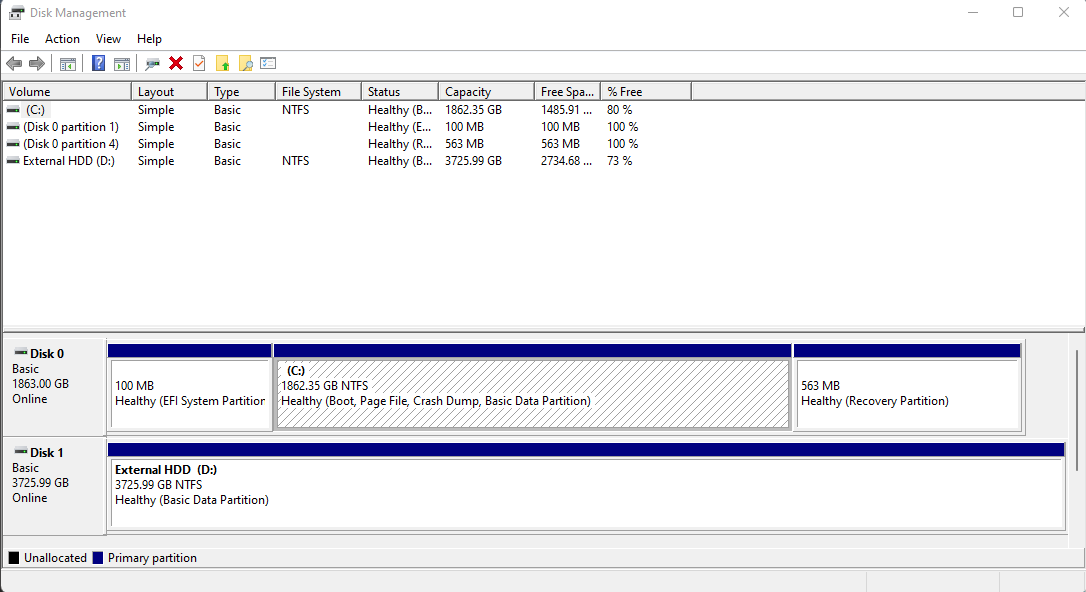
Partition cleanup
If you have experimented a lot and/or had a failed installation and/or you have a messy partition scheme you will have to manually delete those extra partitions with the Windows Disk Manager tool. Be careful that you do not delete partitions required by Windows or by an OEM recovery tool.
Disk space
Use Windows disk tool to make room for a secondary Linux installation because Windows is the best tool to release space.
- So boot into Windows.
- Rightclick on Start → select Disk Manager
- In Disk Manager - rightclick on your Windows drive C: → select Shrink partition
- A reasonable size to release - depending on available space - would be 32768-65536 MiB (32-64GiB) or more.
- When you are ready click Shrink
When you are done you are ready for the installation.
Installation
Some of the choices presented here can be argued and the following two points I would like to address beforehand.
Auto partitioning vs Manual partitioning
Some will argue that one should select the auto partition in the Disk preparation section of the installer.
The strategy described here ensures no messing with the Windows EFI partition and therefore no problems with Windows rewriting the $esp.
Separate root and /home
Separation of the system root and the home folder is not required but is another benefit of using manual partitioning.
The separation of your personal data from the system - using a designated partition for the system’s home folder makes it a bit easier to maintain your system. It is no secure replacement for a backup strategy it is just a handy solution should you decide to reinstall your system.
One pitfall here is making the root partition too small - using the recommended minimum size requires you to do regular system maintenance to avoid the system disk running full and thus making your system very hard to boot.
Other considerations is application distribution methods such as snap and flatpak both of which requires a considerable amounts a disk estate.
Depending on your available disk space your system root could be from 32-64GB. The remaining is assigned to your personal data.
The number mentioned is just examples - they will work if you are just getting your fet wet and needs a gentle hand holding.
Swap size
Setting a swap partition is the better choice because a little swap is - in most cases - better than none.
The chosen size depends on your system, available RAM and disk type. Use the suggested size of 2 GiB *or* research and adjust accordingly to system, taste and need.
If you plan on using hibernation ensure the swap can hold both system and graphics memory.
Installation
Now that you have partition sizes defined let start and the numbers are MB which is the unit Calamares makes use of
- Reboot your computer to the live USB media.
- Launch the graphical installer - it is named Calamares.
- Follow the guide until you reach the Disk selection/preparation
- Select Manual partitioning → Next.
- Select the correct disk selected - should be easy to see.
- BOOT PARTITION either or - not both
- EFI
a. Select the unpartitioned space → Create
b. Size → input 512
c. Filesystem → select FAT32
d. Mountpoint → select /boot/efi
e. Flags → check boot → OK - BIOS
a. Select unpartitioned space → Create
b. Size → input 32
c. Filesystem → select unformatted
d. Flags → check bios-boot → OK
- EFI
- SWAP PARTITION
a. Select the unpartitioned space → Create
b. Size → input 2048 or the number you decided to use
c.. Filesystem → select linuxswap → OK - ROOT PARTITION
a. Select the unpartitioned space → Create
b. Size → input 32768 (32G) or the number you decided to use
d.. Filesystem → select ext4
d. Mountpoint → select / (root) → OK - HOME PARTITION
a. Select the unpartitioned space → Create
b. Size → Use remaining
b. Filesystem → select ext4
d. Mountpoint → select /home → OK - Next
- Reboot
That’s it
Enjoy …
A rewrite of my old guide for dual-booting Manjaro and Windows. The original guide can be found following this link