Sandisk, Samsung, and Lexar SD cards have always been stellar for me. Get the highest Tier any of them offers that you can afford.
Thanks for letting me know. That guide doesn’t work anymore so it was removed from github.
I did an Edit on the post you mentioned, removed the link and told why it was removed. ![]()
The new instructions are included with the .tar file that you download.
Yes, you can use
time zstd -dc RPi4b_64-2021.9.8.zst | dd of=/dev/sda
to write the image to a ssd drive. The “time” command simply tells at completion how long the zstd command took to run. It was about 10 minutes for me. “time” can be omitted, but I find it interesting how long it takes to extract the .zst file and write it to the uSD.
For now, I know the uSD card should work with this method. However, installing on a USB SSD takes a couple of additional steps. So far I have not had time to test if this works, maybe this evening. If I know you like I think I know you, you will be experimenting with different DEs, so for a first try use a uSD card if you have one and save the USB SSD for the next step in your Endeavour. Pun intended.
Also, after the huge changes that came with the newest EndeavourOS ISO, I am not sure the WMs (i3wm, sway, & bspwm) will install properly. I will test these when I get a chance. So much to do, so little time.
Pudge
Pudge
1 Like
Yes, I have started using GPT for the partitioning table of the uSD / USB SSD card instead of msdos and so far no problems. ![]()
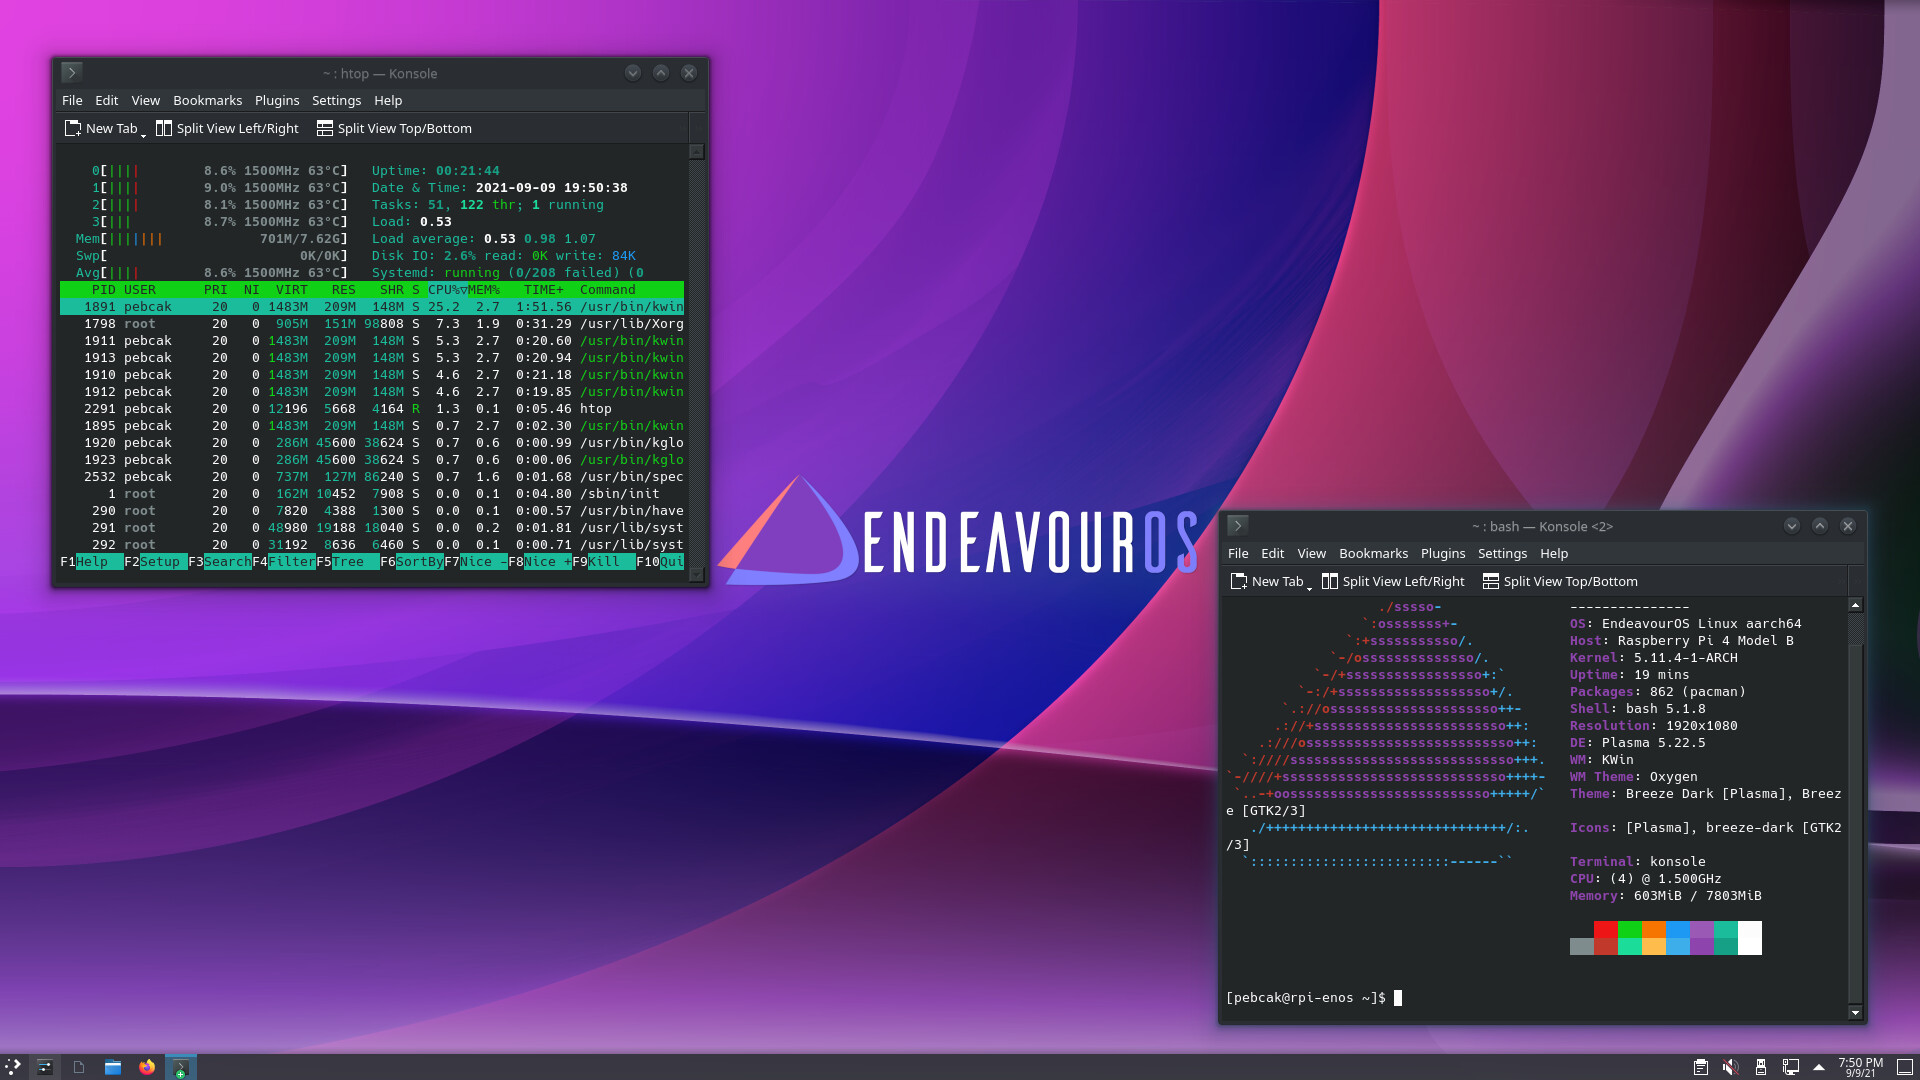
Where I am at with testing the above base install image, RPi 4b 4GB and RPI 4b 8GB work with 64 Bit OS. RPi 400 does not boot with this image. It gets into a loop looking for certain hardware and when it doesn’t find what it wants it resets and tries again. RPi 400 is low on my To Do list at the moment.
Pudge
1 Like
Hi Pudge!
Thank you so much for your reply!
I have successfully written the image to uSD. It took almost the same time as yours, around 10 minutes. When I finally wanted to test it to boot the RPi up I realized to my dismay that the micro HDMI adapter I had would obstruct the power input. I needed to leave home to buy a new adapter 
Now I’m back at my desk, with a freshly booted up Pi and the alarm login prompt on the screen.
I need to consult your instructions now to see how I can take it from here.
I just want to thank you for your kindness and generosity to spend so much time on this project and share it with the rest of us.
1 Like
Yes, 64 bit OS’s should work now. But at this point Arch Linux ARM RPi 4b base image has not adapted to correctly boot from 64 Bit. I am sure they will get it fixed shortly. If one installs the RPi 4b 4GB with their 64 bit OS it works. The base image above hopefully shows that it can work with the RPi 4b 8GB device also. As of now, if one installs via
https://archlinuxarm.org/platforms/armv8/broadcom/raspberry-pi-4
the RPi 4b 8GB will not boot. It gets in a loop looking for USB controllers, can’t find them, then reboots and tries again.
Arch Linux ARM RPi 4b 8GB with 64 bit os will get there.
Pudge
1 Like
Great. Please provide feedback on the clarity of the instructions, etc.
Now, instead of blowing up your x86_64 daily driver with experimentation, you can blow up your ARM install. No harm, no foul there. Unless of course you start using the ARM install as your daily driver.
Pudge
1 Like
I’m afraid this is a very likely scenario ![]()
Sure, I will. I am a bit excited now to get into the system. Already logged in as root. I’ll get back with the report.
1 Like
I have now come to this stage of your instructions:
Your Raspberry Pi 4b device with 64 bit OS is now ready to install a DE.
Go to this web site
EndeavourOS ARM install
and follow the instructions starting with the “Installing EndeavourOS” section.
Login as root, do the ‘git clone’ command to download the installer, then follow the guide.
I followed your guide, step by step, to the letter and everything worked out just perfectly. I couldn’t possibly go wrong with these instructions. They are concise, clear and to the point. Simply perfect.
This guide will walk you through the steps needed to install a Rpi 4b 64 Bit image to a uSD card for
your Raspberry Pi 4b.
And indeed it delivers on that promise. Thank you Pudge!
3 Likes
I got to give credit where credit is due. @linesma wrote the original instructions. ![]()
I just modified them for this little project. So:
That praise belongs to @linesma. In fact, if this becomes normal procedure instead of a work around, I will humbly ask @linesma to purdy up my rushed edits.
Also, if installing a DE does not work, it may be due to things being different since the new 2021.08.27 ISO. I am currently working with @manuel and @joekamprad on standardizing the netinstall.yaml file and other considerations. I believe all the DEs will work (maybe) but I’m not sure about the WMs yet.
Please let me know what DE you try to install and the results.
Pudge
2 Likes
You are too kind @Pudge. I was glad to help. Let me know if you need my services again, and I will gladly help out.
5 Likes
I will be away from the house all afternoon, will check in this evening. US Mountain Time.
Pudge
3 Likes
safe journey
1 Like
I choose KDE this time.
The install script ran its course and everything went smoothly. And I am here:
And now, let’s the fun begin! ![]()
4 Likes
Enjoy the fun …
3 Likes
Thank you @Shjim for all the info and support!
And thank you to @ everybody for helping me to get on this new adventure!
Without your knowledge and support I couldn’t have done it.

2 Likes
Congratulations.
Thank you, that is one less DE I have to test now. Six DEs and 3 WMs left to go.
Just an observation from an interested bystander. Evidently installing EndeavourOS on a Raspberry Pi 4b 8GB is easier than setting up a BRTFS system. ![]()
OKAY, I’m out the door. Don’t throw anything at me.
Pudge
3 Likes
I will clean my Gnome and test WM for you ASAP … 
3 Likes
Unfortunately I don’t have more uSD’s at the moment. I would gladly test other DE’s (read Gnome ![]() ). I’ll see if I can get some more before the weekend.
). I’ll see if I can get some more before the weekend.
The whole process was just done by itself. I was only observing all the lines passing by on the screen and when asked, made the inputs. Next moment, I was at the login screen.
But I must say I like “messing around” with BTRFS subvolumes as well. ![]()
1 Like
Just out of curiosity, which case / heatsink did you end up using for your RPi 4b? Pic?
Pudge
Pimoroni - Aluminium Heatsink Case for Raspberry Pi 4
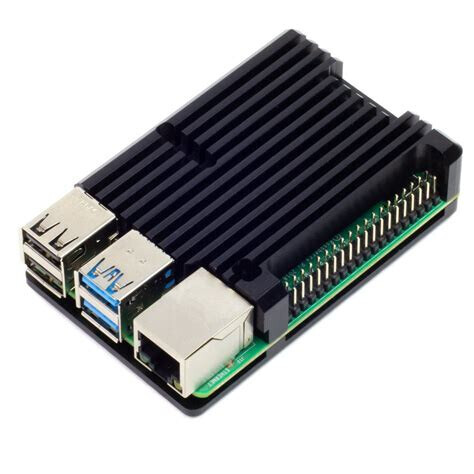
I think this will do for now. Perhaps later on I’ll get a fan or a case both with heatsink and fan.
I’m not sure as my experience with Rpi is not yet one day old ![]()
I would appreciate any recommendations in this regard.
I used s-tui to stress the processor a bit and the temperature stayed around 55 Celsius.
Btw, the CPU runs all the time at max frequency 1500 MHz. Is that normal?
1 Like