How to Install Apps from AUR

Hi,
Now that I have the system running, I am trying to install the apps I need. I want to Install a trading app and not being successful on Arch, as I believe it requires creating things from scratch. I have installed this on other Arch based systems but they had an interface where one could enable AUR and Snapd etc.
Below are the to images for ref:
Screenshot 2021-07-30 at 12.22.03 PM
Screenshot 2021-07-30 at 12.28.00 PM

When I try to run these commands it doesn’t work and says no directory exist. I understand that the documentation provided assumes that the user knows the basics. But if I do this a few times I think I will get the hang of it.

Also, I need to install a basic screen capture tool so I can attach system logs as well and general apps like whatsapp (how do I go about searching for these apps as there is no add/remove program as far as I can see).
Cheers.

4 Likes

AUR is enabled by default in Endeavour, and Yay, an AUR helper is already installed too.

yay -S packagename

:slight_smile:

Edit: There’s an inbuilt screenshot application, just search for it in the menu :slight_smile:

2 Likes

Thank you so much for your detailed response. I want to learn the basics from the ground up so maybe after a few months i should be able to control things better. Can you guide me to a video/article for beginners on how to build a package manually as you recommended.
Cheers.

Well technically it’s @Kresimir who written that great summary…
Good video guide though i’m not sure :upside_down_face:

2 Likes

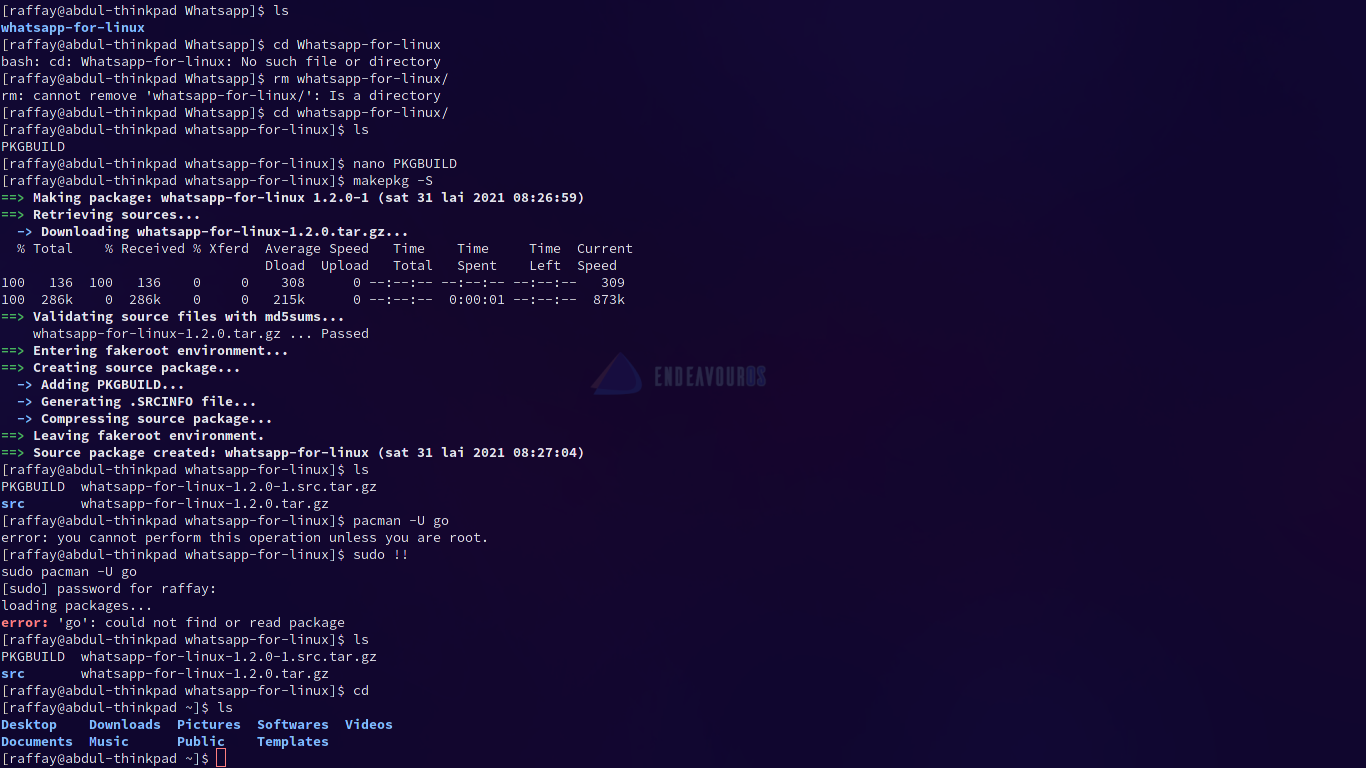
makepkg is a script that creates a foreign (i.e. non-repo) package, which can be installed using pacman -U.

Before we can make a package, we need to have both base-devel and git packages installed:

sudo pacman -S base-devel git --needed

On EndeavourOS, these should already be preinstalled.

Depending on the specific package, we may also need other programs, like compilers and build systems. These are called “make dependencies”.

Typically, making a package from the AUR involves the following steps:

  1. Find the package on aur.archlinux.org/packages
  2. Find the “Git Clone URL” for the package.
  3. Download everything needed to build the package (“clone”) using the git clone command.
  4. cd into the directory where everything downloaded, including the PKGBUILD file.
  5. Open the PKGBUILD file in a text editor and inspect it for anything suspicious (see my tips on what to look out for)
  6. Run makepkg -si inside the directory where the PKGBUILD file is.

In the makepkg command, the option -s means “automatically install dependencies (including installing make dependencies – programs needed to build the program you’re packaging)”, and -i means “if package is built successfully, install it”. If you don’t provide the -i option, makepkg will only create the package, which you can install later manually using pacman -U command.

Here is a concrete example:

On vanilla Arch, you don’t get the program yay preinstalled, and it is not available in the official repos (so sudo pacman -S yay will not work). This is probably intentional to force you to go through the above process at least once in your life. So you would do the following:

  1. Find the AUR page for yay, this is it: https://aur.archlinux.org/packages/yay/
  2. Look under “Git Clone URL” and you’ll see it says this:
    https://aur.archlinux.org/yay.git
    Take this opportunity to look at the package popularity, the names of the maintainer and the last packager, date when it was last updated, etc… and also to read the comments if there is anything unusual you should pay attention to. Clearly, yay is a very popular AUR package!
  3. Run the following command:
    git clone https://aur.archlinux.org/yay.git 
    
  4. Notice that a directory named yay has been created. cd into it:
    cd yay
    
  5. Notice that there is a PKGBUILD file inside. We can quickly glance through it using the less command:
    less PKGBUILD
    
    Looks like a normal PKGBUILD to me1 :sunglasses:, nothing malicious in there, so we’re good to go (hit Q to exit less).
  6. Run:
    makepkg -si
    
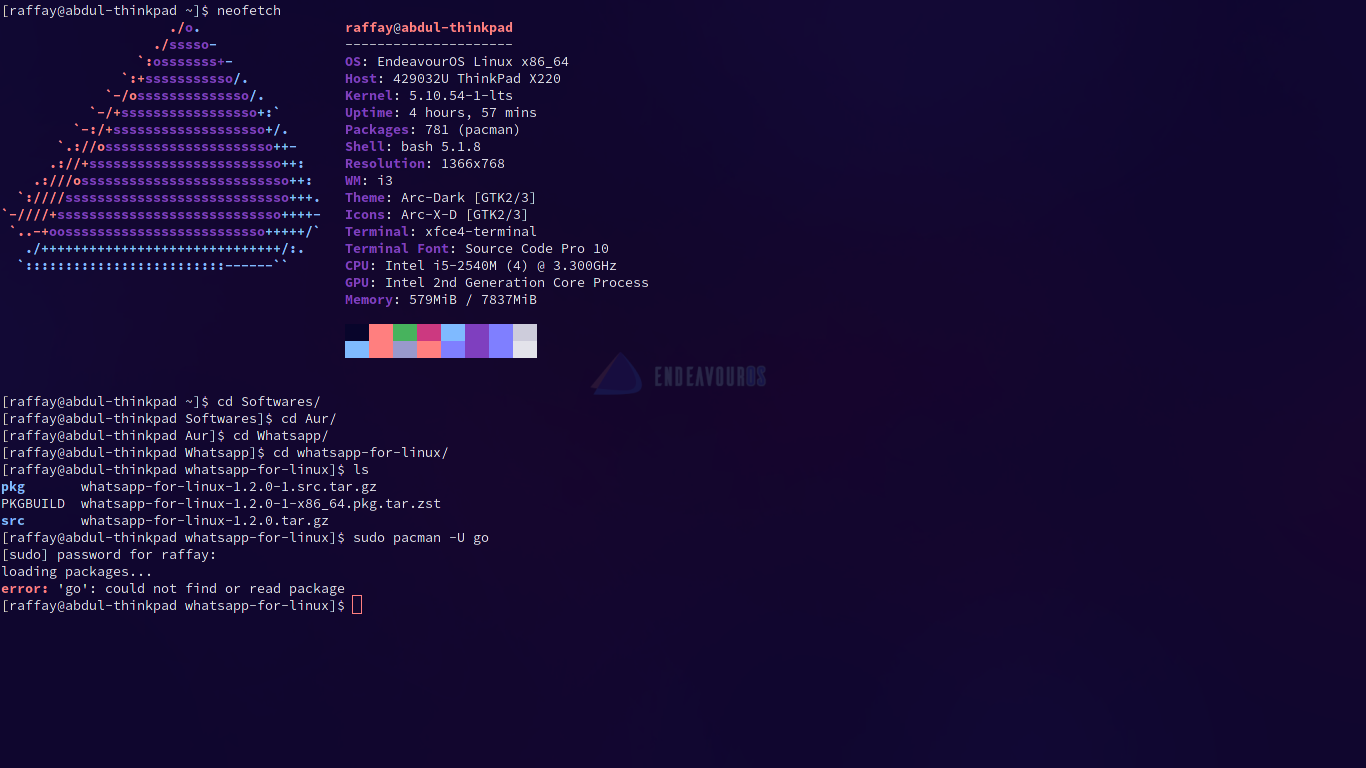
    A make dependency for yay is go (the compiler for the Go language). Unless you already have it installed, pacman will be launched and prompt you to install it from the repos (asking you for your sudo password). After you do so, the building of the package yay will commence. Give it some time… When the package is built, pacman will be launched again to install it. And there you go, now you have yay installed (assuming there were no errors).

Of course, when it comes to yay on EndeavourOS specifically, you don’t have to do this, because the yay package happens to be in the endeavouros repo, for our convenience. So we can just sudo pacman -S yay (we don’t even need to do this, because EndeavourOS comes with yay preinstalled).

This whole process of building and installing a package from the AUR is what an AUR helper like yay does automatically for you (except step 5, but yay gives you a convenient way to look at the PKGBUILD file), and it also keeps track of all installed foreign packages, and allows you to update them when they are updated on the AUR. This is why, normally, you should use an AUR helper, because it makes life so much easier. But in order to understand what’s going on, and avoid potential pitfalls, it’s beneficial to know how to do this manually.

With time and experience, you’ll be much more comfortable with all of this.

More reading:

To learn how to use yay to automate this process:

  • man yay

    TL;DR, usually it is sufficient to just run:

    yay package_name
    

Though you should at least look up at the package on aur.archlinux.org, regardless.

Good luck!


1 Famous last words…

13 Likes

thanks, as I want to learn so I started manually installing whatsapp. So here is what I did, correct me if I am wrong anywhere during this process.

  1. First I made a directory called Softwares
  2. Added another dir inside softwares called Aur
  3. Inside i made a dir called whatsapp
  4. In there i did git clone the link
    2021-07-31-11:16:38-screenshot

It did something but I cannot see the package file so it did not install in the end.

Any idea what I did wrong?
cheers

Some weird stuff yeah :wink:

You ran makepkg -S instead of makepkg -s.
(uppercase “s” vs lowercase… that will do different things)

2 Likes

I tried with small “s” and it gave an error: PKGBUILD does not exist. something wrong with the steps i took

Well, you have to be in the folder that contains the PKGBUILD file.

1 Like

my bad its installing now :slight_smile:

Now it has the pkg file
2021-07-31-12:19:21-screenshot

but it says this
2021-07-31-12:21:30-screenshot

Please post the terminal output as text and not as a screenshot. This will make it searchable, easier to read and easier to copy-paste for quoting.

Just copy the output as text, paste it in your reply, highlight it and click on </> to format.

:enos_flag:

2 Likes

ok sure

1 Like

Why do you type “sudo pacman -U go”?
Instead of “go” you’d want to type in the package file name (the one with .zst).

btw. makepkg -si would have installed it for you right away…

You should probably try to understand what you’re doing instead of wildly entering some commands that you’ve picked up somewhere… :wink:

2 Likes

thats a bit rough “wildly”

I’m your first post the photos look like you’re attempting to install snapd, is that the package you’re trying to install?

I would recommend not using it, especially if it’s already available in the AUR.

I am trying to install this:

Package Details: snapd 2.51.3-2

Package Actions

Git Clone URL: https://aur.archlinux.org/snapd.git (read-only, click to copy)
Package Base: snapd
Description: Service and tools for management of snap packages.
Upstream URL: https://github.com/snapcore/snapd
Licenses: GPL3
Conflicts: snap-confine
Submitter: Barthalion
Maintainer: bboozzoo (zyga)
Last Packager: bboozzoo
Votes: 164
Popularity: 5.17
First Submitted: 2018-01-07 17:37
Last Updated: 2021-07-27 12:49

Installing facebook’s spyware :face_with_hand_over_mouth:
Sorry i couldn’t hold myself :sweat_smile:

5 Likes