I’ve been setting up the fingerprint reader on my Thinkpad today. Many laptops have one but users struggle with the installation. I explored lots of options (and many pitfalls), so I thought I’d share my notes with you.
Warning: Long and detailed!
As usual, documenting took three four times as long as actually setting it up…
EDIT 2025-08-07: Added some info about fingerprint reader types, storage and how to delete a fingerprint.
Fingerprint Reader
On EndeavourOS with Cinnamon DE and the Thinkpad T14 Gen 1.
Note these instructions might work for other DEs as well. Just check what you got in /etc/pam.d/ and replace the “Cinnamon Screensaver” part with your screensaver/locker. KDE Plasma, for instance, should have an additional /etc/pam.d/kde (or similar). Check the Arch Wiki!
Goals
- Enable fingerprint reader for:
- User login (LightDM)
- Virtual console login (
Ctrl+Alt+F1..F6) - Screensaver (also used when resuming from suspend/hibernate)
- Apps using Polkit (Firewall settings, etc.)
sudosu(root; includes Welcome screen apps usingeos-run-cmd-with-su)
- Fingerprint first, password input after 3 wrong fingerprints or timeout.
- Since user and root are technically different users, use separate fingers:
- right index finger for User
- right middle finger for root
Prerequisites
- Arch fprint documentation
- Fingerprint reader must be in the list of supported devices
$ lsusb ... Bus 001 Device 032: ID 06cb:00bd Synaptics, Inc. Prometheus MIS Touch Fingerprint Reader ... - Install fprintd and imagemagick:
$ sudo pacman -Syu fprintd imagemagick - Do not use
pam-fprint-grosshackfrom the AUR, as it doesn’t work with the Cinnamon screensaver, and possibly others.
Configuration
Upstream recommends using S2Idle sleep instead of S3 but depending on your device, S3 might work as well.
In the system BIOS, S2Idle is often called “Windows”, S3 “Linux” sleep mode.
On my Thinkpad, S3 works fine.
Configuration files in /etc/pam.d/
LightDM login
Add pam_fprintd.so as sufficient to the top of the auth section of /etc/pam.d/lightdm:
auth sufficient pam_fprintd.so
This tries to use fingerprint login first, and if it fails or if it finds no fingerprint signatures in the given user’s home directory, it proceeds to password login.
Local console login
Add pam_fprintd.so as sufficient to the top of the auth section of /etc/pam.d/system-local-login:
auth sufficient pam_fprintd.so
Cinnamon screensaver
The screensaver can be used to lock the screen via command (Ctrl+Alt+L or cinnamon-screensaver-command -a) or after a suspend/hibernate when the system resumes.
Add pam_fprintd.so as sufficient to the top of the auth section of /etc/pam.d/cinnamon-screensaver:
auth sufficient pam_fprintd.so
Polkit
This is used by several GUI apps like the firewall configuration.
Copy the default configuration file:
$ sudo cp /usr/lib/pam.d/polkit-1 /etc/pam.d/polkit-1
Add pam_fprintd.so as sufficient to the top of the auth section of /etc/pam.d/polkit-1:
auth sufficient pam_fprintd.so
sudo
Add pam_fprintd.so as sufficient to the top of the auth section of /etc/pam.d/sudo:
auth sufficient pam_fprintd.so
su
Note su is run as root, thus it needs a different fingerprint!
su is also used by EOS’ Welcome screen applications, via eos-run-cmd-with-su.
Add pam_fprintd.so as sufficient to the top of the auth section of /etc/pam.d/su and /etc/pam.d/su-l:
auth sufficient pam_fprintd.so
Group input
Add yourself to the input group:
$ sudo usermod -aG input "$USER"
Restart your system.
Create fingerprint signatures
You will need to have an authentication agent running before being able to enroll.
Be sure you know the type of sensor you have. There are basically two types of sensors: On cheaper and less reliable ones, you’ll have to swipe your finger over it at a constant speed and direction. The better ones allow you to just (slightly) press your finger onto them and are generally more reliable.
Note: It may be tempting to enroll more than one finger per user. Don’t. Most software only ever uses enrolled finger #0. Also, the storage space in the fingerprint device is limited and might overflow if too many fingerprints are registered.
Note: Most modern fingerprint readers have their own chipset and store/verify fingerprints on device. For safety reasons, I recommend to delete your fingerprints before dumping, gifting or selling your hardware.
Signature data is also typically kept in /var/lib/fprint:
$ sudo tree /var/lib/fprint/
Legen Sie Ihren rechten Zeigefinger auf den Fingerabdruckleser
/var/lib/fprint/
├── matthias
│   └── synaptics
│       └── 5a8893c61436
│           └── 7
└── root
    └── synaptics
        └── 5a8893c61436
            └── 8

7 directories, 2 files
The lowest level “number” indicates the finger, counting from the left hand little finger to the right hand little finger. So in our case, we have signatures for matthias’ right index finger and root’s right middle finger.
User
To add a signature for a finger, run:
$ fprintd-enroll
This will usually add the right index finger signature. Depending on the sensor used, swipe or press your finger multiple times, in slightly different position, until it has enough data.
You can also specify the finger and user:
$ fprintd-enroll -f right-index-finger "$USER"
To verify the newly created fingerprint, use:
$ fprintd-verify
root (for su)
Since root and the normal user are technically different users, they require different fingerprints. You must use another finger, since fprint doesn’t allow duplicates!
Let’s use the right middle finger for root access:
$ sudo fprintd-enroll -f right-middle-finger root
Verify it:
$ sudo fprintd-verify
List signatures
To check which signatures are already stored for a user:
$ fprintd-list "$USER"
found 1 devices
Device at /net/reactivated/Fprint/Device/0
Using device /net/reactivated/Fprint/Device/0
Fingerprints for user matthias on Synaptics Sensors (press):
- #0: right-index-finger
and
$ fprintd-list root
found 1 devices
Device at /net/reactivated/Fprint/Device/0
Using device /net/reactivated/Fprint/Device/0
Fingerprints for user root on Synaptics Sensors (press):
- #0: right-middle-finger
You will be asked to authenticate if trying to list fingerprints for another user.
Deleting fingerprint signatures
Check which signatures are already stored for a user as shown above and decide which one to delete. Let’s say we wish to delete the signature for the current user’s right ring finger:
$ fprintd-delete "$USER" -f right-ring-finger
found 1 devices
Device at /net/reactivated/Fprint/Device/0
Using device /net/reactivated/Fprint/Device/0
Fingerprint right-ring-finger of user matthias deleted on Synaptics Sensors
Careful: You can also delete all fingerprints for a user:
$ fprintd-delete "$USER"
Testing
LightDM login
Log off. The login should prompt you to press (or swipe) the right index finger.
After a timeout (or 3 unsuccessful attempts) you can still login using your password.

Console login
Switch to a virtual console using Ctrl+Alt+F2. Enter your username and it should prompt you to login using the fingerprint:
EndeavourOS 6.15.9-arch1-1 (tty2)
t14-mch login: matthias
Place your right index finger on the fingerprint reader
[matthias@t14-mch ~]$
Cinnamon Screensaver
Lock your screen using Ctrl+Alt+L. Once the lock screen is shown, move the mouse or press a key.
The lock screen should prompt you for fingerprint access.

Note: Even if it looks like, you cannot enter a password before either your 3 tries to fingerprint or the timeout are exhausted! It will only work after that!
Suspend/Resume
If you have set your system to invoke the lock screen on resume after suspend/hibernate, logging back in using the fingerprint should also be possible.
If this doesn’t work, you might have to enable S2Idle (“Windows”) sleep mode in your BIOS.
See also Throubleshooting in the Arch wiki.
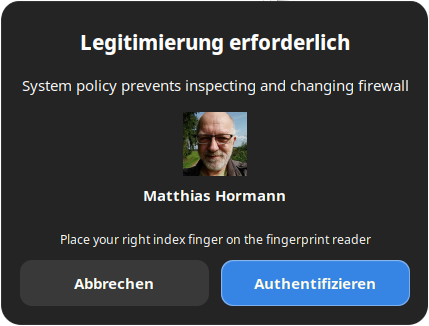
Polkit
Some applications use the Polkit for authentication. Let’s go to Menu → Settings → Administration → Firewall.
You should see an authorization request like this:
sudo
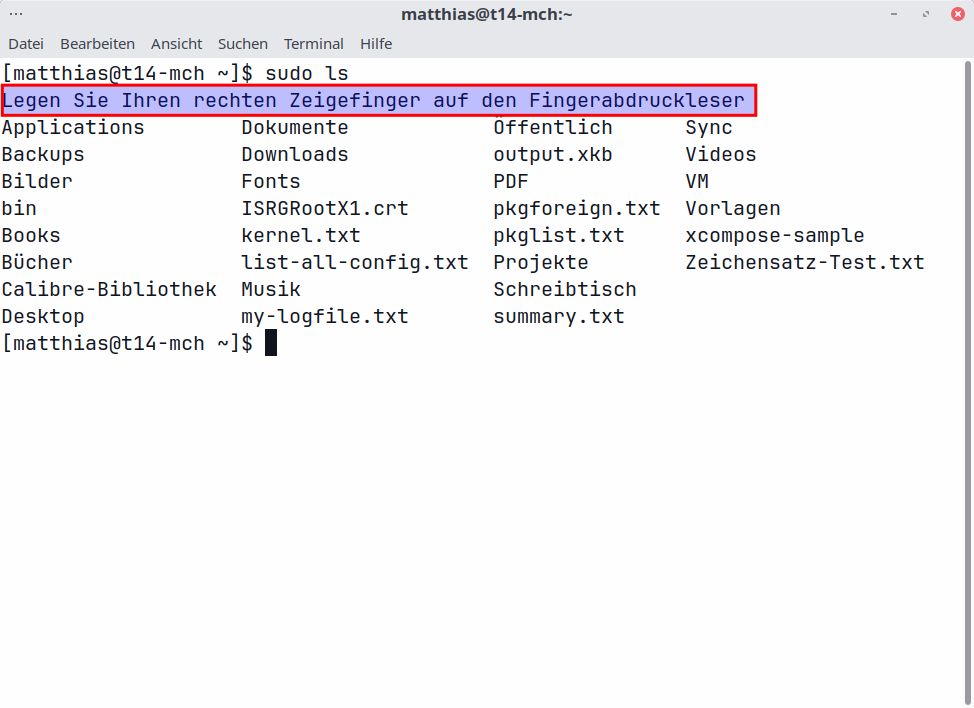
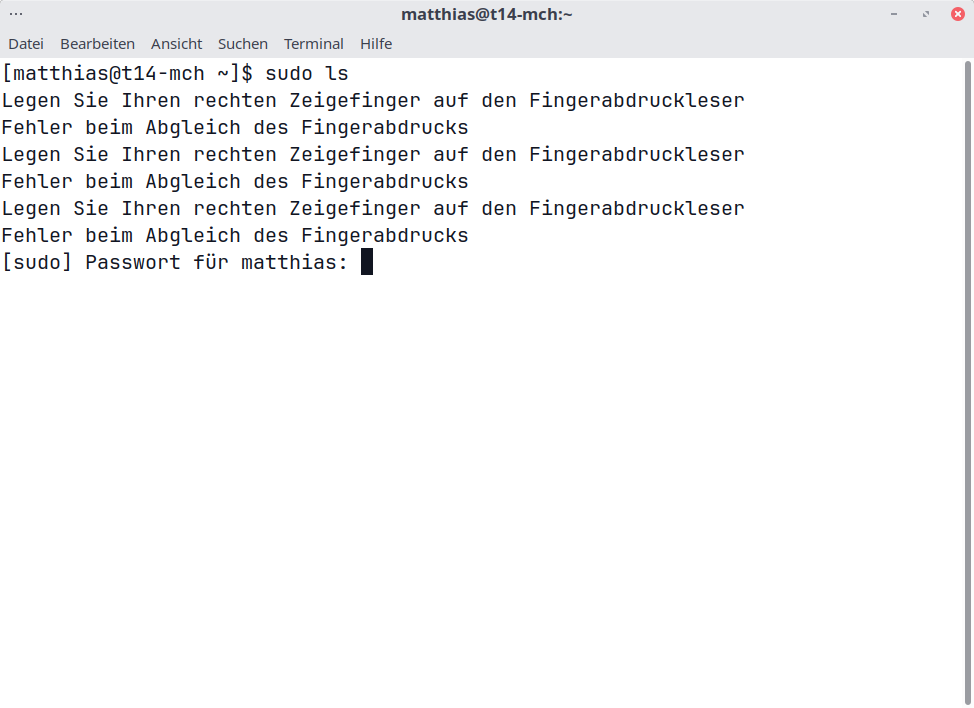
Open a terminal (Ctrl+Alt+T). Enter a harmless command like ls with sudo:
$ sudo ls
It should also ask you for your user fingerprint (right index finger in our case):
In case of failure or a timeout, you can still use your password:
su
Note su runs as root, so we need to use the finger we enrolled for root usage here! You also need your root password to use su, not your user password!
Some apps in EOS’ Welcome screen also use su internally, so these should also prompt you for your fingerprint.
Open a terminal (Ctrl+Alt+T). Enter a harmless command like ls with su:
$ su -c ls
It should ask you for root’s fingerprint now (right middle finger in our case):
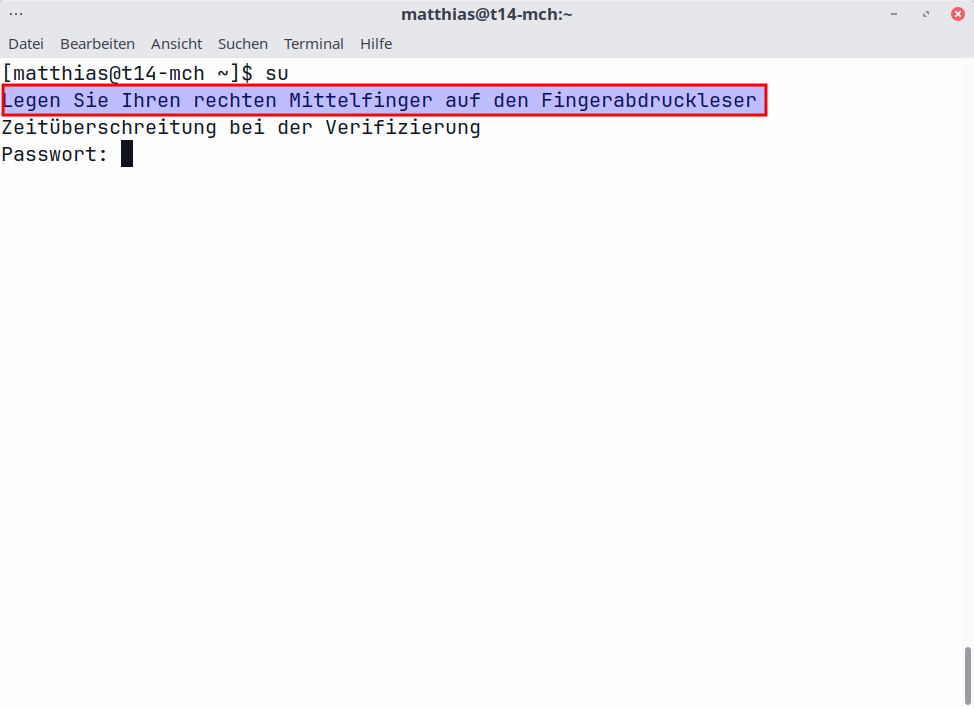
After a while, it times out and asks for your root password, as shown.
If all worked out, congratulations!
You can now use your fingerprint reader for quick and easy access, and no one can look over your shoulder and see what you type in as your password.
Please be aware that even fingerprints can be faked—this doesn’t give you more security, it’s more like a convenience feature.