An user-friendly, pictorial-tutorial inspired by user @2000 detailing steps required to successfully install Endeavour OS (EOS) in an LV(s) + LUKS environment with help from Manjaro Architect.
Manjaro Architect (M-A for short) is a simpler means to install Manjaro linux for power-users. A series of packaged scripts, baked into Manjaro .iso’s. Here’s a small demonstration of its usefulness beyond intended purpose.
What’s Needed:
- 2 flash drives.
- One for Manjaro Architect and EOS Live sessions, the other for EOS install.
- Machine where you’ll be installing Endeavour OS.
Preparation Steps
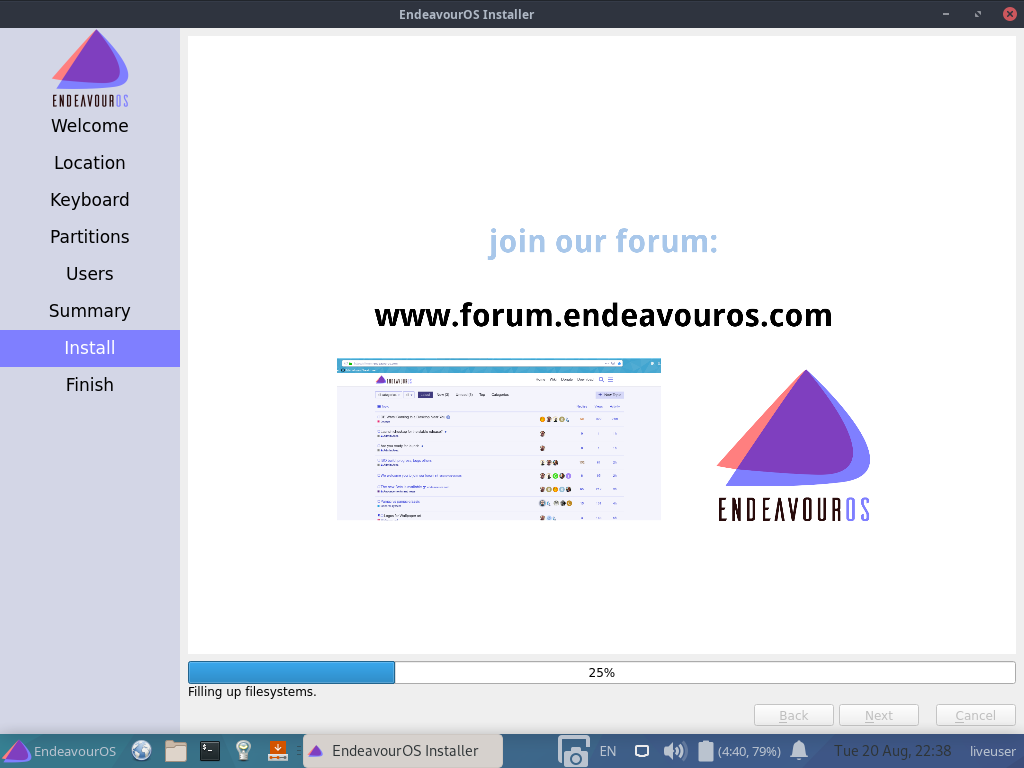
- Create an Endeavour OS Live USB/CD using USB #1, boot it.
- Install EOS to USB #2. Erase Disk (USB #2). Tick the box that says “Encrypt System”. Enter a simple passphrase, it’s temporary.
- PLEASE NOTE: Remember the passphrase, you’ll need it later!
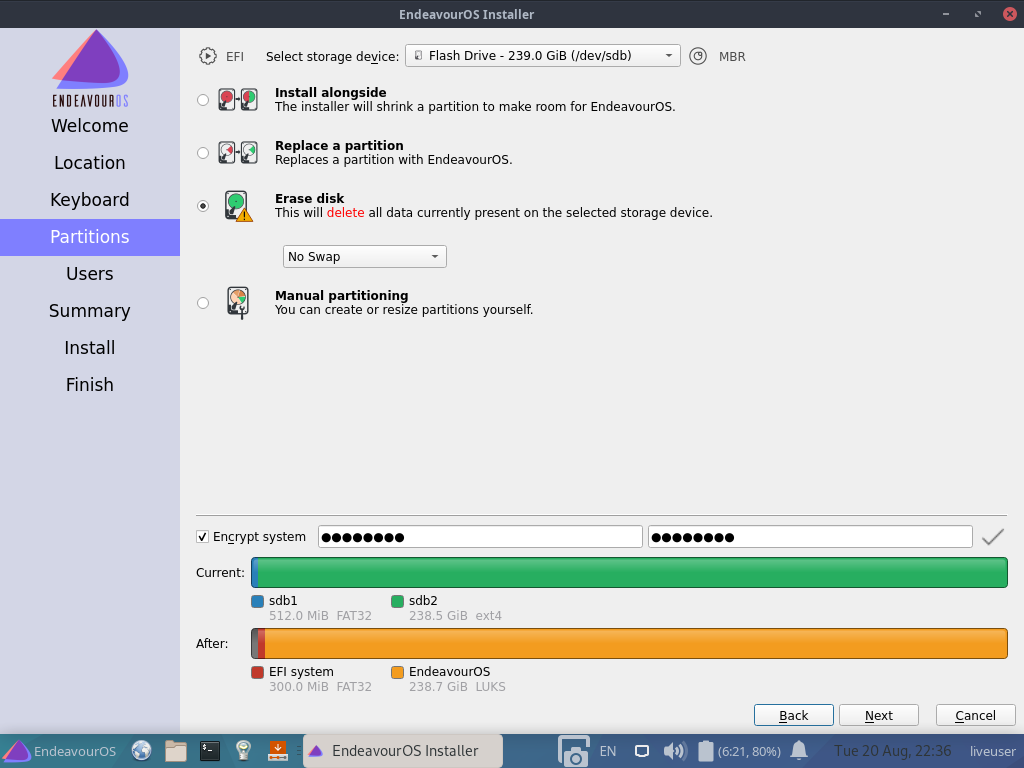
- Configure the system until you’ve reached the confirmation screen. Make sure everything is correct.
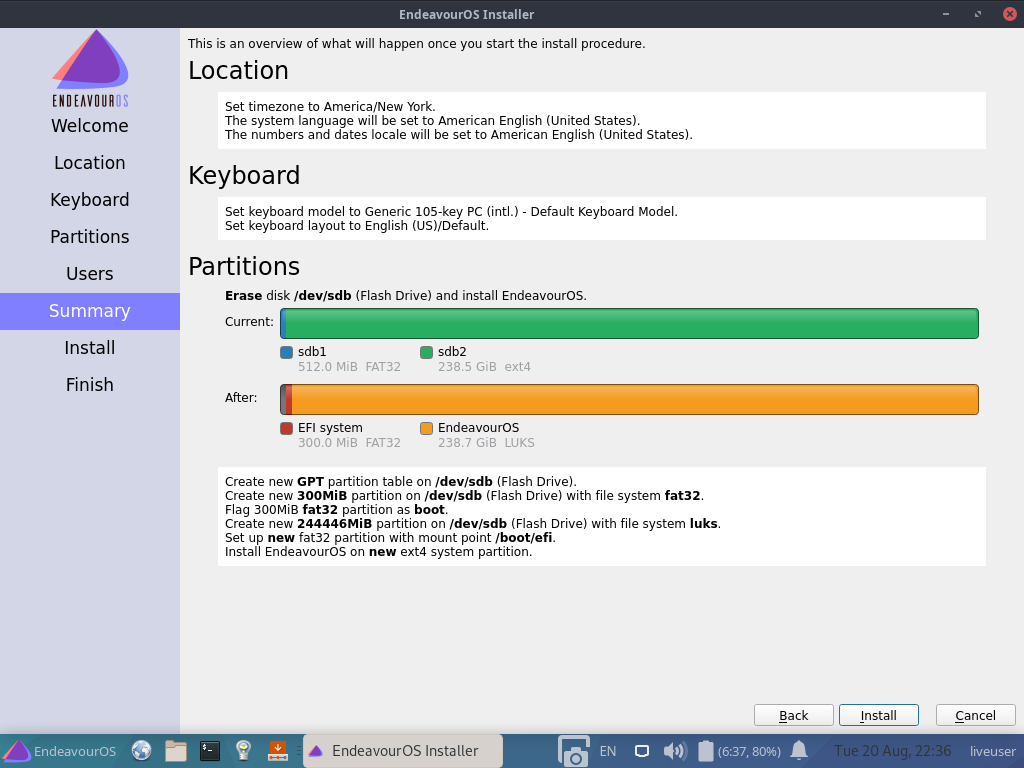
- … Proceed and finish.
-
Format USB #1 and create Manjaro Architect live USB. LINK TO ISO
-
IMPORTANT! Make sure to boot USB #1 on machine intended for Endeavour OS install only.!
The Ropes
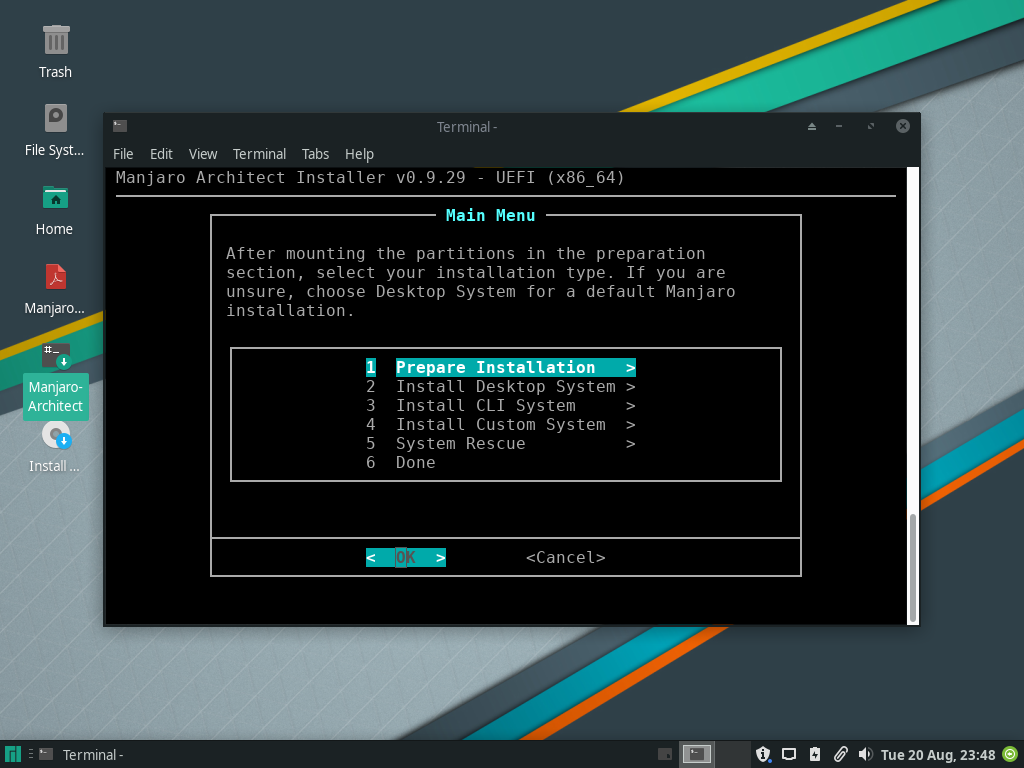
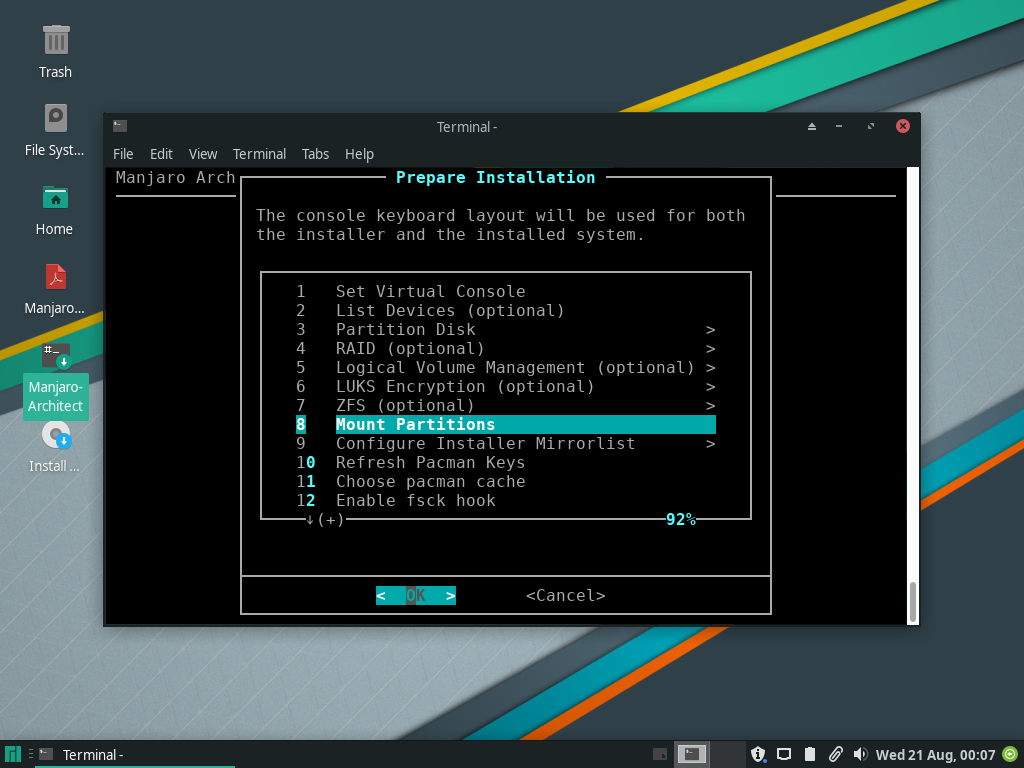
- Once you have arrived at the desktop, launch Manjaro Architect and follow the steps.
- The next 22 images are self-explanatory. M-A makes it hard to get lost.
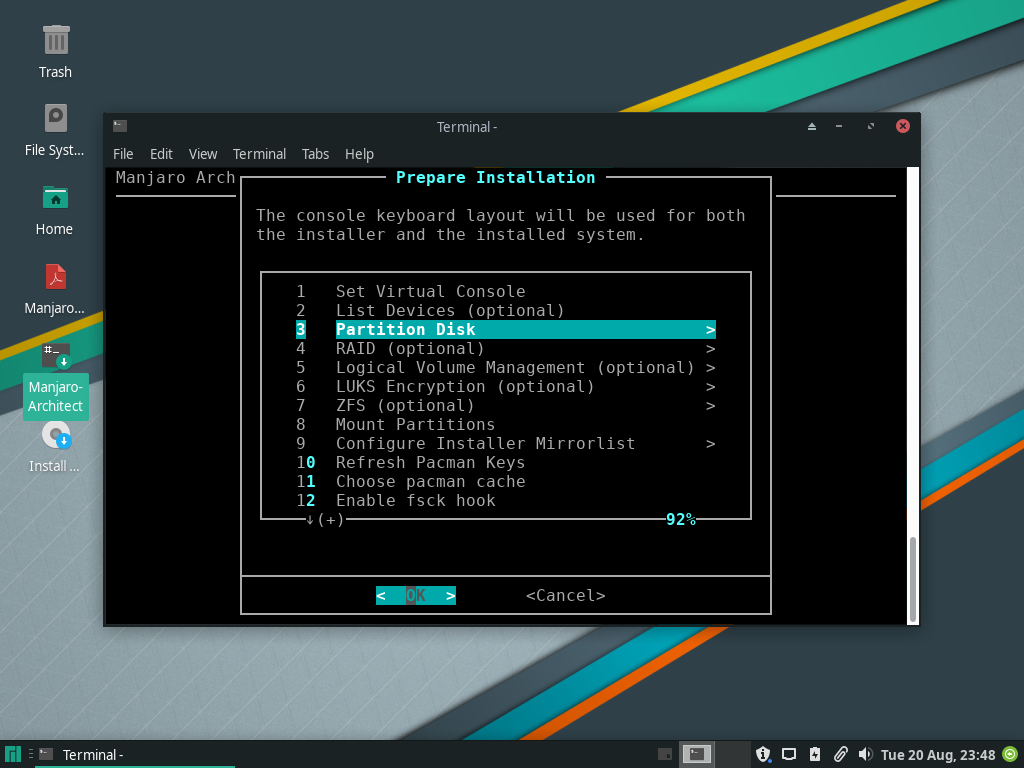
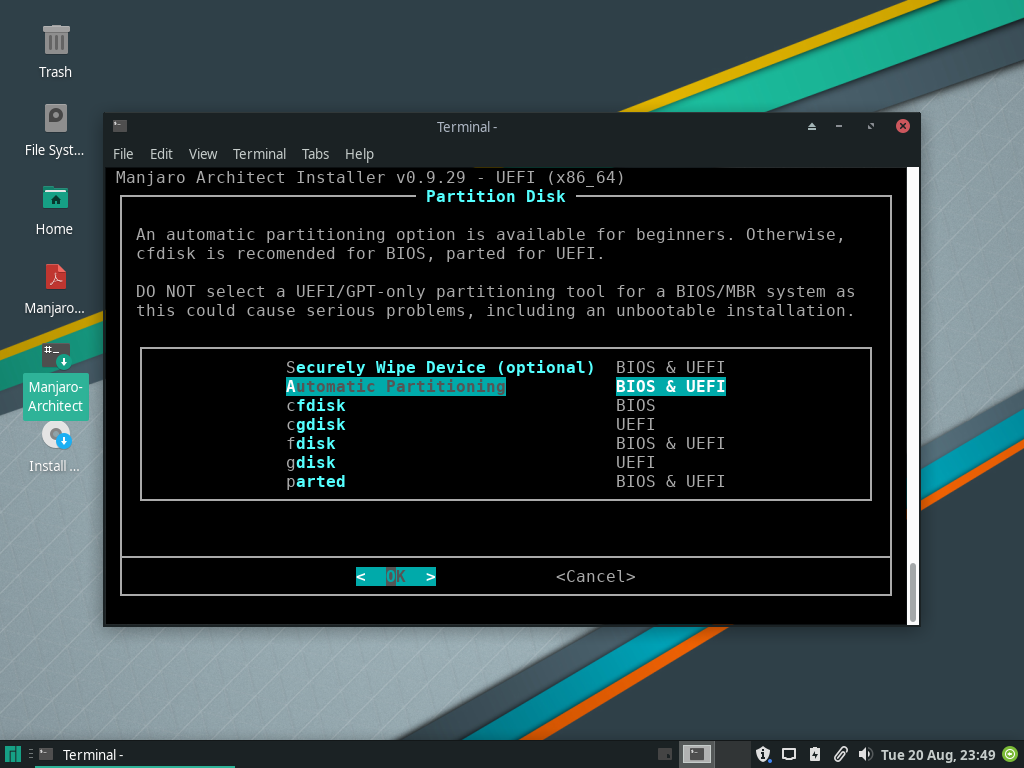
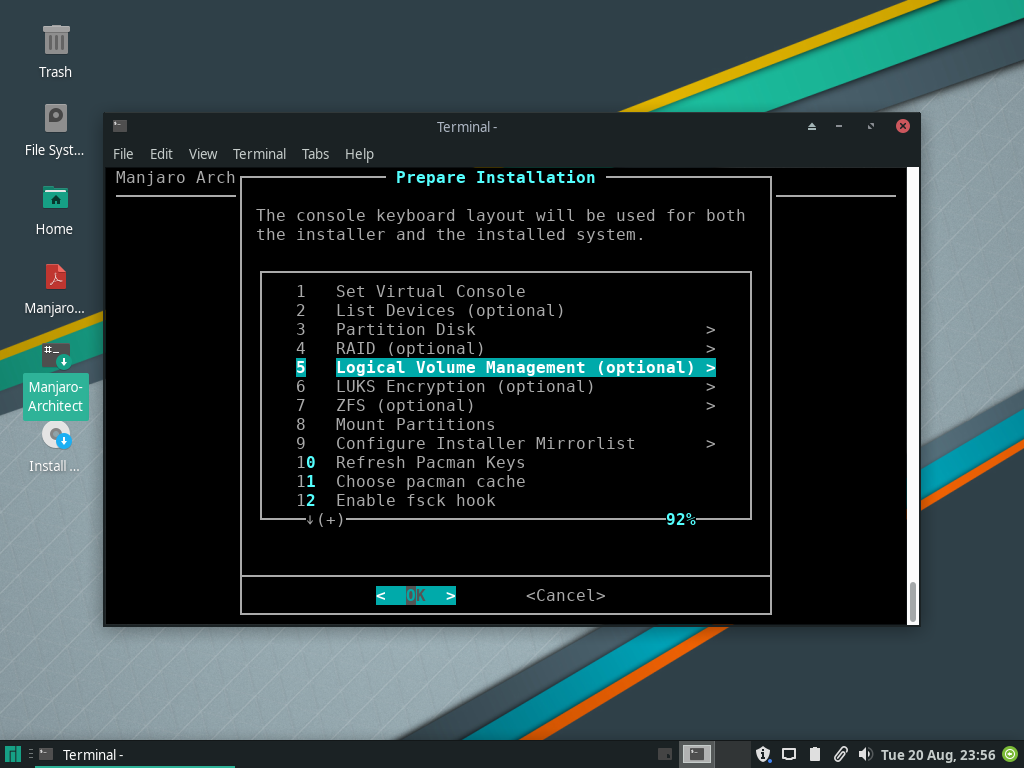
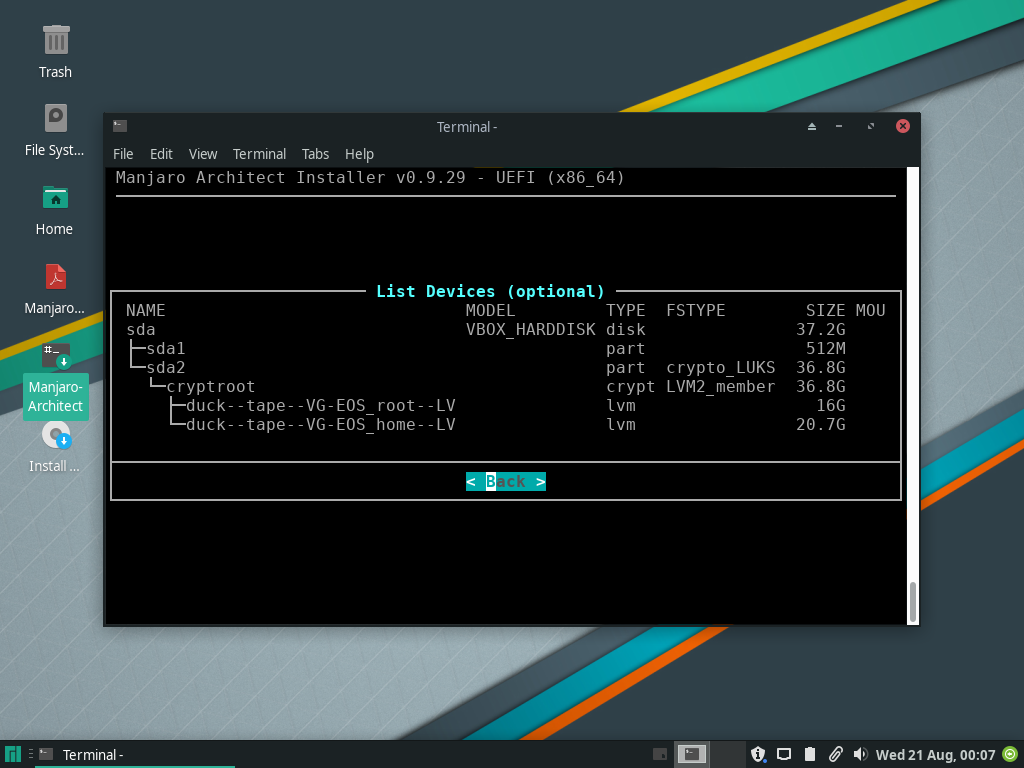
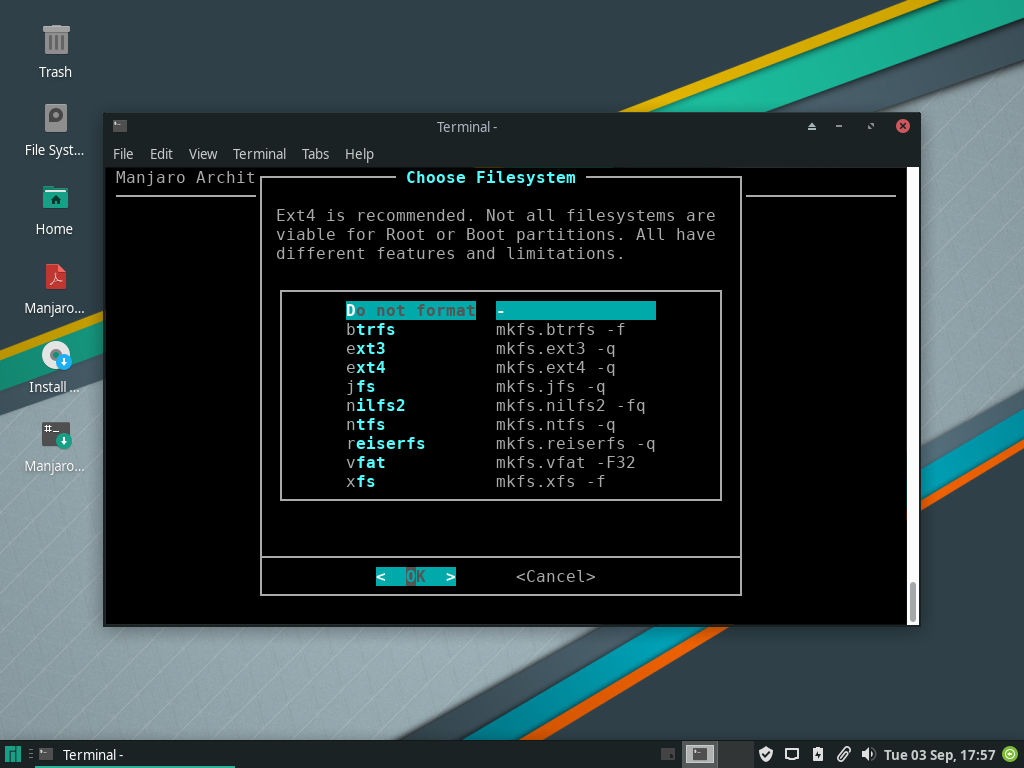
- Partition Disk

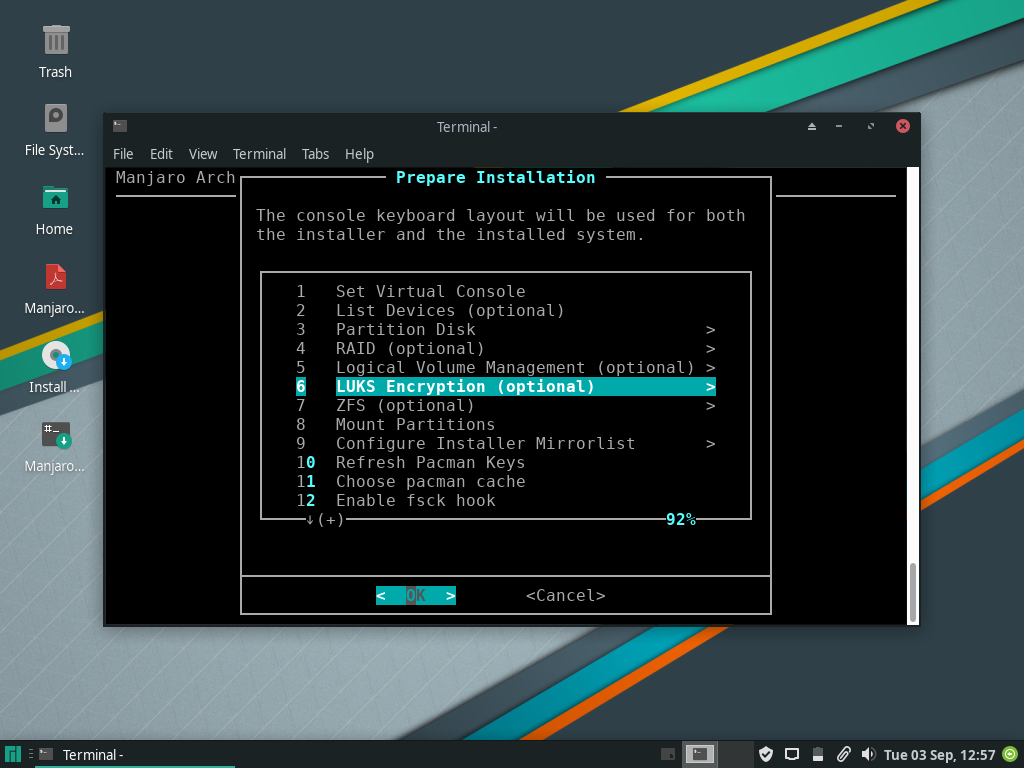
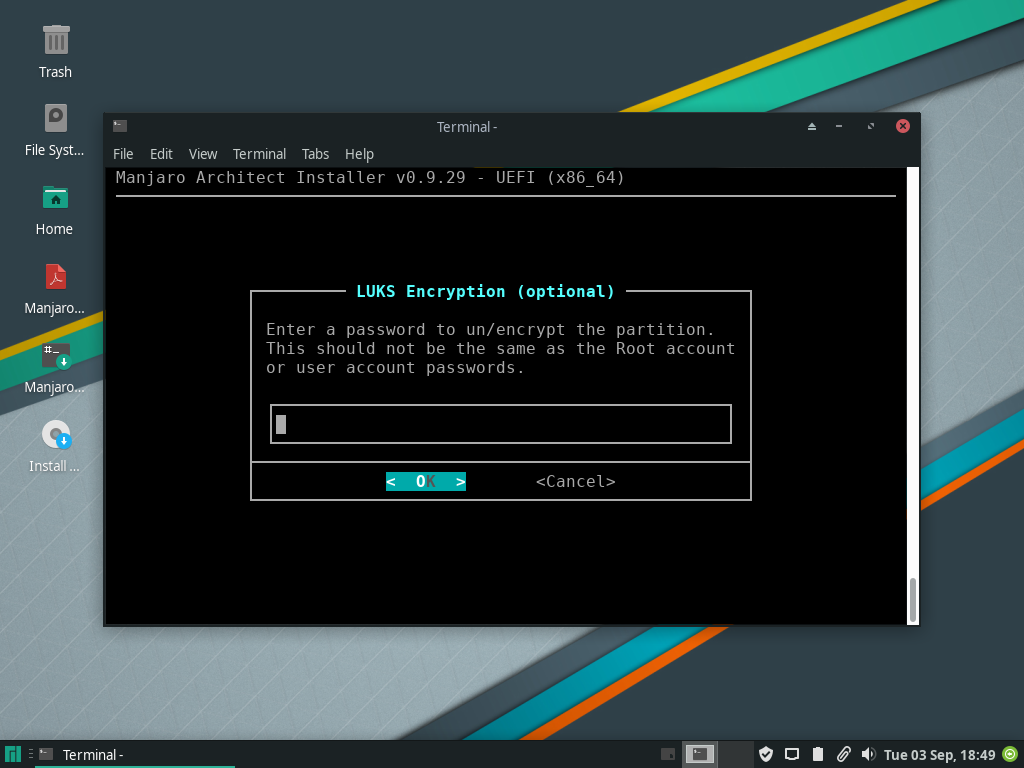
- LUKS Encryption.
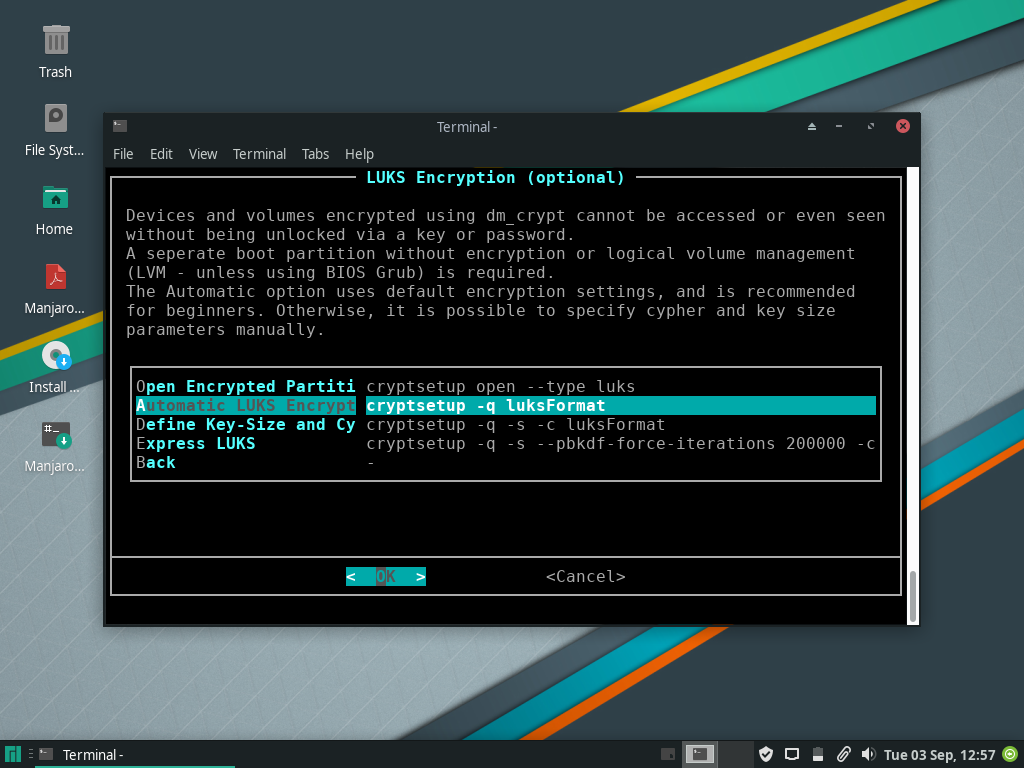
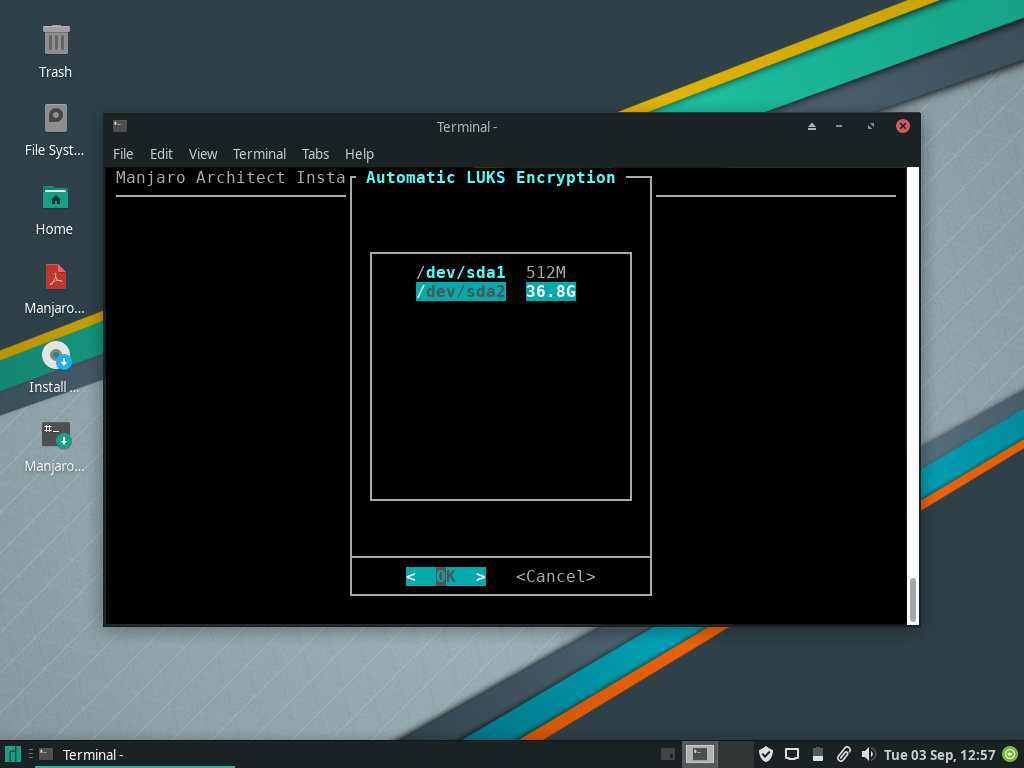
- Make sure to enter a strong passphrase here. It will be used to lock/unlock your EOS installation on disk.
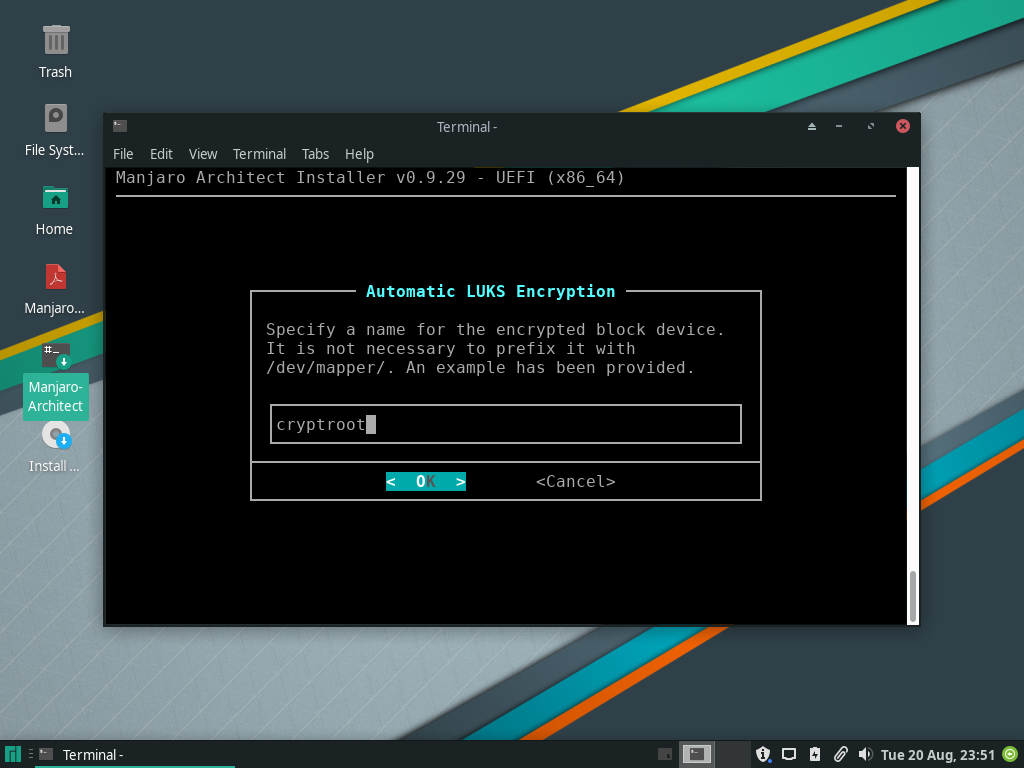
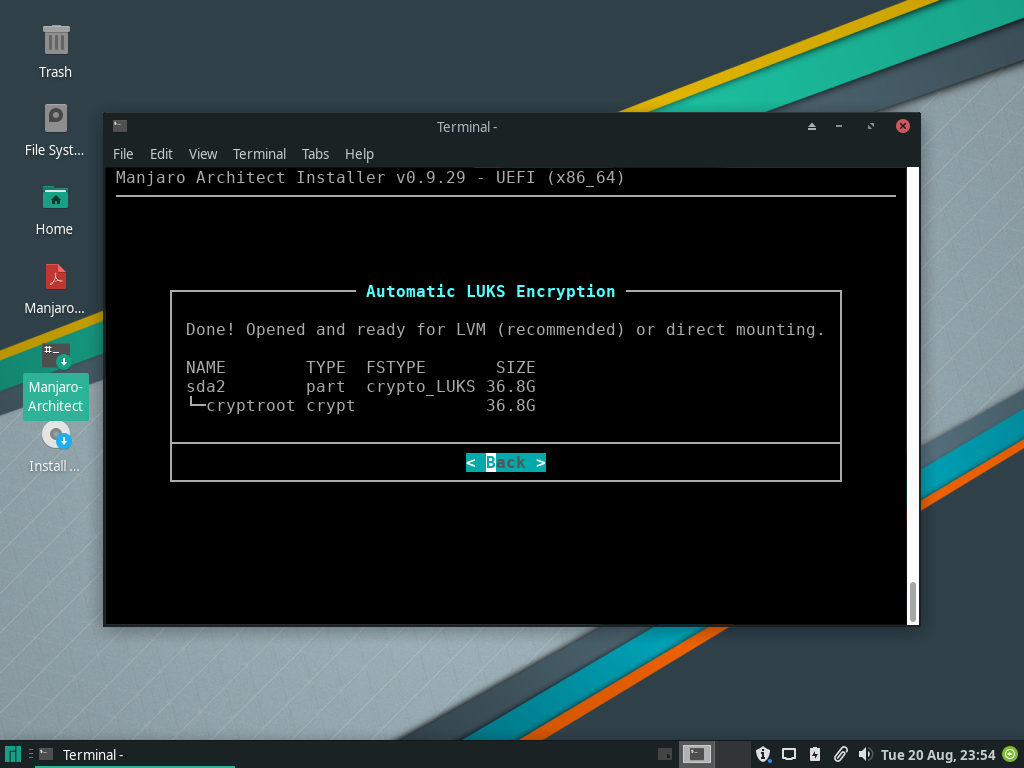
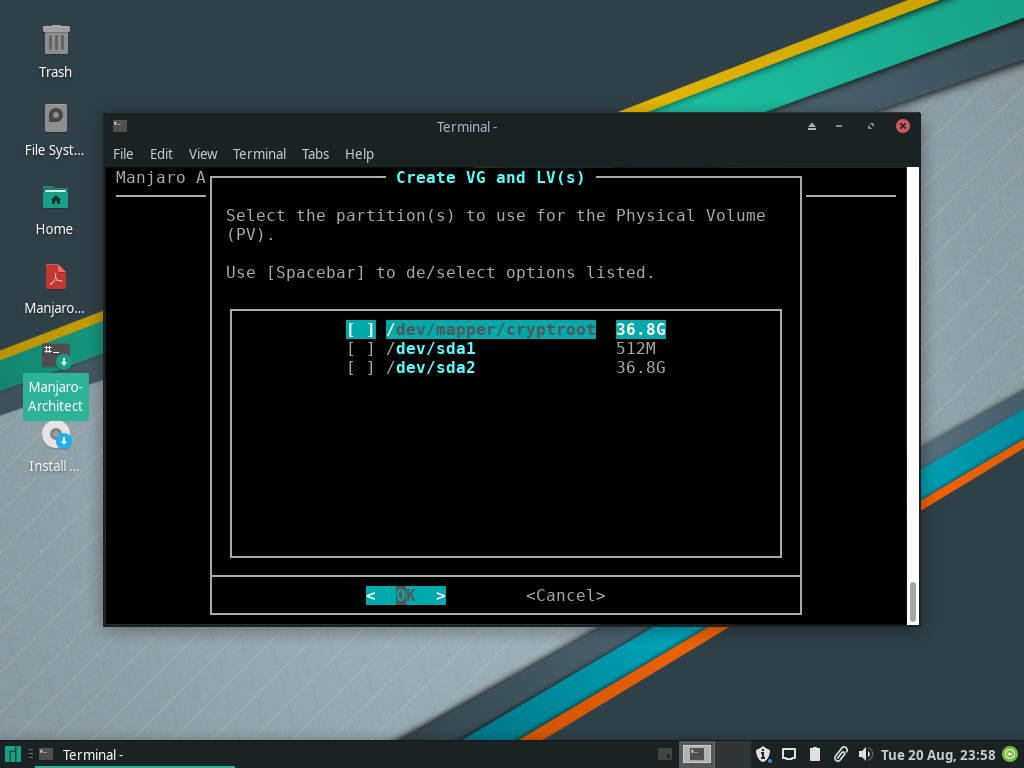
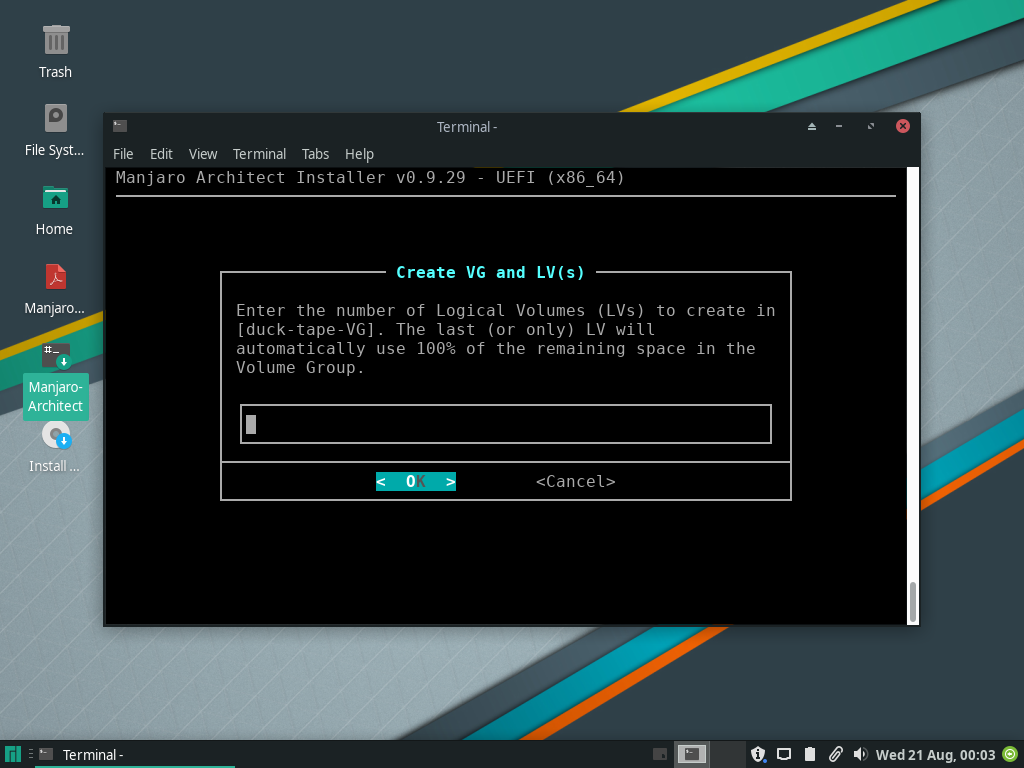
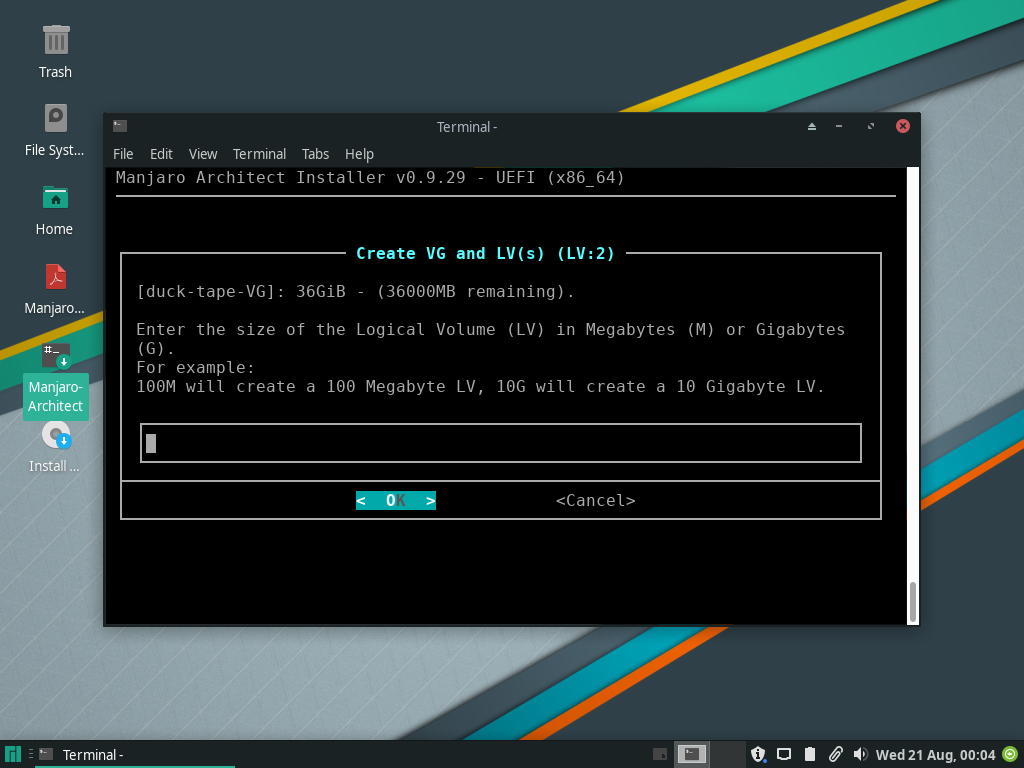
- Logical Volume Management (LVM)
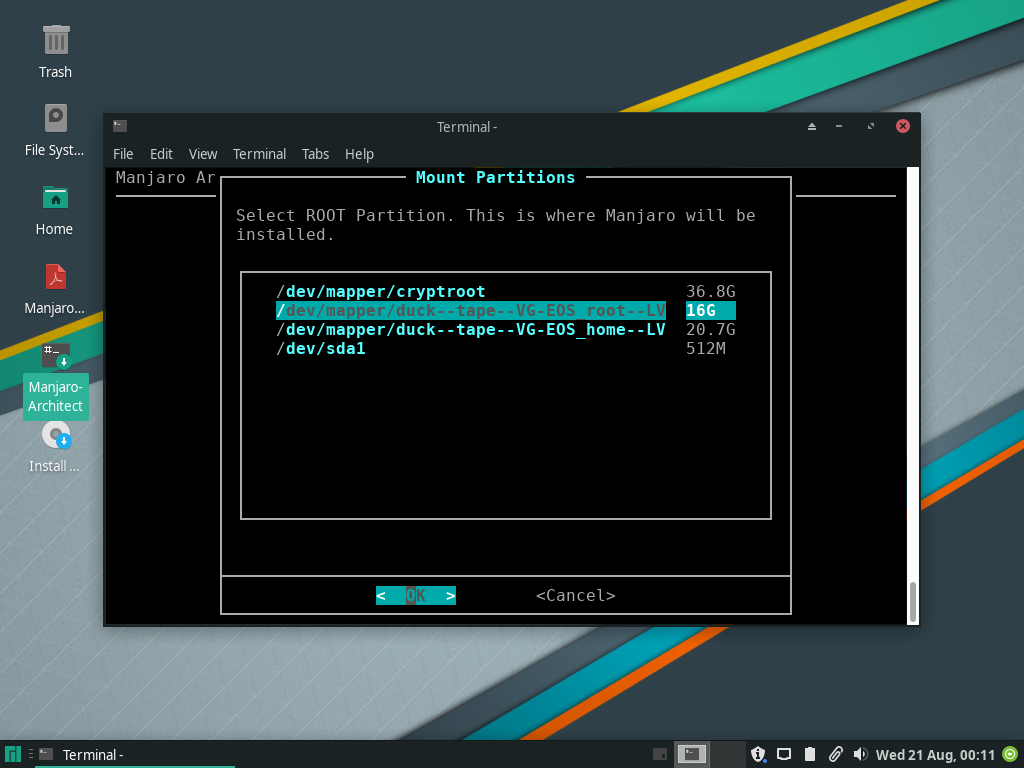
- Select the encrypted block device (e.g. “cryptroot”).
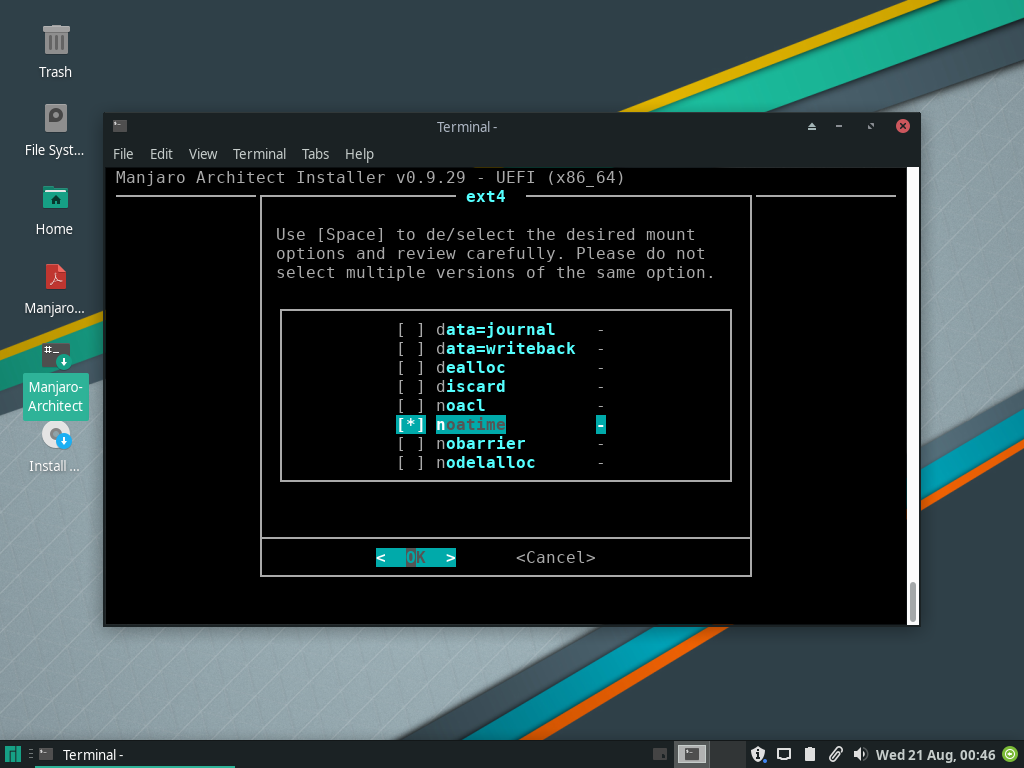
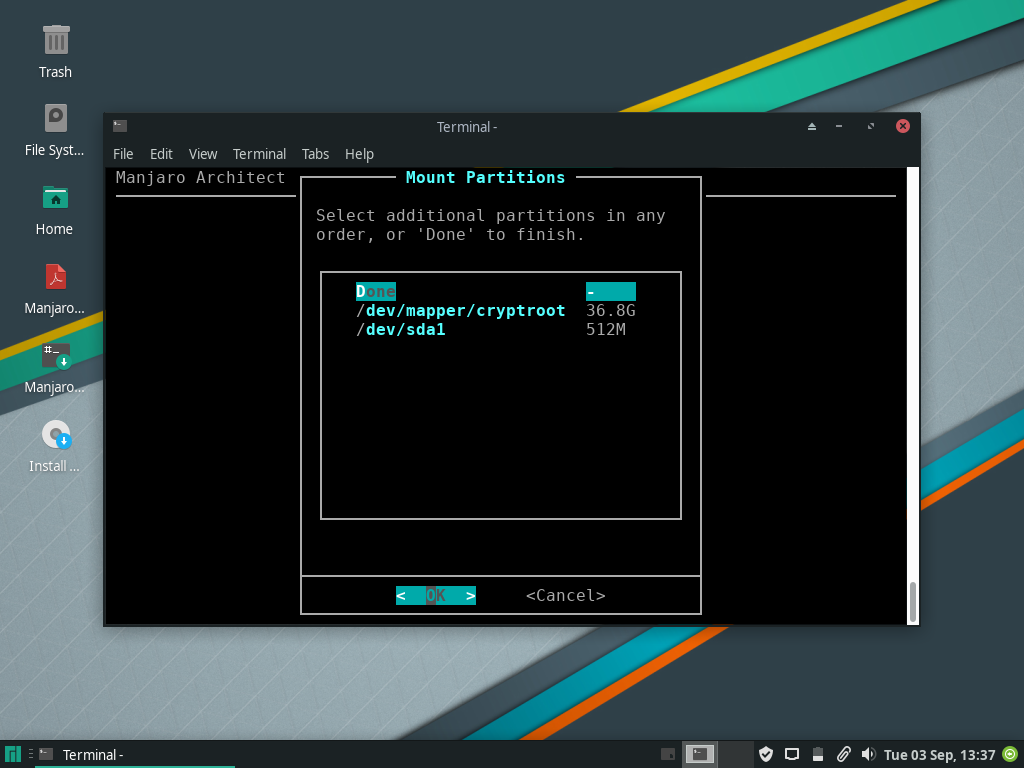
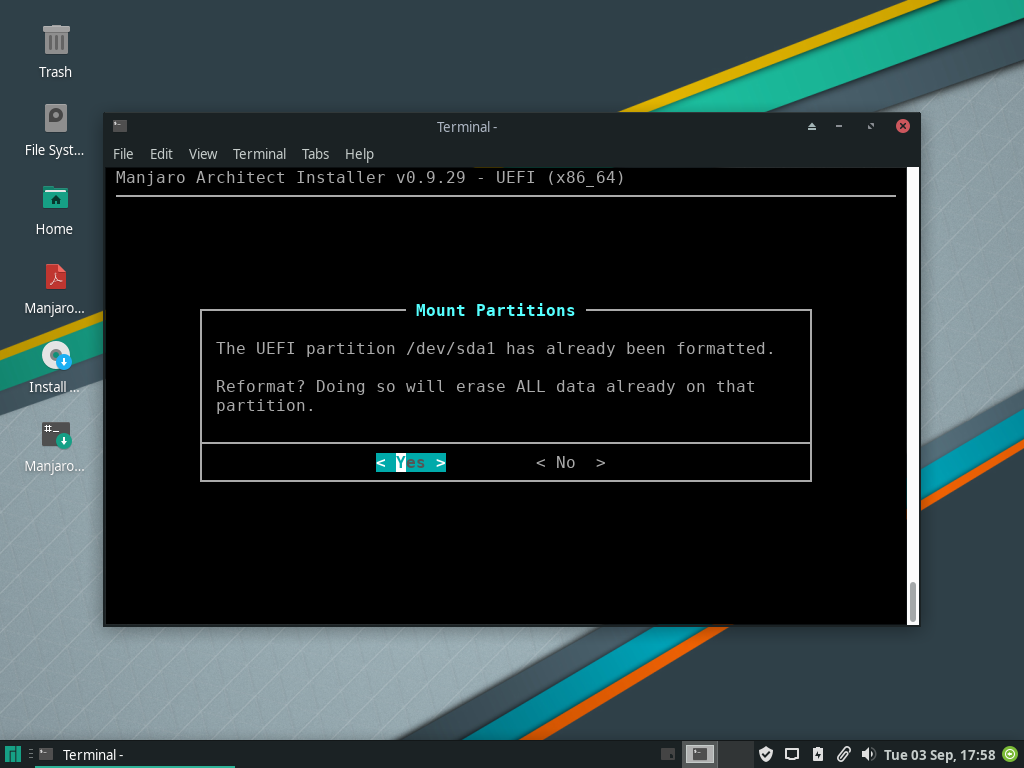
- Mount
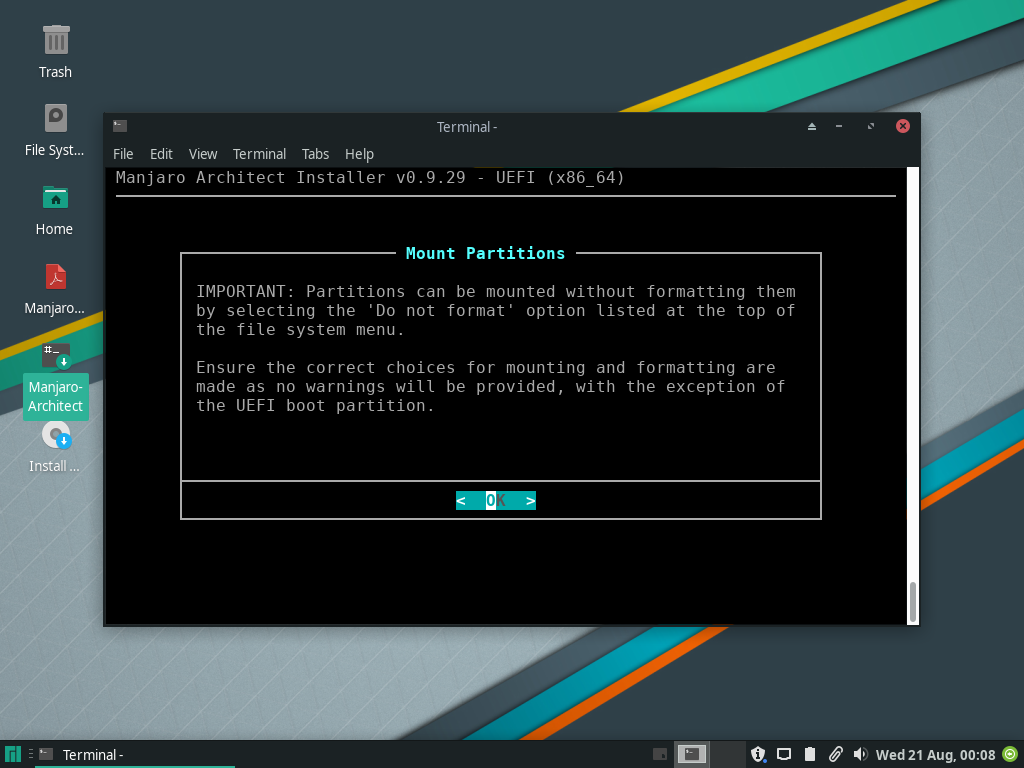
- Mount
/(Root)

- Mount
/home


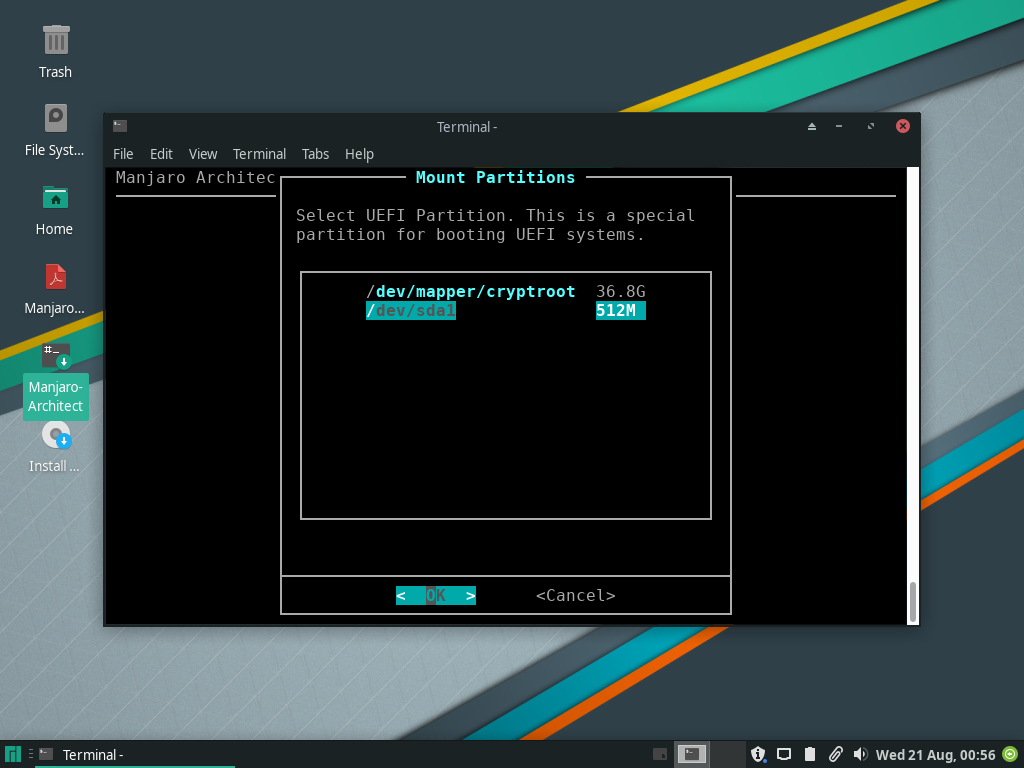
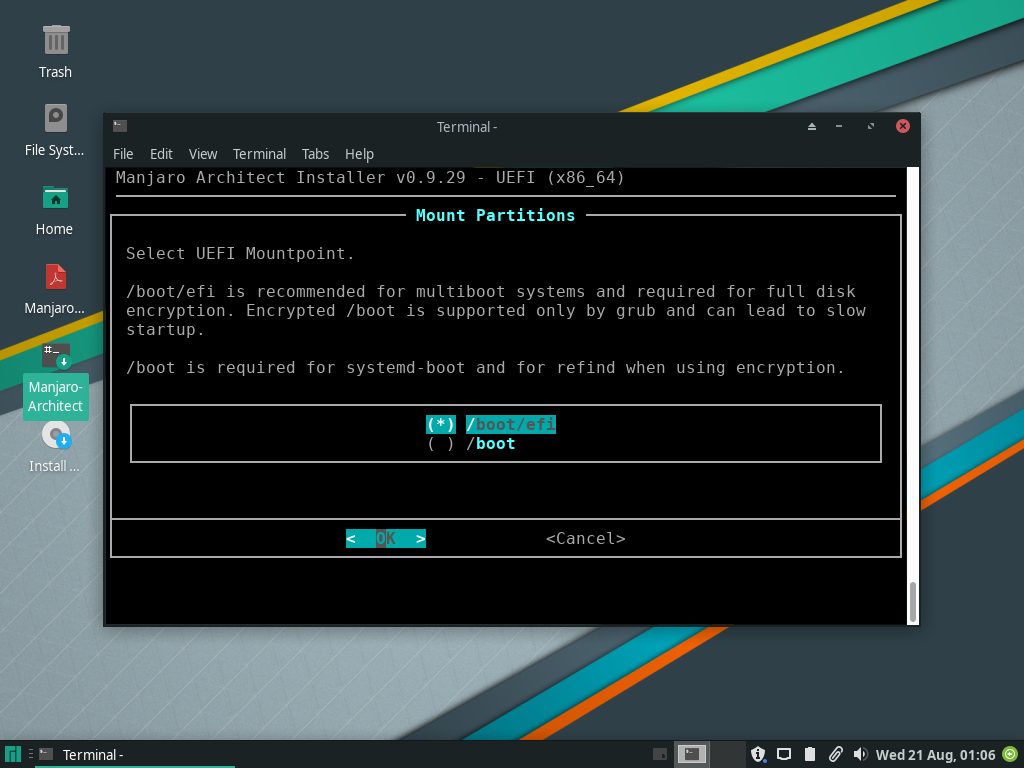
- Mount
/boot/efi
Endeavour Switch
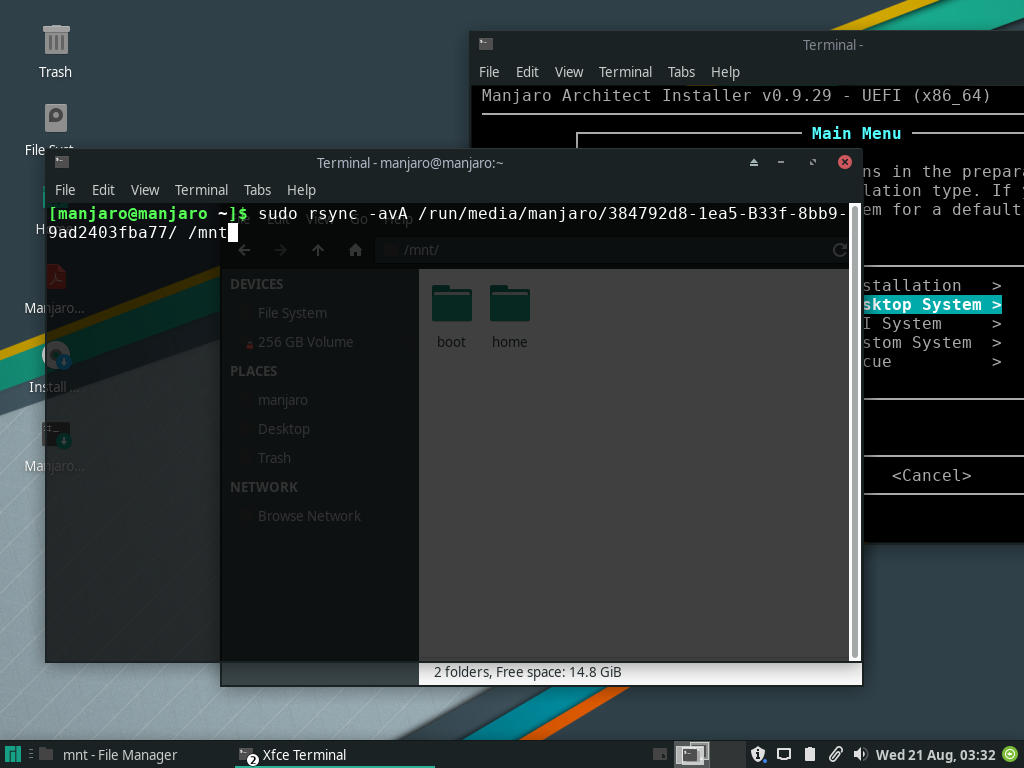
Moving our USB #2 EOS installation from earlier to destination disk.
- PLEASE NOTE: Don’t forget to keep the M-A window open.
- Plug-in USB #2 and launch the file manager (Dolphin). Select USB #2 from the sidebar and unlock it using the same passphrase from “Preparation Steps” > Step # “2”.
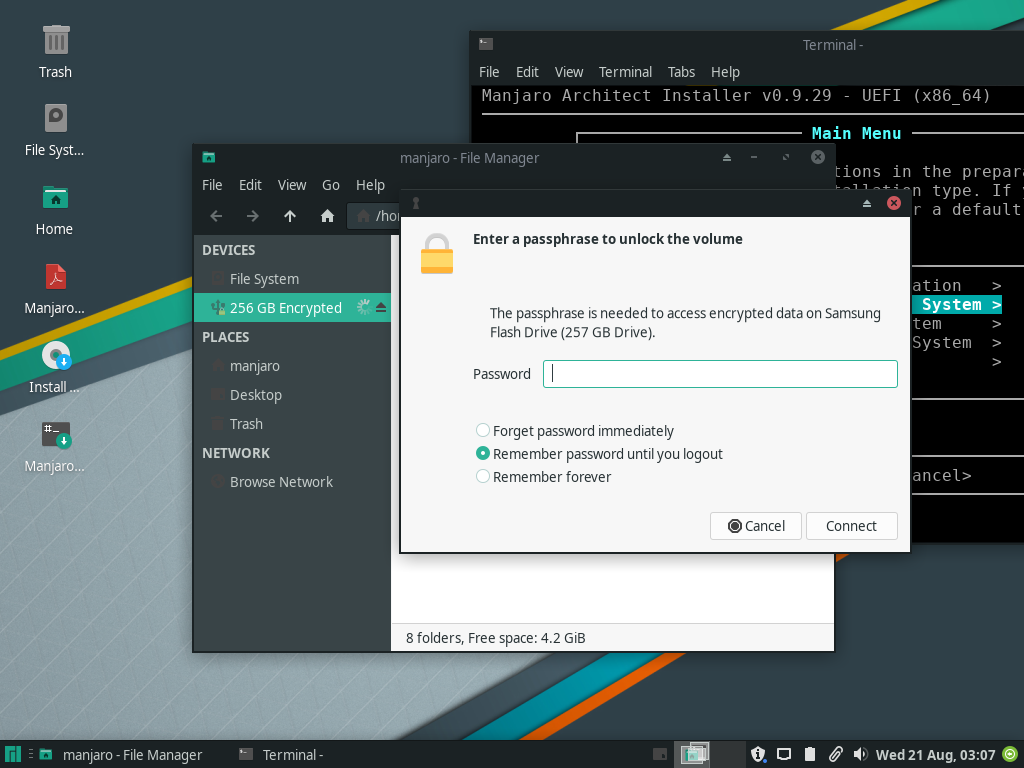
- Once unlocked, Copy the
pathin the Dolphin search bar. For example:
/run/media/manjaro/384792d8-lea5-B33f-8bb9-9ad2403fba77/
- PLEASE NOTE!: Yours will be different!
- Because our disk is chrooted-in by M-A in
/mnt/, all we need to do now is “sync” EOS to it. Open aterminalwindow, then run:
sudo rsync -avA /PATH/TO/UNLOCKED/USB-#2/ /mnt/
- When finished, close the M-A window then boot back into M-A (USB #1). Set USB #2 asside, we won’t be needing it anymore.
- PLEASE NOTE: Do not attempt to boot into EOS, it is broken.
Last Mount
Manjaro Architect can only do so much (As it is). Additional changes must be made for EOS to be bootable.
- Relaunch Manjaro Architect. Navigate to:
Prepare Installation>LUKS Encryption>Open Encrypted Partition.

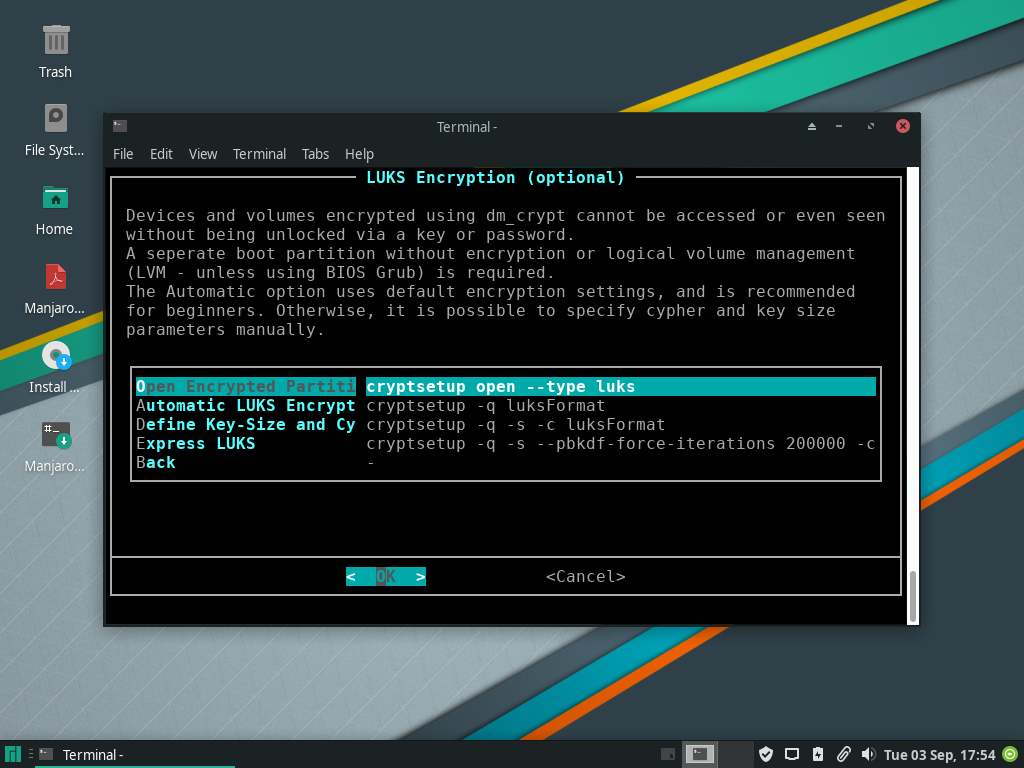
- Select your machine’s disk (where we “synced” EOS earlier).
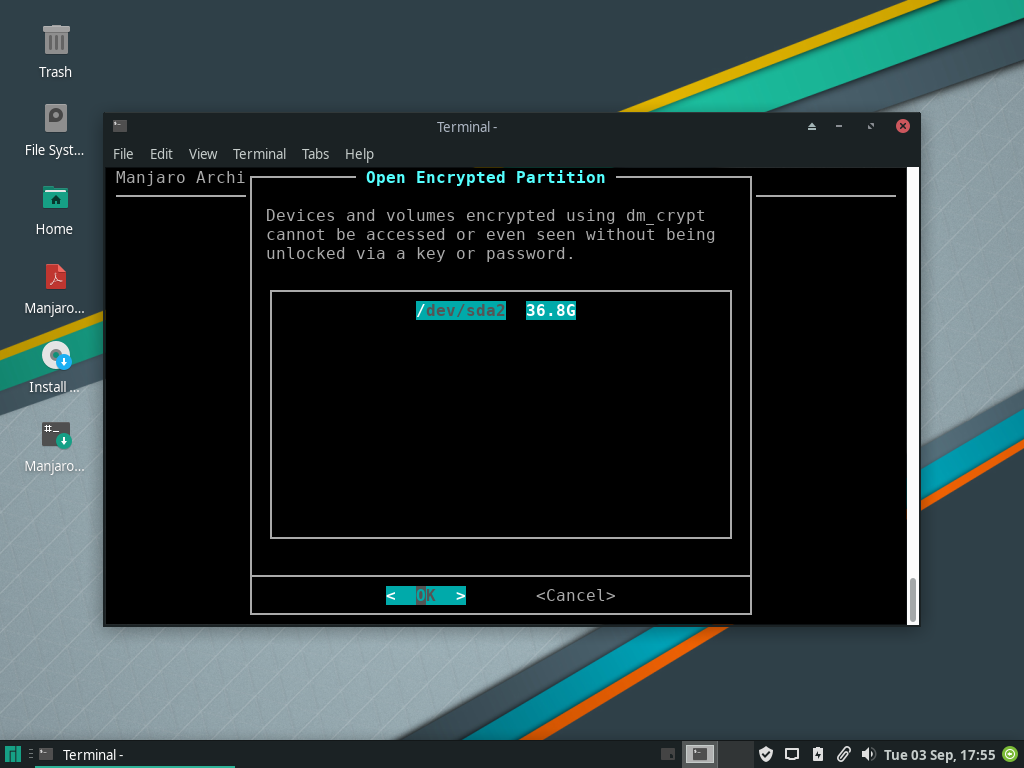
- Enter the name of your encrypted block device (e.g. cryptroot), and unlock using its passphrase.

- Mount
/(Root) and/homeLogical Volumes (LVs) on disk. To do so goBack, navigate to:Prepare Installation>Mount Partitions.
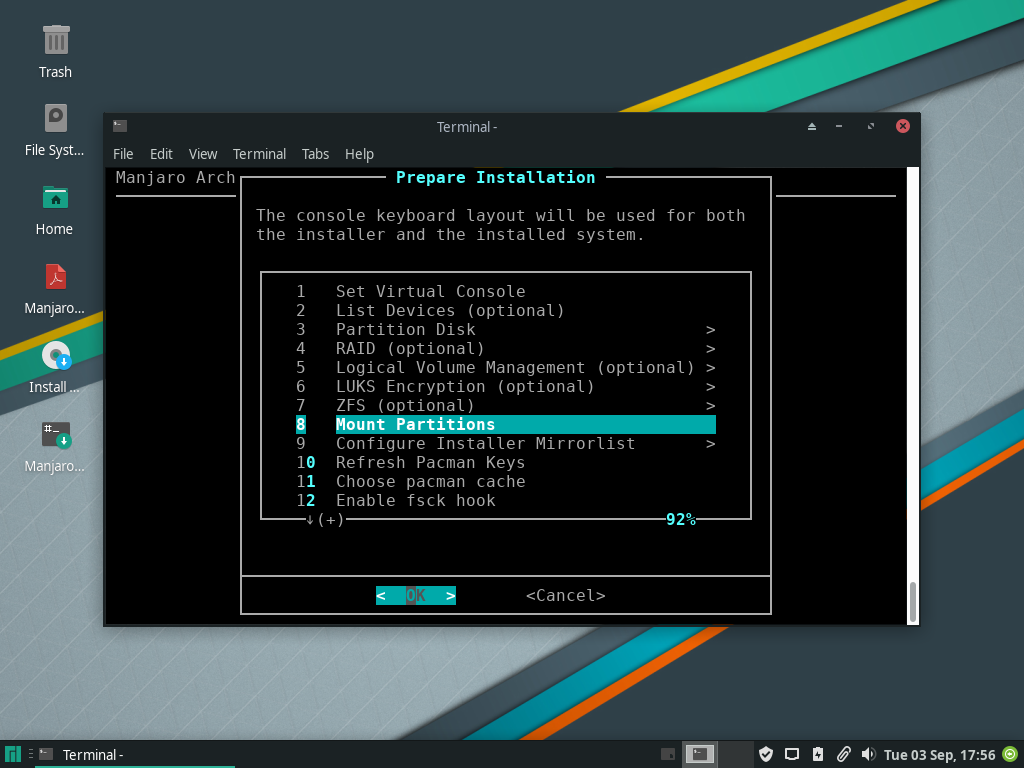
- Select “Do not format” for both
/(Root) and/home.
- Reformat
/boot/efi.
Duck Tape
Final touches, so everything sticks togethere!
- Go
Back, navigate to:Install Desktop System>Install Bootloader.
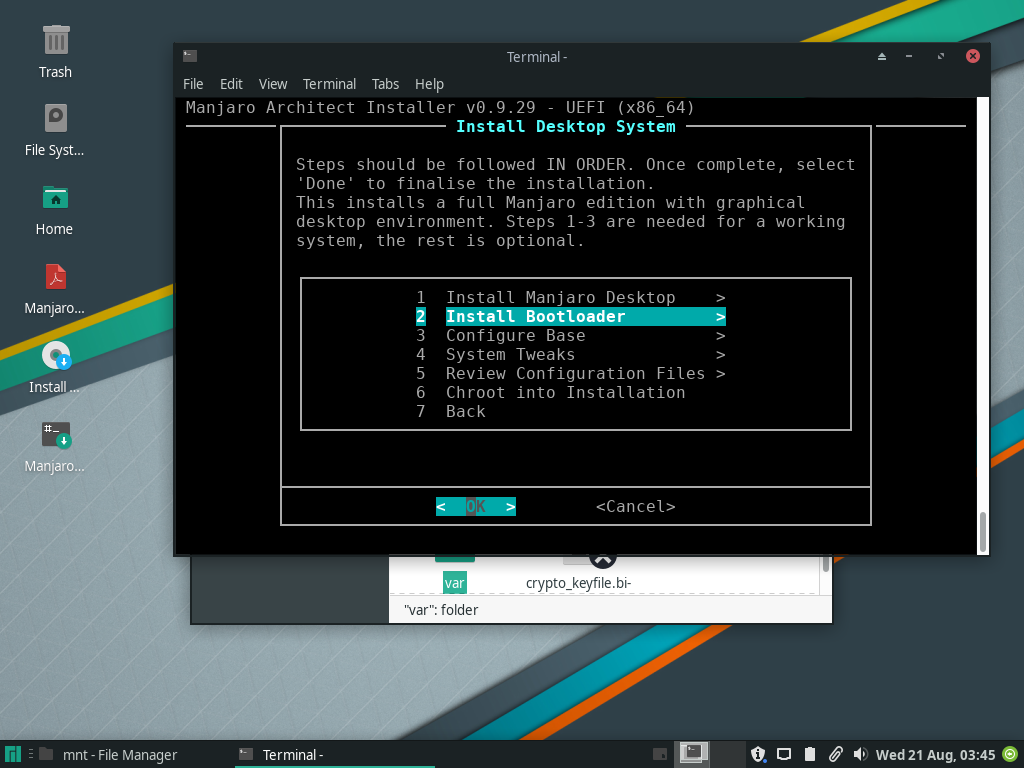
- Select
grub.
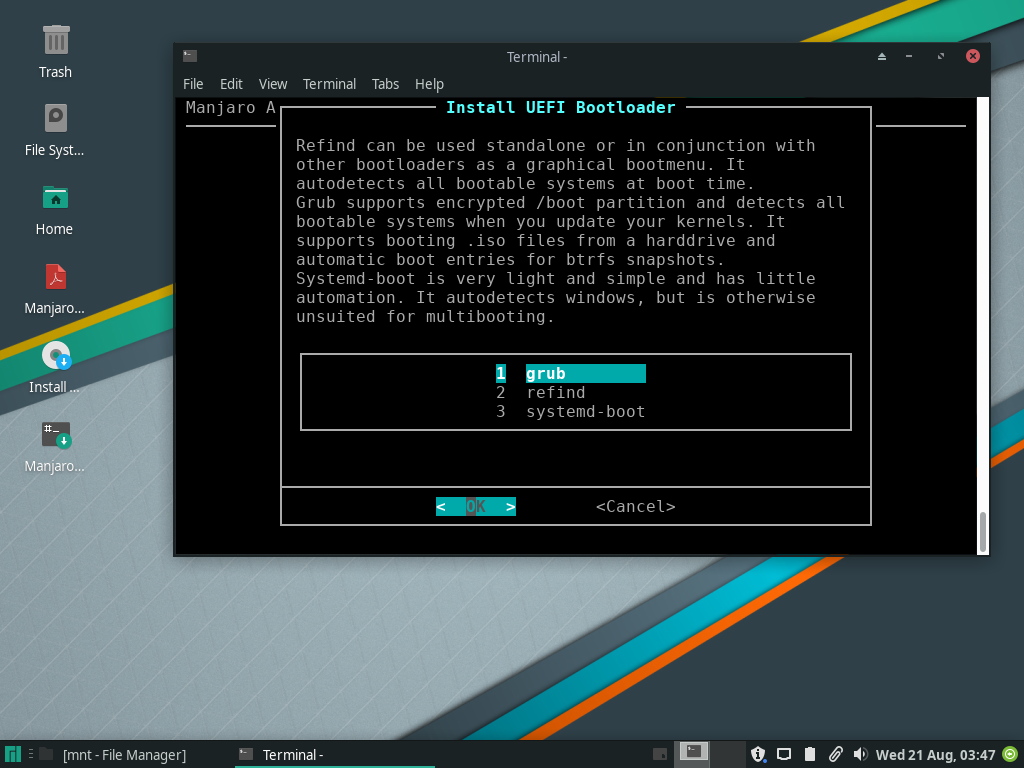
- Unlock using the same passphrase from “The Ropes” > “LUKS Encryption” > “4th” picture down (.i.e.. “Strong Passphrase”)
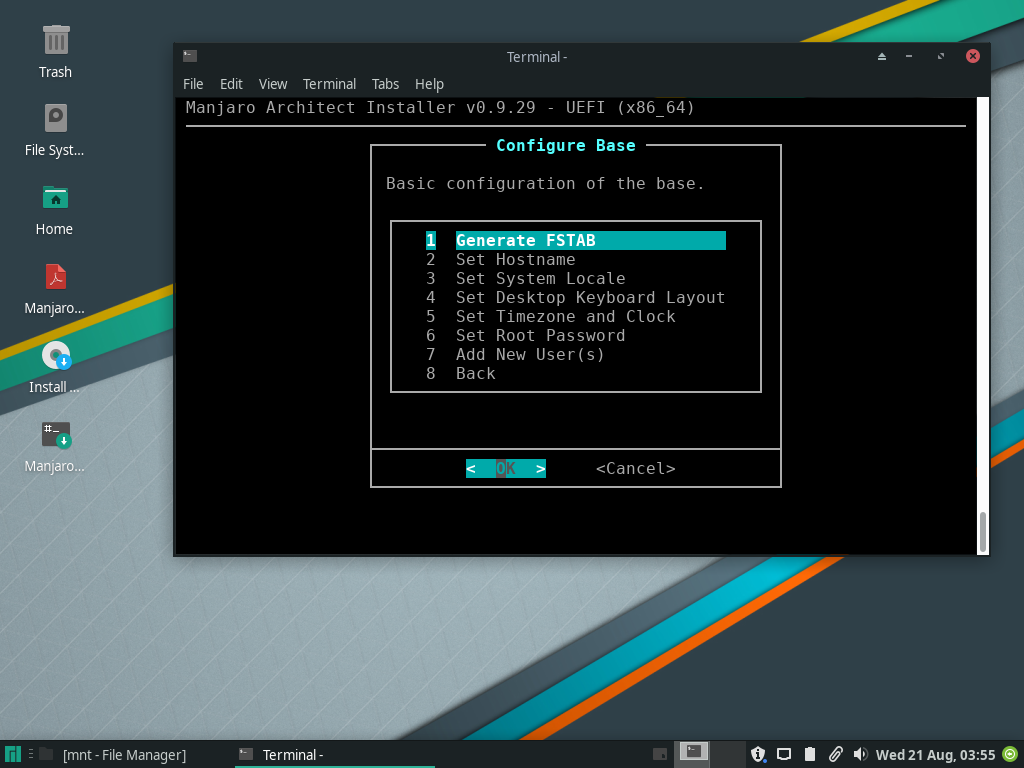
FSTAB: GoBack, navigate to:Install Desktop System>Configure Base>Generate FSTAB
- PRO TIP! Every option under
Configure BaseandSystem Tweaks“just works”.Set Root Passwordwill change a preexisting entry, for instance.
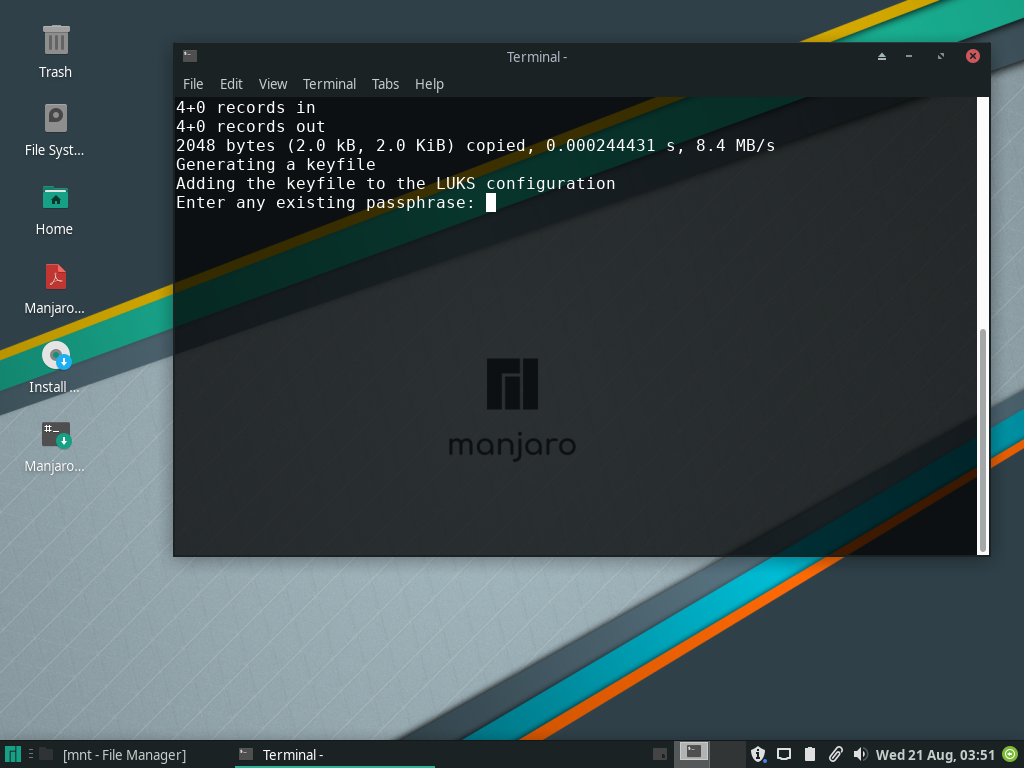
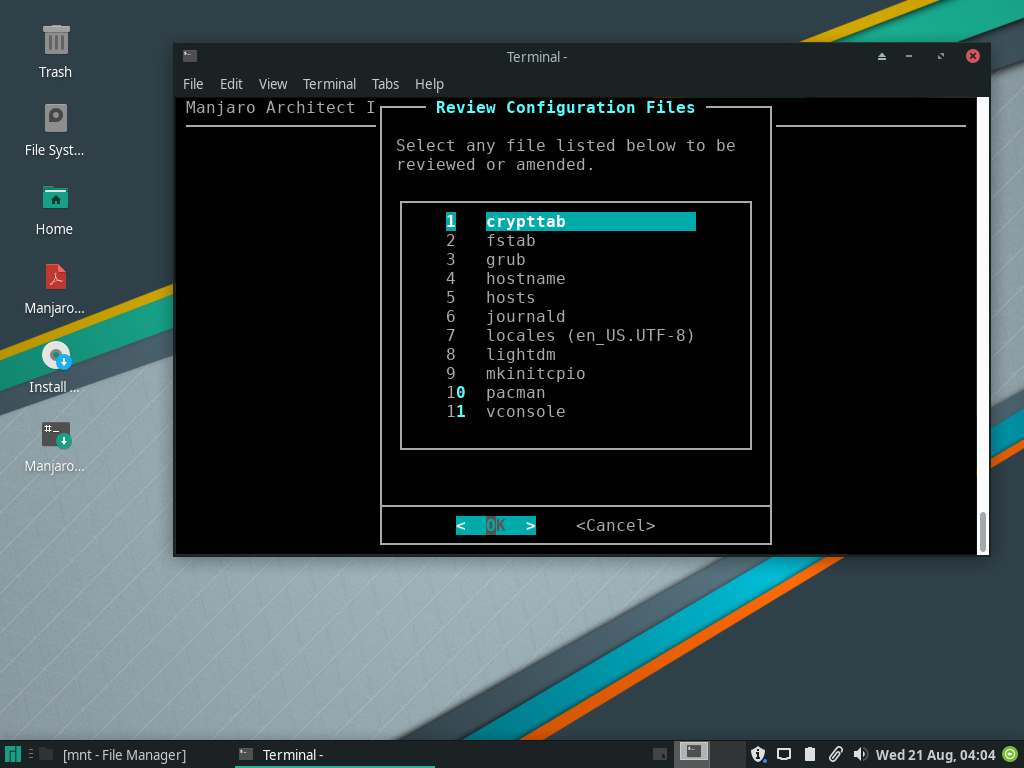
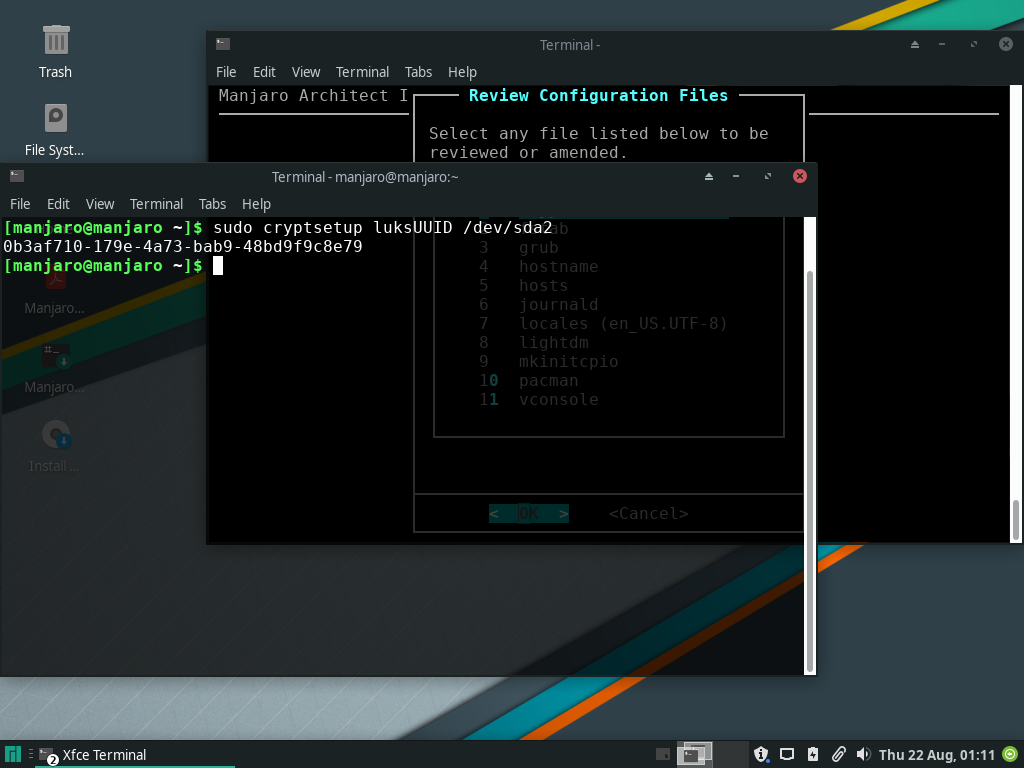
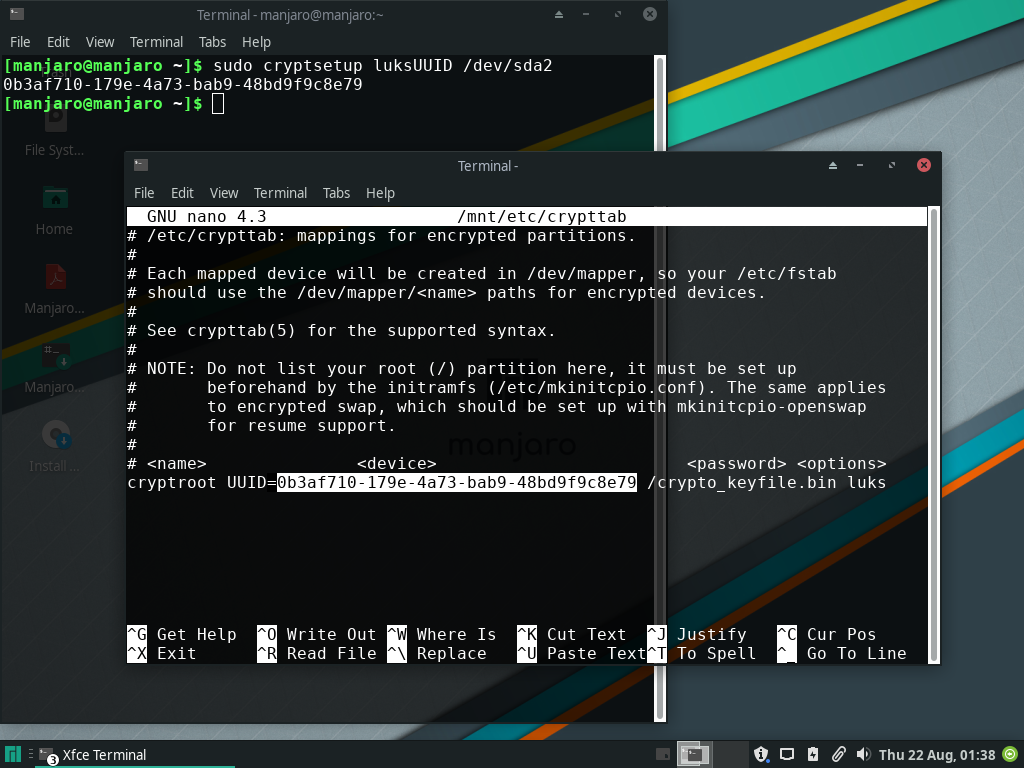
crypttab: GoBack, navigate to:Install Desktop System>Review Configuration Files>crypttab.
- Open a
terminalwindow, then run:
sudo cryptsetup luksUUID /dev/sda2
- Identify your encrypted block device by running
lsblk -p(e.g./dev/sda2)
NAME
/dev/sda
├─/dev/sda1
└─/dev/sda2
  └─/dev/mapper/cryptroot
Return to M-A and select crypttab. Remove everything in the uncommented line, leaving only this:
# <name>             <device>                       <password> <options>
cryptroot UUID=YOUR-LUKS-UUID-GOES-HERE /crypto_keyfile.bin luks
- When done exit, saving changes.
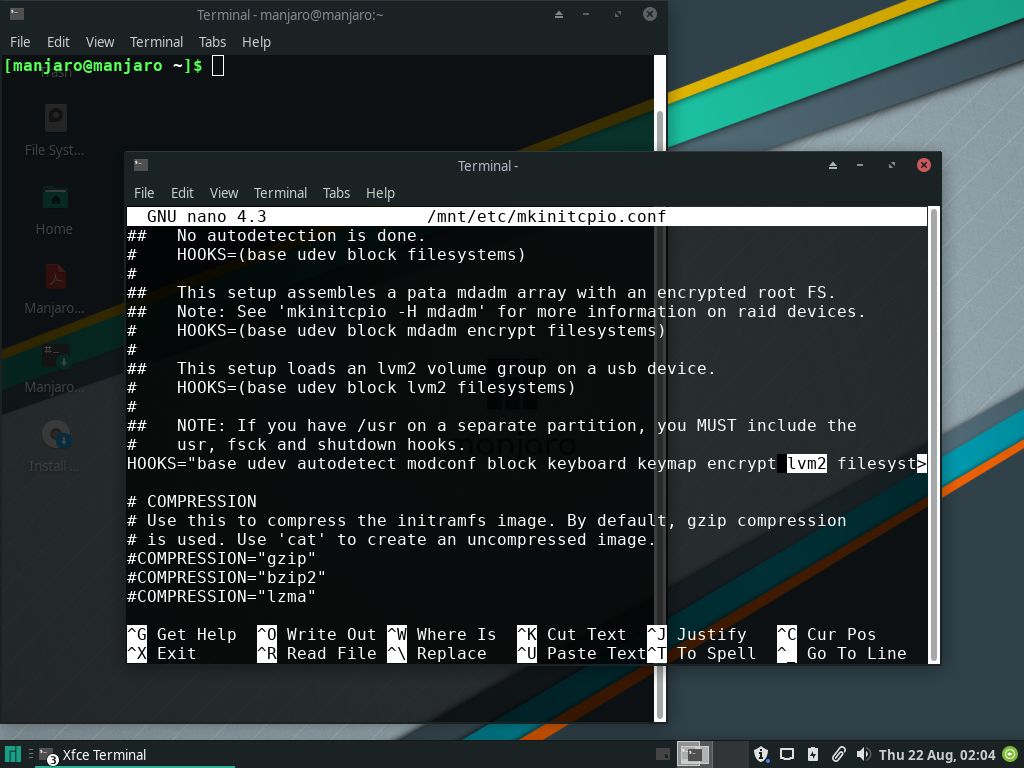
mkinitcpio: Selectmkinitcpiofrom theReview Configuration Fileslist. Scrolls down toHOOKS=and add thelvm2hookto the line:
HOOKS="base udev autodetect modconf block keyboard keymap encrypt lvm2 filesystems"
- When done exit, saving changes. Select
Yesto “Run Mkinitcpio?”.
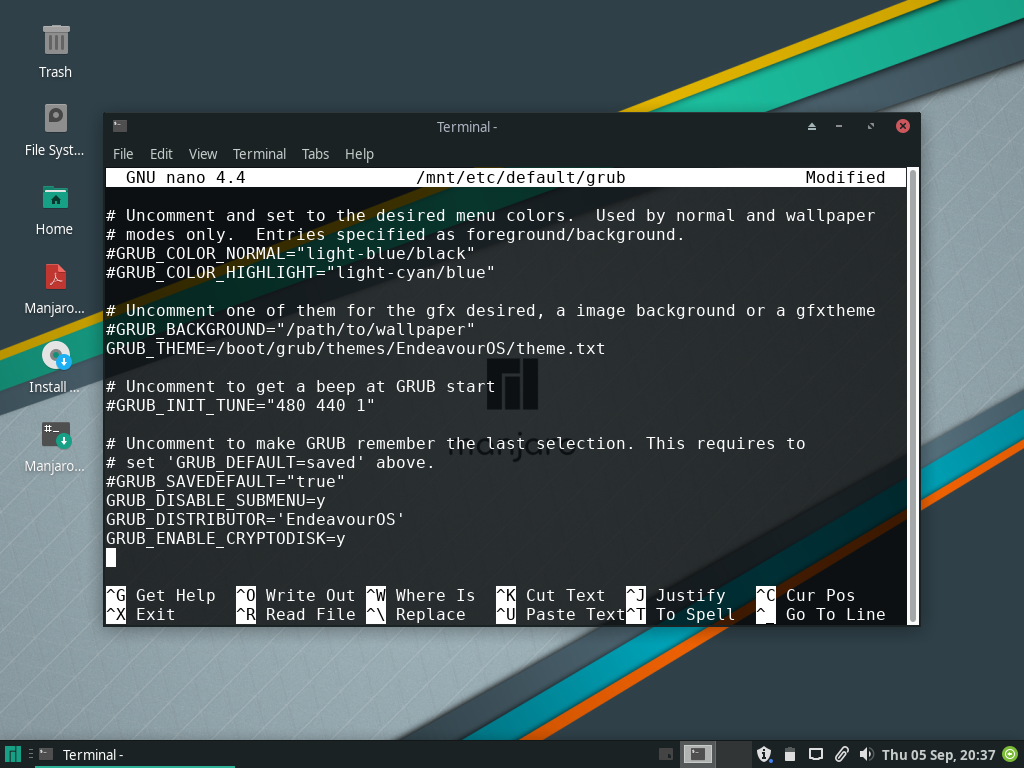
grub: Selectgrubfrom theReview Configuration Fileslist. Clear everything betweenquietandloglevel=3parameters followingGRUB_CMDLINE_LINUX_DEFAULT="
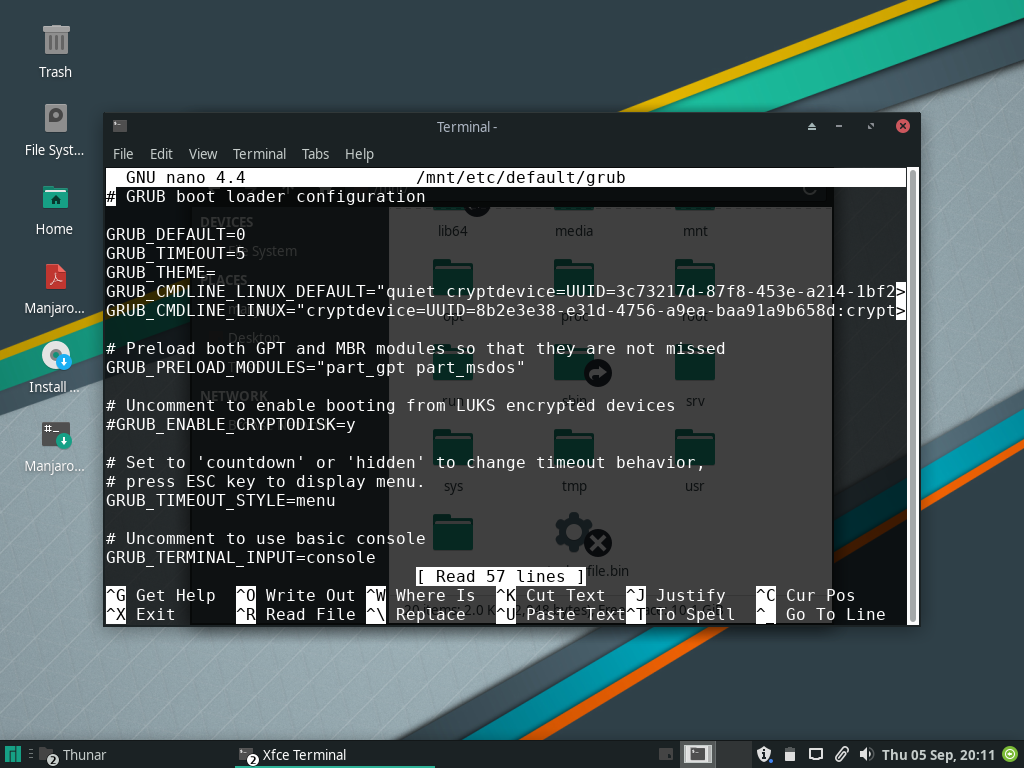
- … Leaving only
GRUB_CMDLINE_LINUX_DEFAULT="quiet loglevel=3"
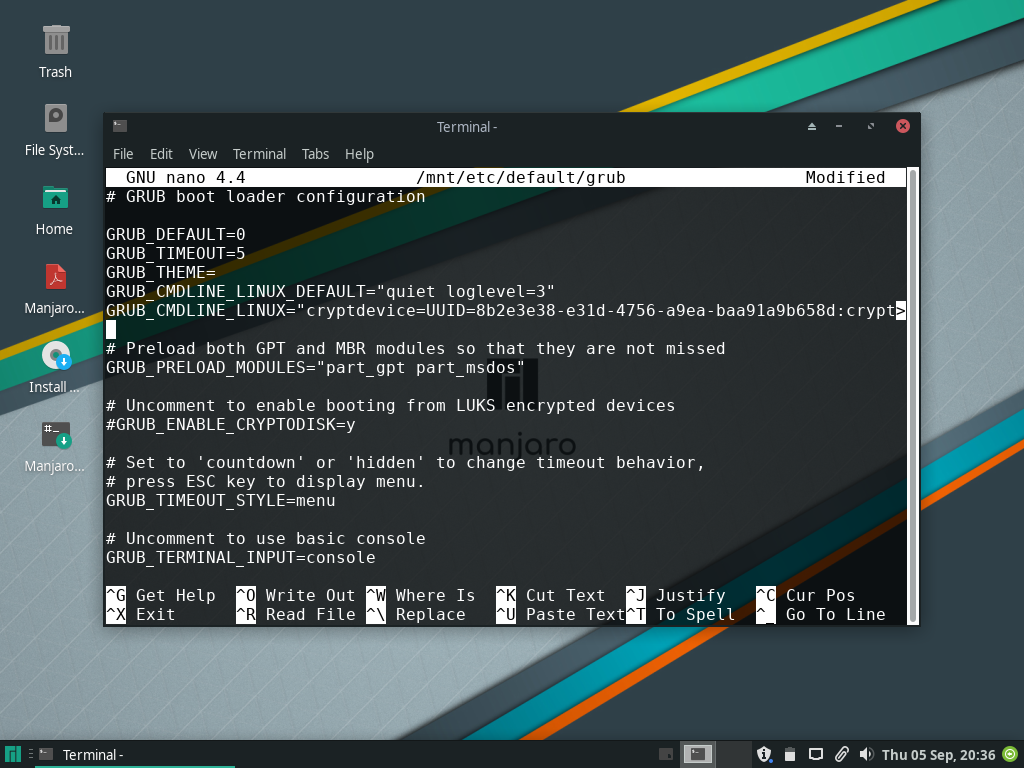
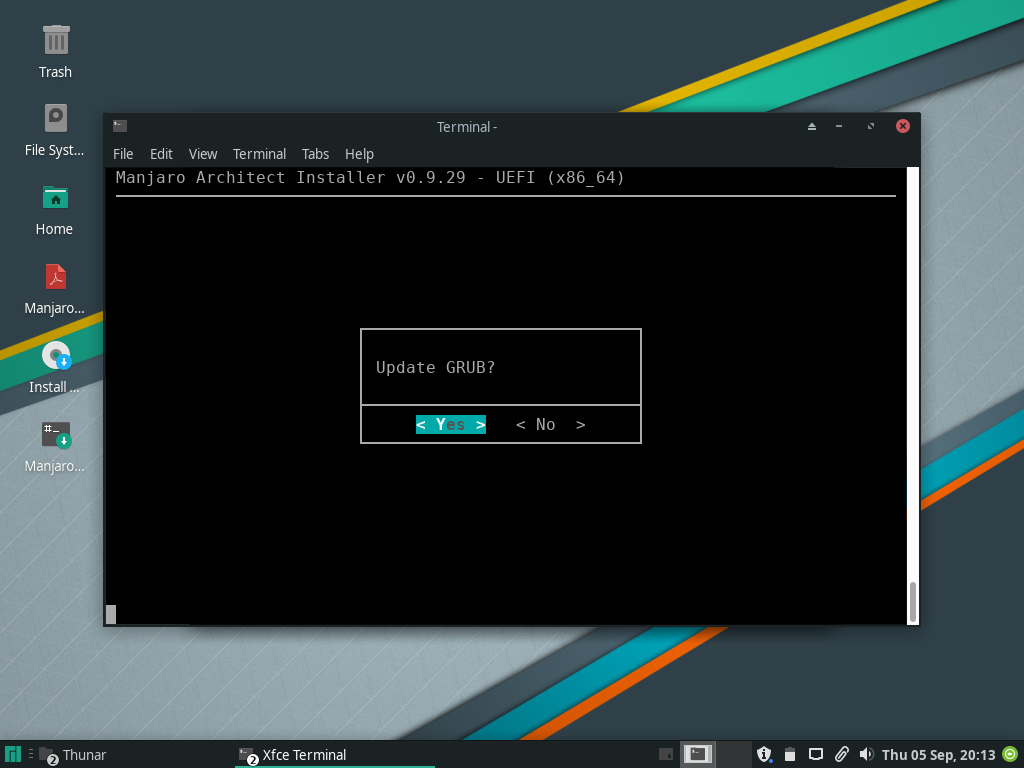
- When done exit, saving changes. Select
Yesto “Update GRUB?”.
Finished!
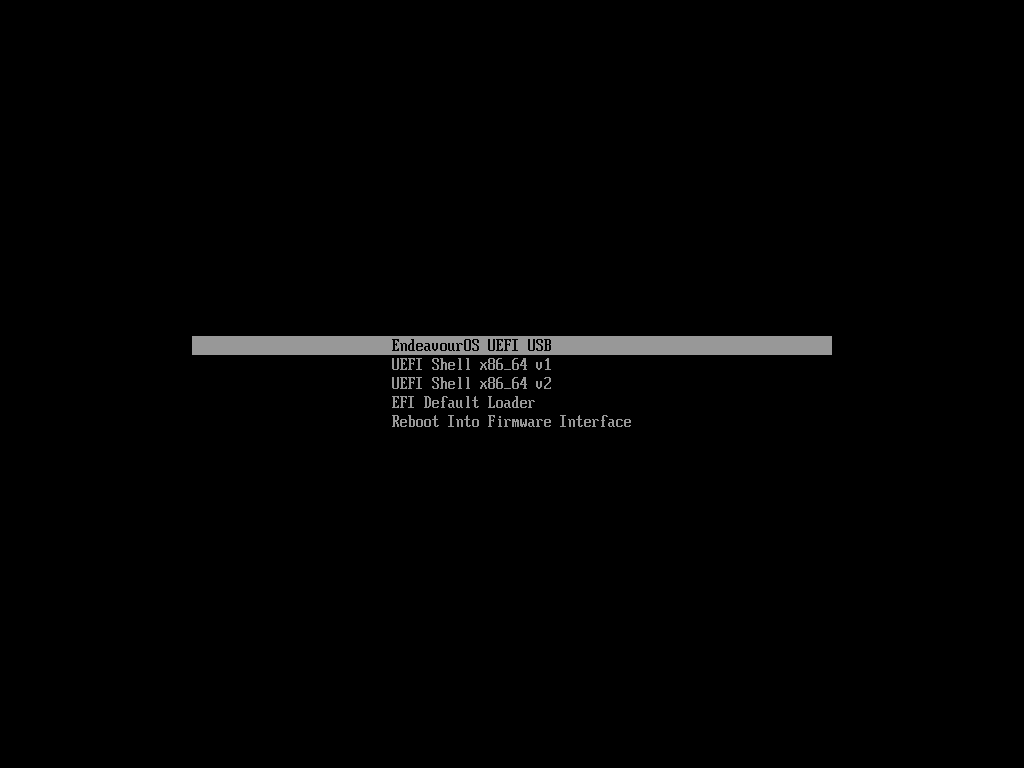
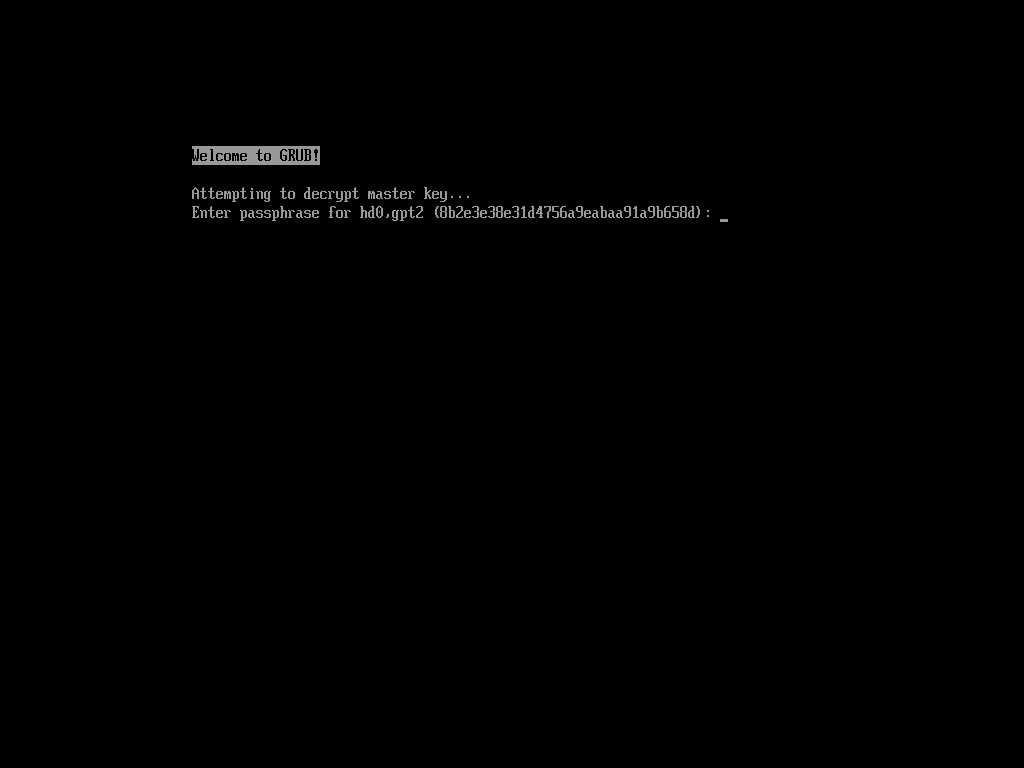
- Exit Installer and boot to disk.
- Enter passphrase, you’re done!
NOTES
Any changes/updates made to this tutorial will go here!
09/06/19 - In the future, #ENABLE_CRYPTODISK=Y will need to be uncommented once EOS’s Calamares assimilates /etc/default/grub default entries.
- EOS’s
/etc/default/grubis somewhat messy by default.GRUB_CMDLINE_LINUX_DEFAULT="edit here is partly due to this. Duplicate, out of place entries at the bottom: