Started this thread so that we can share all of our handy tips and tricks with Plasma. If you have some tips and tricks to share, then please do share over here.
I will go first
Extend the life of Battery
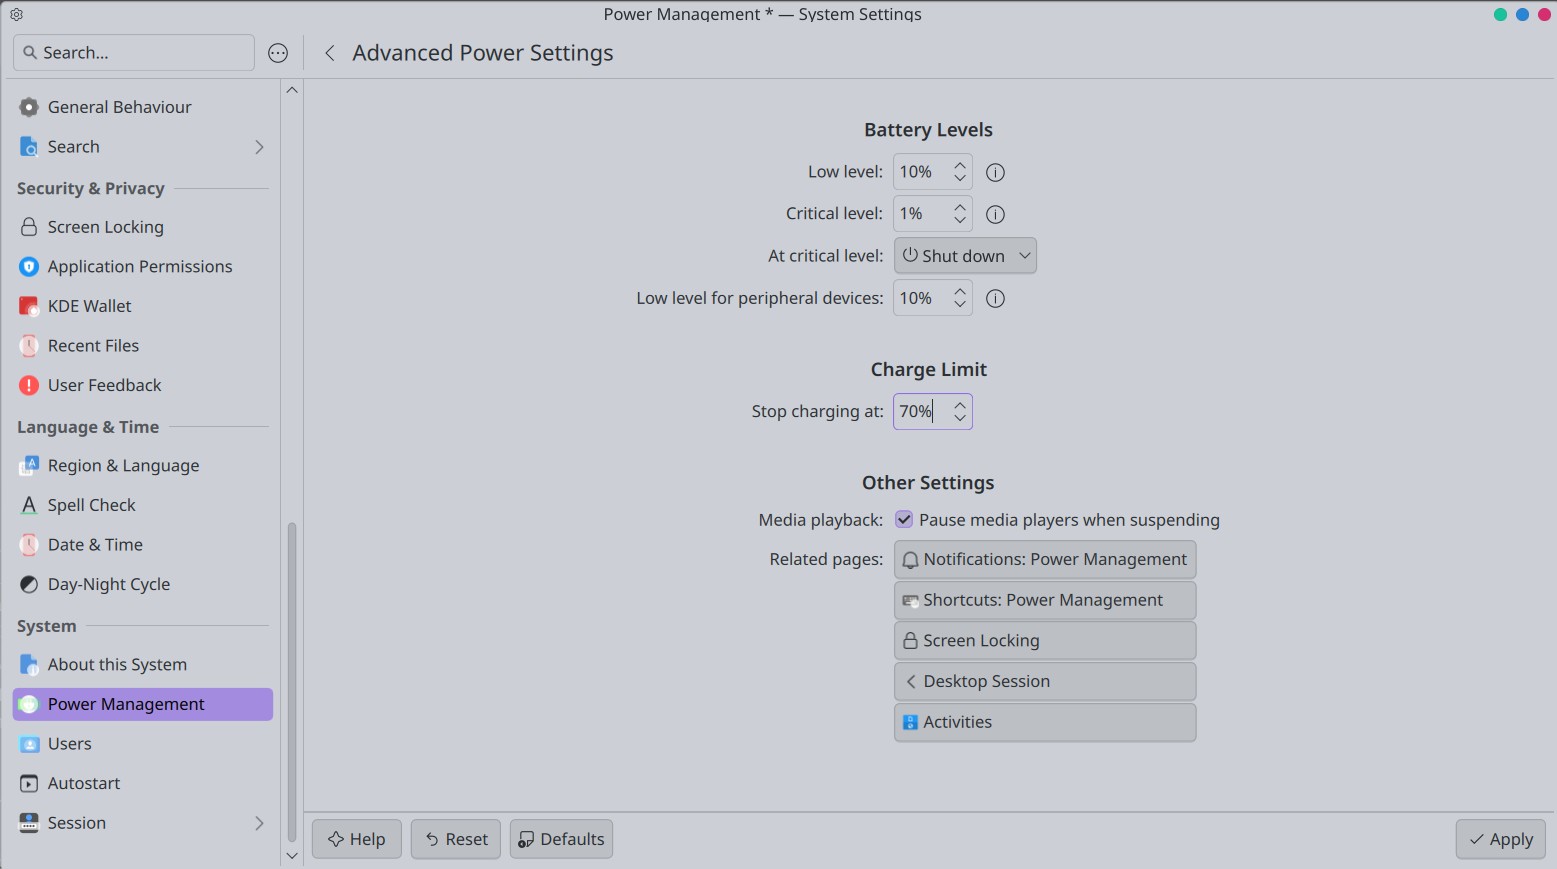
Typically Lithium ion and Lithium polymer batteries are charged to 100%. And once the battery is charged it is kept at 100%, being charged. This reduces their life and also may impact the number of charge cycles that they go through. To extend the battery life, typically some computer manufacturers provide the ability to limit the battery charge to say 75% or 80% or 85%. In KDE Plasma 6.x the same can be achieved by going to
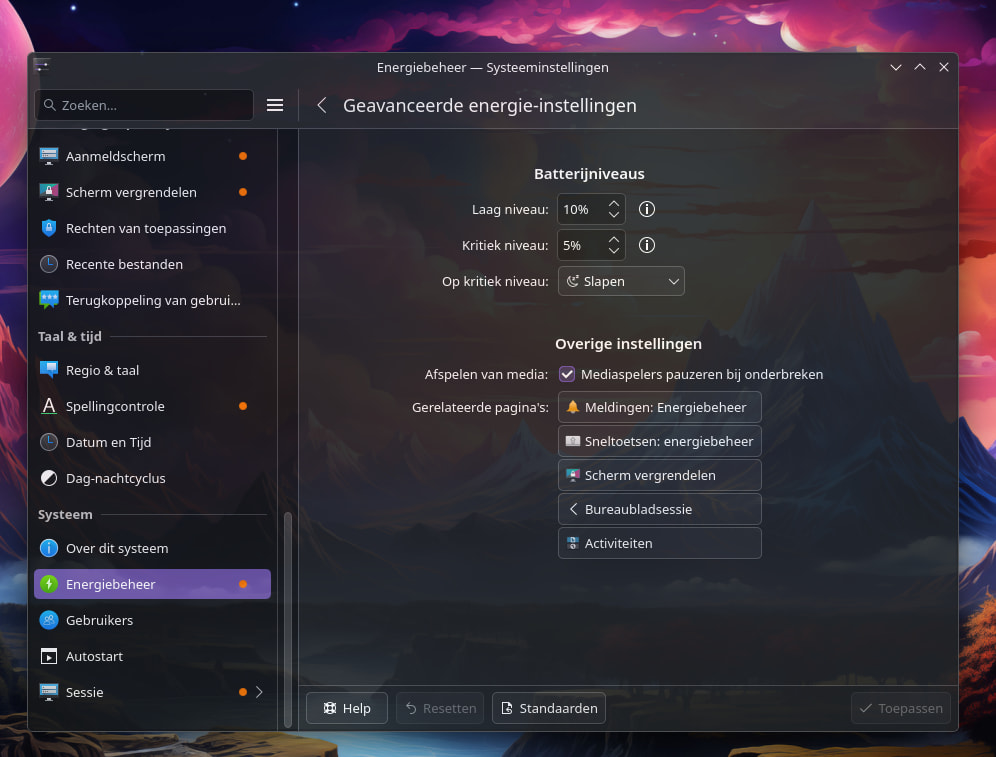
KDE System Settings > Power Management > Configure Advanced Settings
and changing the value of Charge Limit from 100% to 80% or to a value lower than 80%. Please see the screenshot given below for more details
This setting is dependent on the KDE Packages powerdevil and the package power-profiles-daemon.
Edit: As on date with Plasma version 6.6.3 on reboot the value of the Charge Limit Threshold is reset to 100%. There is a bug-450551 with KDE team which is being worked on as on date.
There are two workarounds for this.
The first one is If you are using systemd as your init program then create a service which sets the value at every boot. Details provided in the link.
The second one is as mentioned below by @lorebett. Please note that if you do take the second workaround please disable and/or remove the package power-profiles-daemon. You will have to use the tlp package instead. KDE powerdevil supports both, i.e. power-profiles-daemon and tlp. There is some talk in KDE on using uPower package but it is still hazy. And Arch/EOS defaults to power-profiles-daemon package.
Use the shortcut for switching power modes
Typically in KDE the package powerdevil and power-profiles-daemon provide 2 modes by default. They are
Balanced
Power Saver
Sometimes if the drivers and hardware support is there an additional power profile is also provided, “Performance”
To switch between these power profiles in KDE Plasma 6.x use the key combination Super+B or Meta+B or WindowsKey+B. While switching between these profiles, Plasma will show the power profile being used on the screen. This keyboard shortcut is defined in System Settings > Keyboard > Shortcut > Power Management > Switch Power profile.
You can add or modify or delete the keyboard shortcut for switching the profiles over there.
It is recommended that the default key combination is not touched, unless you know what you are doing.
Just one little feature that might not been known to everyone.
Instead of using the key combination to switch between the different power profiles, another option is to simply hoover over the taskbar item (if not hidden of course) and to simply use the scroll-wheel of your mouse. That would also switch the current power profile.
@lorebett you are right the KDE settings for charge threshold is reset at every boot. This is as per the Linux Kernel design. I will update the tip with the relevant information. Thanks for pointing it out.
In KDE Plasma there is an option to change the blue light filter based on the time of the day. This setting is available at KDE System Settings > Display & Monitor > Night Light.
You can switch the time slot when blue light should be reduced, from sunrise to sunset or at a fixed interval of your choosing. Typically in the night blue light levels should be decreased so as to prevent disruption to the Circadian rhythm sleep patterns. The night temperature can be made more warmer, i.e. display will have a yellow ting.
The ideal yellow temperature is between 2600 kelvin to 2400 kelvin.
One can turn off my monitor on the lock screen with the esacape key. This works when the user locks the screen using Meta+L or Super+L or when one has not logged into the computer.
KDE Plasma has a download utility called as kget. It is similar to uget and other download managers, but this one is integrated with KDE Plasma. It is not feature by feature comparable with uget, as uget has more features and ability to select the download backend (curl/aria2/etc), but kget is still pretty nifty.
kget allows the verification of the downloaded file using Checksum hash (MD5/SHA256/SHA512/etc) and via pgp signature files (.asc and .sig). Both types of verification can be done simultaneously. Or only one. This helps to check if the validity of the files downloaded.
Verification of the Checksum
While downloading a file, right click and select the option, “Transfer Settings” or use the key combination CTRL+T. A new popup window will open up. To provide the checksum hash select the file again in the popup window and select the “Verification” button. It will have a lock icon.
A new window will open up where click on ADD select the hash type, MD5/SHA256/SHA1/etc, give the hash from the download page and again click on ADD button. Now click on the “Verify” button. If the Checksum checks out then a check mark will come there otherwise a warning will be displayed. Multiple checksum values from different algos for a single file can be given. So for example if MD5 and SHA256 values for a file are available both can be given.
This is best done after download but prior to opening or processing the file.
Verification of the PGP Signature
To verify the PGP signature, kget already integrates with a few pgp servers like gnupg.net or pgp.mit.edu and a few others. If a signature file for the download is available and to verify the download using the signature file then the following steps have to be followed.
Select the download file in the kget window and use the key combination CTRL+T or right click on the download file and select “Transfer Options”. A new popup window will open up, select the download file once again and there click on the button “Signature”. Then click on the “Load Signature” button and select the pgp signature file. This will take a few seconds. Then click on “Verify” button. In that box it will show whether the ISO has been signed with the PGP key or not.
For signature verification kget requires the package gpgmepp to be installed and configured.
Here is something I stumbled upon. A way to add hardware encoding to mpv and I assume haruna (since it is a front end for mpv).
To enable hardware acceleration in mpv on Linux, install the necessary
VA-API drivers for your GPU (e.g., mesa-va-drivers for AMD/Intel) and add
hwdec=auto to your ~/.config/mpv/mpv.conf file. This offloads decoding from
 the CPU, reducing usage and lowering temperatures.
I assume this is mostly for playing videos, but I am not sure if this effects audio playback.
Any thoughts on audio playback and hardware decoding ?
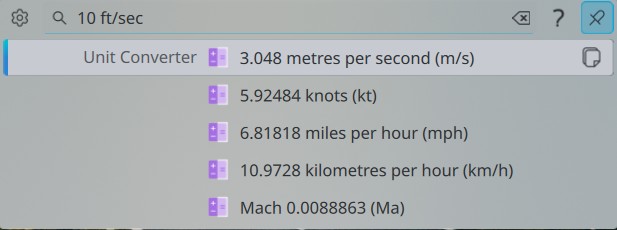
Typically as part of the KDE/Plasma the package kunitconversion is installed. This is not an application per see but part of KDE Frameworks, This works with krunner. So if a quick conversion is sought between say feet/sec to meters/sec or to mph or to mach number then do the following
Launch the KRunner by using the key combination ALT+F2 of ALT+Spacebar or whatever has been defined and type `10 ft/s’ and see it converted into different units. See the screenshot given below for more details. These converted values can then be copied to clipboard too.
Pounds (lbs, the weight measure not the currency) to kilograms to grams to metric tons and vice versa
ounces(oz) to Pounds(lbs) to grams(g) to metric kilograms and vice versa
Astronomical Unit to Miles, Kilometers, meters.
feet to meters and yards
yards to meter, feet, mile, kilometers, inches, cm, mm
inch to feet, yard, miles, kilometers, meters, cm, mm
Celsius (C) into Kelvin (K) and Fahrenheit (T). For this conversion type the temperature as “15 C” for 15 degree Celsius or “25 F” for 25 degrees Fahreneheit and “100 K” for 100 degree Kelvin
Degrees to arc seconds to radians to arc minutes
parsec to miles, kilometers, yards, meters, feet, etc.
And many many more
To get a full list of all the conversions supported look into the file /usr/include/KF6/KUnitConversion/kunitconversion/unit.h
What is surprising is that unlike Windows Calculator the KDE Calculator app does not provide a graphical way to convert the various values. Nor is there any dedicated GUI Utility which provides this conversion.
Learnt in my intro to CS history that nowadays most of the time the audio decoding is handled by the CPU itself. Microsoft and Intel decided way back in 1980s or 1990s, will have to look up the textbook on the exact decade, that it was not good for a true multi-media capable PC to be dependent on external sound cards. Also laptops were gaining strength and one thing that laptops lack is expansion slots. So as Moore law progressed hw encoding for audio formats was moved inside the CPU itself.
In fact in Firefox one can check which Audio codes are supported for both encoding and decoding by CPU.
Launch Firefox and go to Menu > Help > More Troubleshooting information. Or open a new tab and type about:support. Go to the Media section and see the support for AAC, FLAC ,MP3, Wave, Ogg Vorbis, OPUS. It is possible that the CPU does not support the encoding but only decoding. Or it supports both.
I do not know what the pure audiophiles and sound professionals use. Do they still insist on having an external sound card or are modern CPUs powerfull enough to handle the full spectrum of their needs. If there is an audiophile or sound expert in the house please do comment.
Many of us use Linux on a laptop. With KDE installed it is possible to change the behavior of the inbuilt touch pad
Disable Touchpad when keyboard is being used.
This will help in preventing unforeseen accidental touch which will move the focus of the cursor away from what is being typed. Especially those who use rest their palms on the laptop while typing on the laptop keyboard will find this helpful. The setting for this is available in System Settings > Mouse & Touchpad > Touchpad > General
Enable the option, “Disable while typing,”
Disable touchpad when external mouse is connected
This is will disable the touchpad entirely if an external mouse, wired or Bluetooth or wireless, is connected. Helps in avoiding accidental touches and cursor focus stealing.
Explore the Touchpad and mouse settings for more settings. Like pointer/cursor acceleration, which helps in dealing with multi screen scenarios.
Though there is a one significant capability in KDE that is missing, Middle click and auto scroll.
In Windows, if a mouse with scroll wheel is connected or if the right mouse key+left mouse key are pressed together then the pointer changes to auto scroll. Then by simply moving the mouse up and down the content scrolls depending on the direction of movement of mouse. In windows if we move the mouse so very slightly and let go the mouse the content very slowly auto scrolls either up or down,
This negates the requirement to use the mouse scroll bar or to use the window scroll bar. Super helpful while dealing with massive code files or big documents.
This is unfortunately missing from KDE.