Hi
It’s up and running following the latest advice.
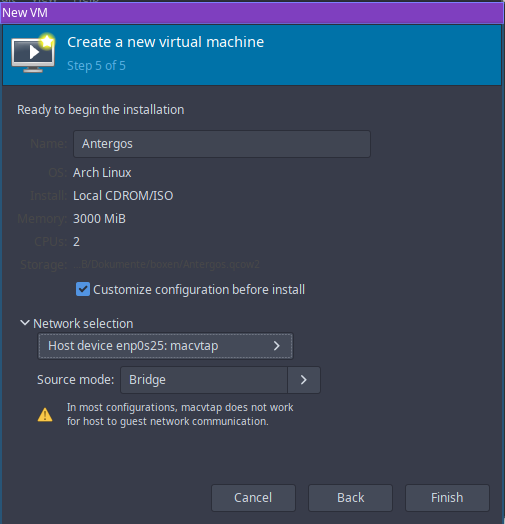
My wish is to test it in the most easy way before going further. I have a virtualbox vdi with W7 in own partition named /virtuel that I would like to use.
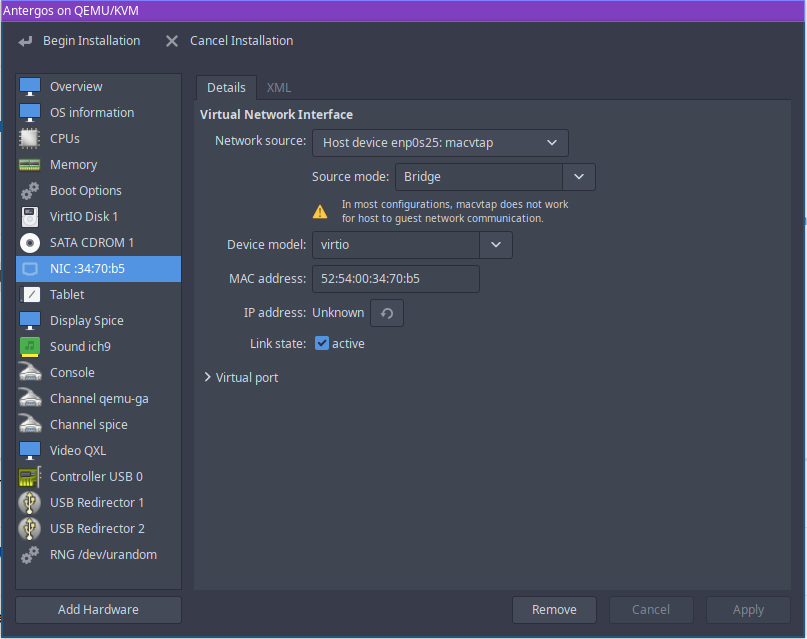
I create the new VM but gets the report that the NAT network is inactive and I do not know how to activate it.
It seems I face a specific problem with RF-kill on my Lenovo laptop. I bought it three years ago and I had to wait 16 months before a Linux firmware update solves this and mades my wifi work…
It’s just slightly better if I try with the ensp network (Ethernet cable, which is connected). I start the VM W7 but only with the windows repair system - which of course repairs nothing.
[roger@lenovo ~]$ rfkill list
0: ideapad_wlan: Wireless LAN
	Soft blocked: yes
	Hard blocked: no
1: ideapad_bluetooth: Bluetooth
	Soft blocked: no
	Hard blocked: no
3: phy0: Wireless LAN
	Soft blocked: yes
	Hard blocked: no
7: hci0: Bluetooth
	Soft blocked: yes
	Hard blocked: no
[roger@lenovo ~]$
For this try, I have better stick to the Ethernet connection (ensp) which does not suffer from RF-kill woes. So that my first problem is to know why Windows does not start normally.
I’ll have to learn a bit more about this and shall resume later. Sorry to make you waste your time.
Booting into the windows repair option sounds like it’s booting from the install media still perhaps. I’ve only used virtual box, but look for an option to “remove” a disk drive and unmount the .iso from there, or change the boot order to hdd before optical.
Have you been able to get virt-manager working? Since I can’t get VirtualBox to work on Arch based installs I have tried getting virt-manager running but seems to not boot the ISO. It’s strange as I have used it in the past but VirtualBox is the one I prefer. Not sure what I’m doing wrong with it? Tried different settings but so far it’s not cooperating. Going to try it again later.
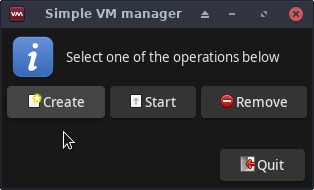
If you feel adventurous, you could try my latest creation, the vm-gui. It wraps virt-manager and virt-viewer into an easy GUI. Note that it is a very new tool, so there may be bugs lying around! So far I’ve used it myself without issues.
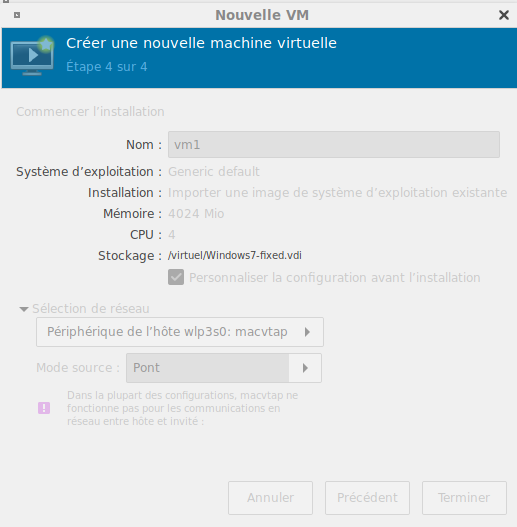
Here are some pictures. The first window is:
In order to use virtual machines, you need to create one first (so click Create). Then you’ll see this:
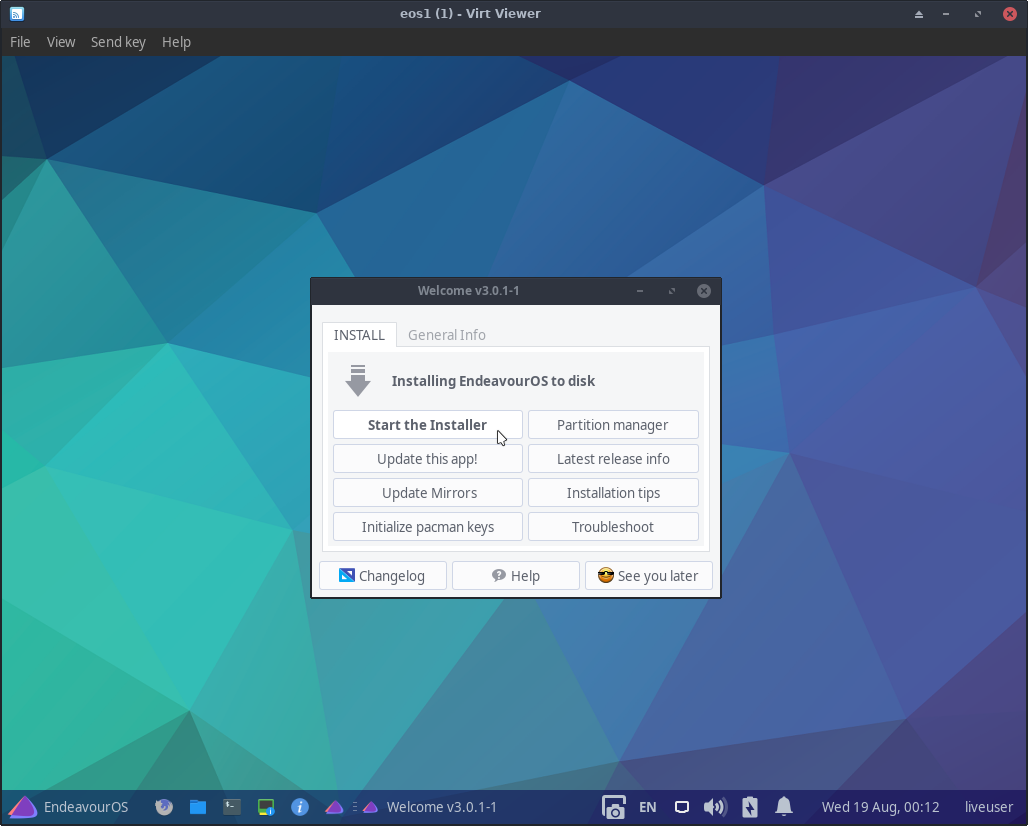
Usually giving the name and the ISO file location is what needs to be done. And here we go:
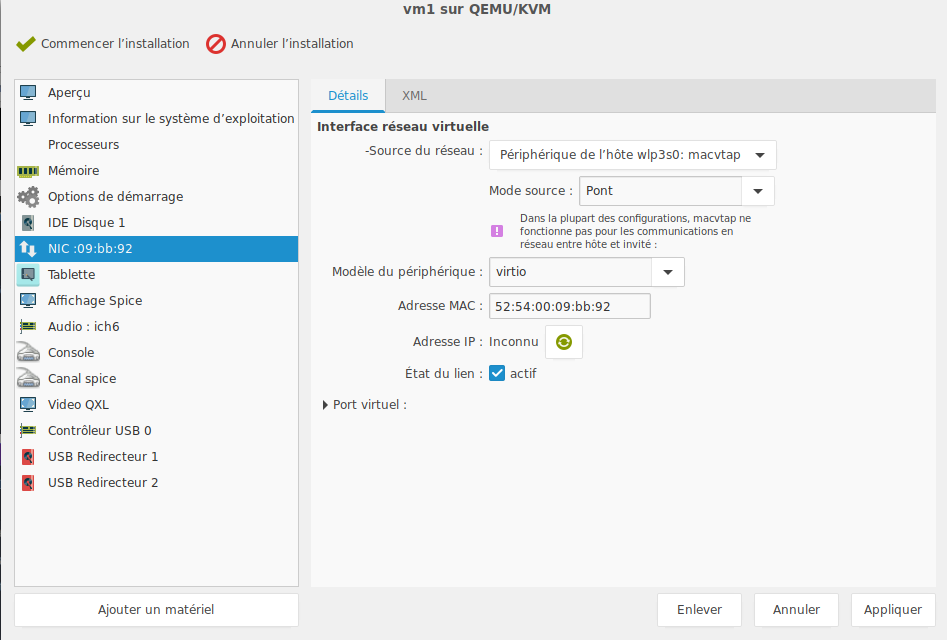
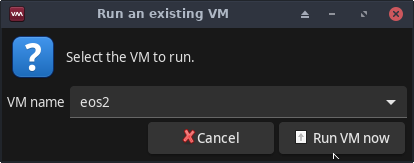
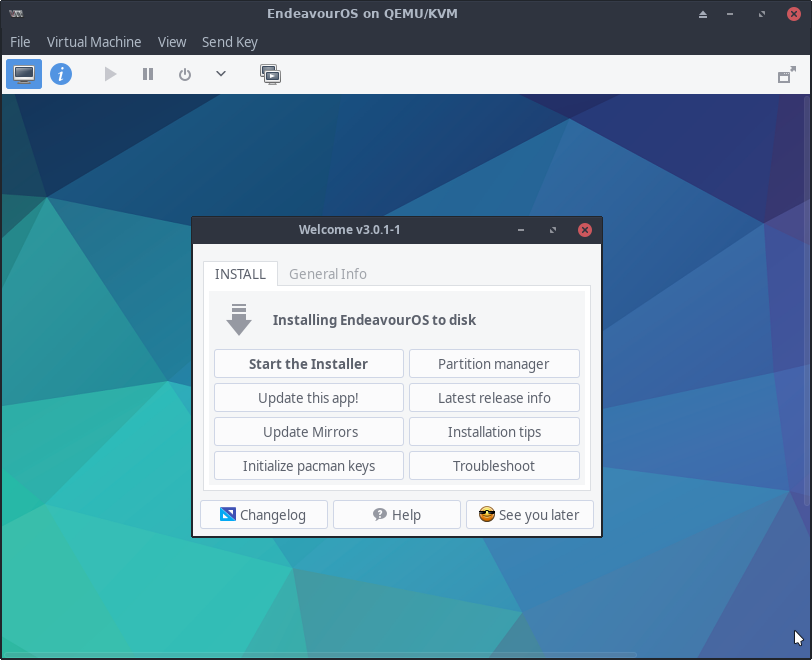
After installation, you can simply reboot and start using the VM. But if the VM is shut down, you can restart it by clicking the Start button on the main window, and you’ll come here:
Just run it!
The code is located under my personal packages at
If you don’t have that repo installed for pacman, there’s another (manual) way to install the package:
cd /tmp
wget https://github.com/manuel-192/m-m/releases/download/x86_64/vm-1.2-2-any.pkg.tar.zst
sudo pacman -U vm-1.2-2-any.pkg.tar.zst