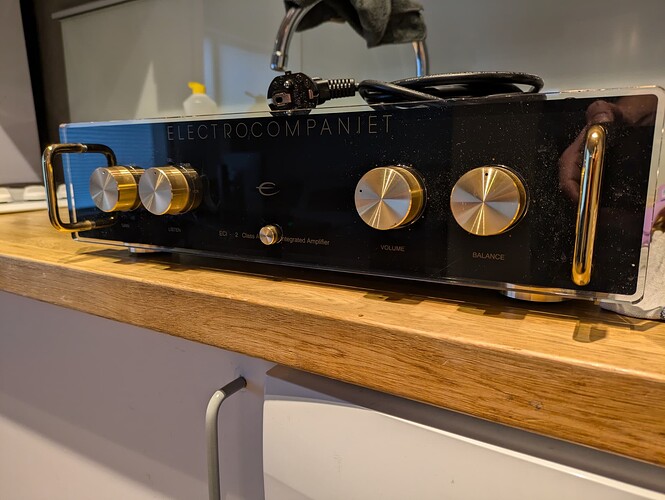
Show your latest purchase! (With pictures)

Well, the Sapphire Pulse RX 480 from which I’ve got in my old system (too long for the new system I’ve build recently) had a silent mode which was definitely less audible and the fans only kicked in when under heavy use.

I should check if the RX 6600 has also an bios switch I guess. But currently it’s totally fine.

The major difference is that my new system resides on my desk and not under it as the old HP Z600 workstation which I’ve got. That system was generally louder anyway.

1 Like

onlyfans.

(Sorry for that one, I couldn’t resist my inner child )

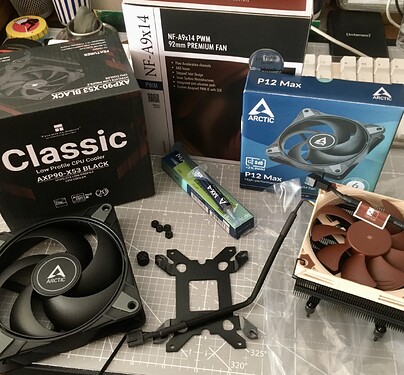
The stock boxed fan has to go now.

The missing low-profile heatsink which will fit into my ITX build finally showed up. As a friendly neighbor came over and handed me the parcel which has be gone missing. Turns out It has been falsely delivered to the wrong apartment building and was laying in their hallway for the last 10 days. A refund has been claimed already. And a different one is also on its way to me.

5 Likes

That…

was way more stressful than anticipated.

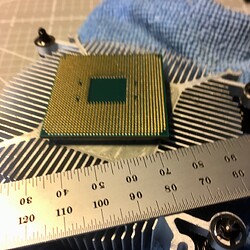
I’ve heard those stories, didn’t expected that it would be an issue. And it never happened to me before that the CPU came out of the socket while removing the CPU heatsink. The IHS was essentially sucked onto the underside of the heatsink rock solid. And wouldn’t move a bit.

Had to do some careful cleaning, removal of the originally pre-applied thermal compound from the stock cooler.
And careful inspection under magnification if any pins are bend. Which wasn’t the case. Flushed it carefully with isopropanol from a syringe with blunt needle to loosen the bond. And repeated that several times. Finally, while using that ruler I could loosen the bond in a controlled manner by using one of the fixed screws as an point of leverage. That did the trick. Which was a big relief !

And now, with the new fans and such. The CPU is directly 10°C cooler. GPU temps also improved.
Just will need to do some profile tweaking now.

7 Likes

I have done this I don’t know how many times in my life while I was working as a technician, it’s never not terrifying :laughing:

Never managed to kill a CPU with it though, I have yet to meet the bent pin that can’t be unbent with a steady hand and a jeweler’s screwdriver!

On older CPU’s with less dense PGAs the go-to trick was always to run a credit card slowly through the rows and ease them back into shape.

Could have been avoided by going for an AM5 platform instead.
It has been a very long time for me that I’ve worked with pinned CPUs. More than 15 years, easily. The times when I’ve build new systems way more often are almost ancient history.

To avoid the possibility of the CPU coming out I have always done the twist method where I twist the cooler a little to break up the paste and then it’s usually quite easy to remove. Although this does depend on how stuck it is though.

1 Like

I probably won’t get into a new AM5 platform for a while since i have all the parts sitting here for two years for another new AM4 system. :wink:

Beware, because from experience this runs the risk of backfiring spectacularly and bending a huge chunk of pins into an awkward swirling pattern if the thermal paste wins the fight :laughing:

1 Like

That’s why you always twist the heatsink before taking off the cooler. And preferrably stress the CPU for 5 to 10 minutes beforehand to warm up the paste.

Or just buy a LGA socket CPU. :wink:

1 Like

The mounting screws from the stock cooler and the back plate were a bit cumbersome. That spring loaded retention system, definitely not my cup of tea. A bit finicky and it came lose earlier than I anticipated, it doesn’t really provide tangible feedback or precise control, in terms of the torque applied.

I also don’t plan to switch and will keep the system for several years. Maybe upgrading the CPU down the road when I find a steal.

That’s a good tip, I’ll hopefully keep in mind. Thanks! Luckily the different mounting bracket is tightened from the backside of the motherboard with simple nuts and I won’t have to struggle with that stock fan / mounting system ever again.

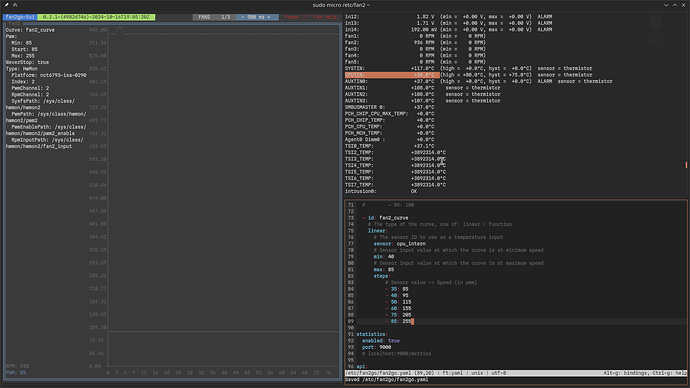
In the end, everything works. Only have the issue that the additional case fan doesn’t work well in an adaptive pwm profile while being combined with a silent fan adapter. The rpm readout fluctuates a lot, even when the duty cycle is effectively constant.

Note to my future self:
If you install new fans, you not only want to update your lm_sensors entries with sensors-detect as a good measure. You should also run pwmconfig again to retrieve valid pwm mappings.

It may be also clever to check which control modes are provided by your bios. And if the fan headers you’re using are actually providing pwm control.

It turned out that coolercontrol which I’ve used up so far hasn’t the capability to override the fan control mode governed by the bios, at least for the chassis fan header. Which only supports voltage adjust mode as it seems like.

Anyway, with fan2go it doesn’t seem to be an issue. But it’s a bit more involved and requires manual configuration. Seems like I’ll have to do some open bench testing for valid fan speeds and such.

You may ask why ? Well, I’m aiming for almost quiet fans at 40°C idle. And the additional Arctic P12Max which I’ve installed actually replaced the stock psu fan. As the ASRock Deskmeet x300 is a miniITX case, the available space is pretty limited. The psu fan pulls the air from the back side of the case, into the psu, exhausting it directly above the CPU socket.

With the fans and coolers which I’ve installed now, there is only 1-2mm space between the cpu fan and the underside of the fan grill of the psu. Thus the psu fan has a significant effect on the heat sinks performance. Might be redundant, but that’s quite nice. Was running into thermal throttling before with the stock setup and didn’t had the option to control the psu fan as it was connected to an internal 2pin header, governed by the psu circuitry itself.

And the mailman rang, once again.

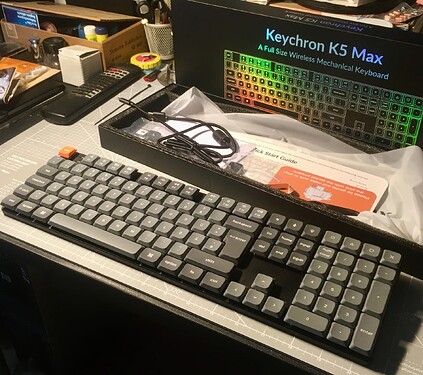
My first impressions so far : That Keyboard is marketed as a low profile keyboard. But it’s actually not that much lower in comparison to the A1048 Apple Keyboards I’ve used in the last decade primarily. The space bar is approximately 3-4mm lower than my trusty A1048. In the back it’s roughly 5-6 mm lower.

The keycaps make an very good impression so far, the tactile key registers (f, j & 5 on the num block) are much solid and easy to feel, unlike the small dots on the A1048 (which are worn down). No complains about them, they are double shot PBT and I really like their fell & the contrast of the letters. The overall fit & finish of the whole keyboard is quite nice. But from a product in that price range. Its only okay I have to admit. I’m a bit disappointed by that fact. It has an aluminum housing, indeed. But it’s not that stiff and as beefy as I’ve hoped. In use it’s not an issue. But along its horizontal axis, while being held in both ends, more flex as I anticipated and even a little twist produces horrible plastic squeaky noises. In short, you wouldn’t use it as a self-defence weapon. To the touch at least, it doesn’t feel that cheap, luckily.

Nevertheless, so far I’m a bit underwhelmed from the build quality. The A1048 also flexes also a lot in the horizontal axis. But doesn’t produce any noises when the same twist is applied.

I’ve ordered that keyboard with the standard linear red low-profile switches. The short key travel is quite nice.
But they’re much more noisy than my worn in rubber domes on the A1048, which are almost silent, without clicking sounds, when they’re lubed correctly. I’ll have to get used to that. As it is, out of the box, i would prefer the keys to be a bit quieter. Especially the non-standard keys ( backspace and enter etc ) are pretty pronounced.

Overall, the key layout is a bit more compact, primarily due to smaller gaps between around the nav cluster & numpad. Thus I’m the hitting delete instead of enter quite a lot currently. Furthermore, even if all the switches are all in a flat plane, I’ve got the feeling that there is a slight curve to the profile, at least for the key caps. It’s not much. And it might be an misconception from my side, as the keycaps of the A1048 mounted in a convex curve, which is actually a pretty comfortable. But you won’t see on mechanical keyboards usually, as they are based on PCB mounted switches.

For now, I’ve decided that I’ll test drive it for a week without doing any changes. Then I’ll come to a final verdict if I keep it. At the moment, I’ll just have to modify some key bindings. As the layout is a bit different than the A1048, which has 13 function keys in total.
6 Likes

I have the K3pro with brown key switches. Very, very satisfied.

2 Likes

At the moment I’m glad that I didn’t choose the brown ones, when I’m already bothered by the noise level of the red switches.

Its a bit inconvenient that the keychron launcher for the keybindings requires an browser which supports HID control. Thus I had to download ungoogled chromium for the keybindings. Haven’t tried to setup qmk and can’t really tell if its supported. At least the K Max / Pro series aren’t listed on the wiki explicitly. Do I even need that ?

I can’t tell you how to configure it. I haven’t had this keyboard for that long and haven’t even gotten around to taking care of the keybindings and qmk yet. It is probably the case that keychron needs a chrome-based browser. Yes, that’s right, these models are not listed in the wiki. That was probably the reason why I hadn’t looked into it in detail yet.

What are the odds, I bought myself a Keychron K10 with red switches. The simplicity of its design is why I bought it but I’m loving typing on it. Much more modest and sleeker looking than my previous gamery ROG Strix Flare, that was a product of my bygone “gamer” era. I really don’t care for keybindings, so I haven’t looked into that yet. Plus, no need for wires anymore with this keeb.

Well, I’m using the mac layout and it has the media controls mapped to the function keys. That needed to be changed. And some additional keybindings. The eject key is mapped as shortcut to an bash script which toggles bluetooth on or off, in case I want to use my headphones. They connect automatically then, which is quite nice.

Furthermore, I like to dial the brightness of my screen down in the evenings and thus I’ve mapped brightness controls to the places I’m used t (print & scroll) . Also a shortcut to suspend night light, in case I need the actual color range late at night (Pause), when I should be in bed already. Volume controls above the numpad, together with a mute button.

The sleek design was also a strong reason why I’ve choosen the K5 max, for sure.

And, once again. The postman delivered a minor purchase.
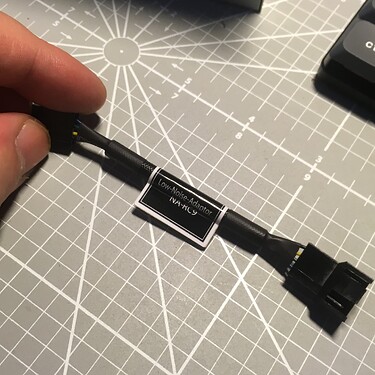
An used Noctua NA-RC-9 low noise fan adapter (100 Ohm resistance) which I scored for little money on eBay.

I was having troubles with my current setup and just wanted to have some options.
The Noctua NF-A9x14 92MM fan which went on my CPU heatsink already came with a NA-RC-7 low noise adapter (50 Ohm resistance) which I didn’t put in.

I took some the time to correctly validate the current setup and tested some alternative configurations on the open case.

As the chassis fan header on my motherboard doesn’t allow for PWM speed control, I use an Y-connector now to hook up both fans to the CPU fan header. And the PSU fan it throttled down with the NA-RC-7 low noise adapter.

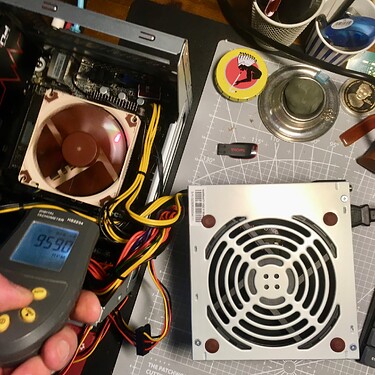
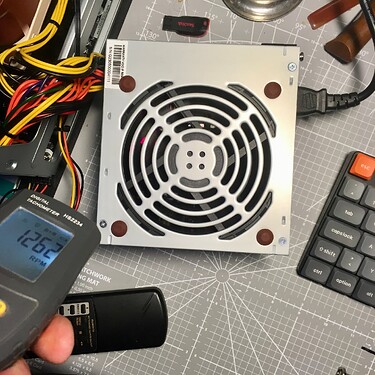
The downside is that I didn’t was sure if the rpm in the range I want it to. With both fans connected to one header I’ll only have access to one fan speed, which is a bit uncertain. Thus I checked the speeds separately with a infrared speed meter. And all seems to be fine now.

The CPU fan and the PSU fan are both controlled by the CPU temperature. And the PSU fan is slightly faster + 300 rpm with the NA-RC-7. With the NA-RC-9 the difference is only +200 rpm. But the PSU fan created an annoying whine in combination with it. While being connected to the chassis fan header it also created weird noises. As if the fan is struggling with it’s stall speed and was running in pulses. Which could be overheard easily, but I expect that wouldn’t be beneficial in terms of long-term reliability.

Thus, with this little test session, I finally ended up with a configuration I’m satisfied with. It’s not perfect, as I don’t have direct access to the second fans speed. But this is acceptable. Beforehand I also didn’t had any insights about the PSU fan. The minimum PWM speed is now definitely slightly above the seconds fans stall speed. And I can’t identify any strange noises or odd behavior.

7 Likes

Electrocompaniet ECI 2
It is about 30 years old. When I was in my late teens, norwegian high-end brand Electrocompaniet was legendary but we couldn’t afford it. the EC 2 is known for its warm, tube-like, sound. Bought it used, dropped it off at the factory and told them I want it to last for another 30 years.

And now I’m putting together the dream stereo of my youth, one piece at a time. Record player, speakers, cassette deck. Plus a modern dac and sub. Love it!

I did the same with a couple of computers, it is great fun to realize the dreams of your youth you couldnt afford them!

18 Likes

As a fellow audiophile, beautiful is all I can say.

My setup is definitely more modest though. No speakers, just my trusty old Sennheiser HD 600 and a NEO iDSD 2 to serve as a DAC/Amp. Absolutely love both.

Sometimes I bring out my HiFiMAN HE1000 Stealth for that extra bass. But I daily drive the Sennies.

And I am not surprised at all that Pipewire on EOS handles my audio needs significantly better than Windows does, inculding detecting my DAC/Amp without any qualms.

1 Like