I don’t think you understood what I meant. You asked me to show you the live ISO in gparted. Here’s what gparted looks like when I open it initially: 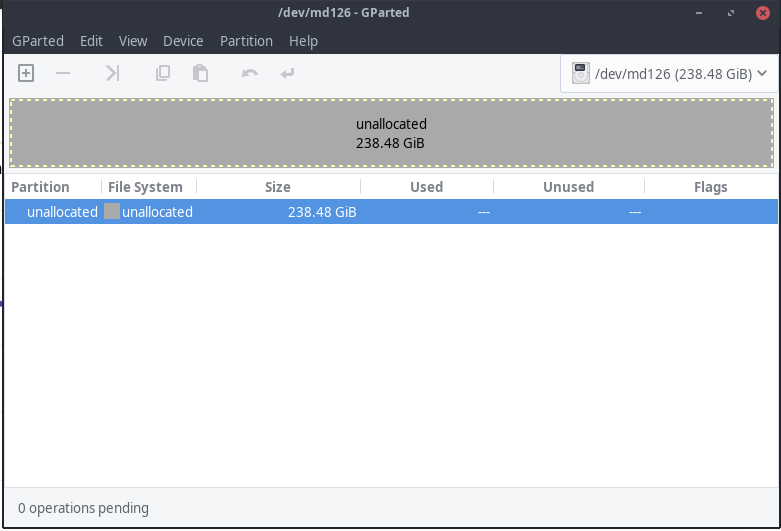
Now here is it with the drop down: 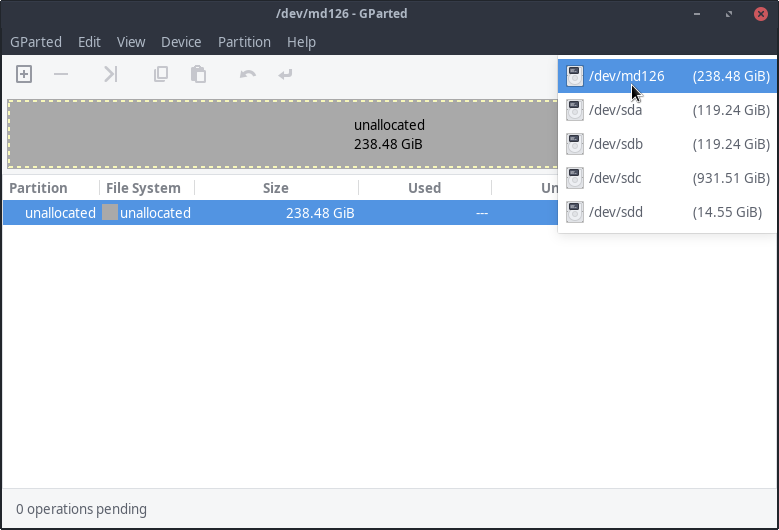
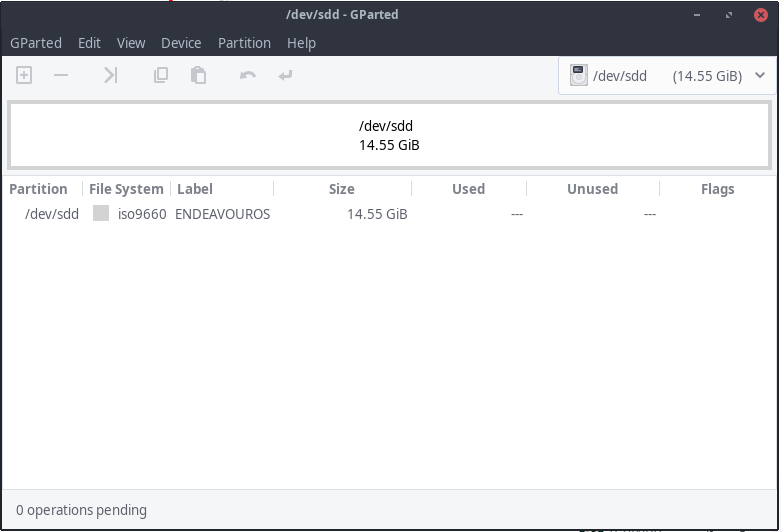
And here it is again with the live ISO selected:
GPT the raid drive and reboot.
1 Like
So /dev/md126 is the raid drive and the /dev/sda and /dev/sdb are the two drives in raid array.
1 Like
Great, you could go to rebuild your GPT table, let us know…
I just did that already. Can I safely install to one of them?
Yes, correct.
1 Like
Okay so before the installer didn’t see the raid array?
I would think it would be better to kill the old array and rebuild a new one but try like this and reboot
1 Like
The installer could only see the RAID array, not the drives making up it, and would fail every single time once it got to making the ext4 partition.
So i guess the idea is to install to /dev/sda then? I’m just asking?
The installer can’t write to sda, so I hope not. 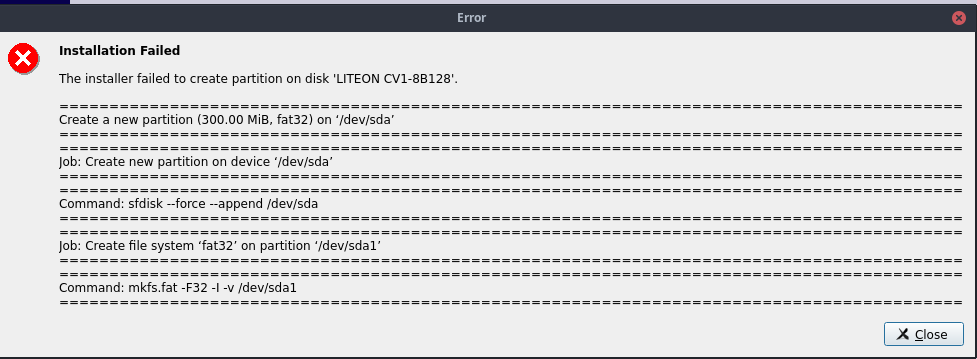
Disk are not ready to accept data still !
The only path to a solution I see is figuring out how to disable the hardware RAID. As established earlier in the thread, nobody seems to know how to do that, and Acer is of no help.
I think probably as @FLVAL suggests it would be better to remove the raid array and start over and recreate it. I only say this too because Calamares sometimes has difficulty overwriting. Did you alraedy use device create partition GPT on the /dev/md126?
Yes, I already created the gpt table for it.
I think it can be done with mdadm commands. So as in my example it would be for the first drive.
Maybe that might help, check it out. https://community.acer.com/en/discussion/542185/restore-initial-hard-drive-configuration-delete-raid-recovery-volume
I’m not sure after you remove the first drive from the array by first failing it then removing it whether you have to do the same with the 2nd drive?
On Arch they said :
Prepare the devices
Warning: These steps erase everything on a device, so type carefully!
If the device is being reused or re-purposed from an existing array, erase any old RAID configuration information:
# mdadm --misc --zero-superblock /dev/<drive>or if a particular partition on a drive is to be deleted:
# mdadm --misc --zero-superblock /dev/<partition>
So I would go for :
mdadm --misc --zero-superblock /dev/md126
[liveuser@eos-2020.07.15 ~]$ mdadm --fail /dev/md126 /dev/sda
mdadm: error opening /dev/md126: Permission denied
[liveuser@eos-2020.07.15 ~]$ sudo mdadm --fail /dev/md126 /dev/sda
mdadm: set device faulty failed for /dev/sda:  Device or resource busy
[liveuser@eos-2020.07.15 ~]$ sudo mdadm --remove /dev/md126 /dev/sda
mdadm: Cannot remove disks from a 'member' array, perform this operation on the parent container
Doesn’t seem to work, unfortunately.
That doesn’t appear to work either sadly
[liveuser@eos-2020.07.15 ~]$ sudo mdadm --misc --zero-superblock /dev/md126
mdadm: Unrecognised md component device - /dev/md126
[liveuser@eos-2020.07.15 ~]$ sudo mdadm --misc --zero-superblock /dev/sda
mdadm: Couldn't open /dev/sda for write - not zeroing
[liveuser@eos-2020.07.15 ~]$ sudo mdadm --misc --zero-superblock /dev/sdb
mdadm: Couldn't open /dev/sdb for write - not zeroing