Recently Ive been thinking of ditching windows and using linux and Ive used endavour os in a vm before and It looks really nice but Im not really ready to erase my ssd and install linux, I want to see how it will preform on a real machine but I dont really want to break anything since I have a lot of important data that I cant loose.
Would It be possible to create a partition on my second drive for endavour os and dual boot that with windows from my main drive?
It’s awesome that you’re thinking about making the jump to Linux, and EndeavourOS is a fantastic choice! If you’re new to the world of Linux, you’ll find this community to be super friendly and helpful, so don’t hesitate to ask questions or seek assistance.
I noticed you’re interested in trying out Linux without erasing your important data, which is a smart move. You can definitely set up a dual boot system with Windows and EndeavourOS to see how it performs on your actual hardware. Here’s a quick recap of the steps:
Backup Your Data: Make sure your important data is safely backed up.
Download EndeavourOS: Get the ISO file from the EndeavourOS website.
Create a Bootable USB: Use tools like Rufus (for Windows) or balenaEtcher (cross-platform) to create a bootable USB drive with the EndeavourOS ISO.
Boot from the USB: Insert the USB drive and boot from it (adjust your BIOS/UEFI settings if needed).
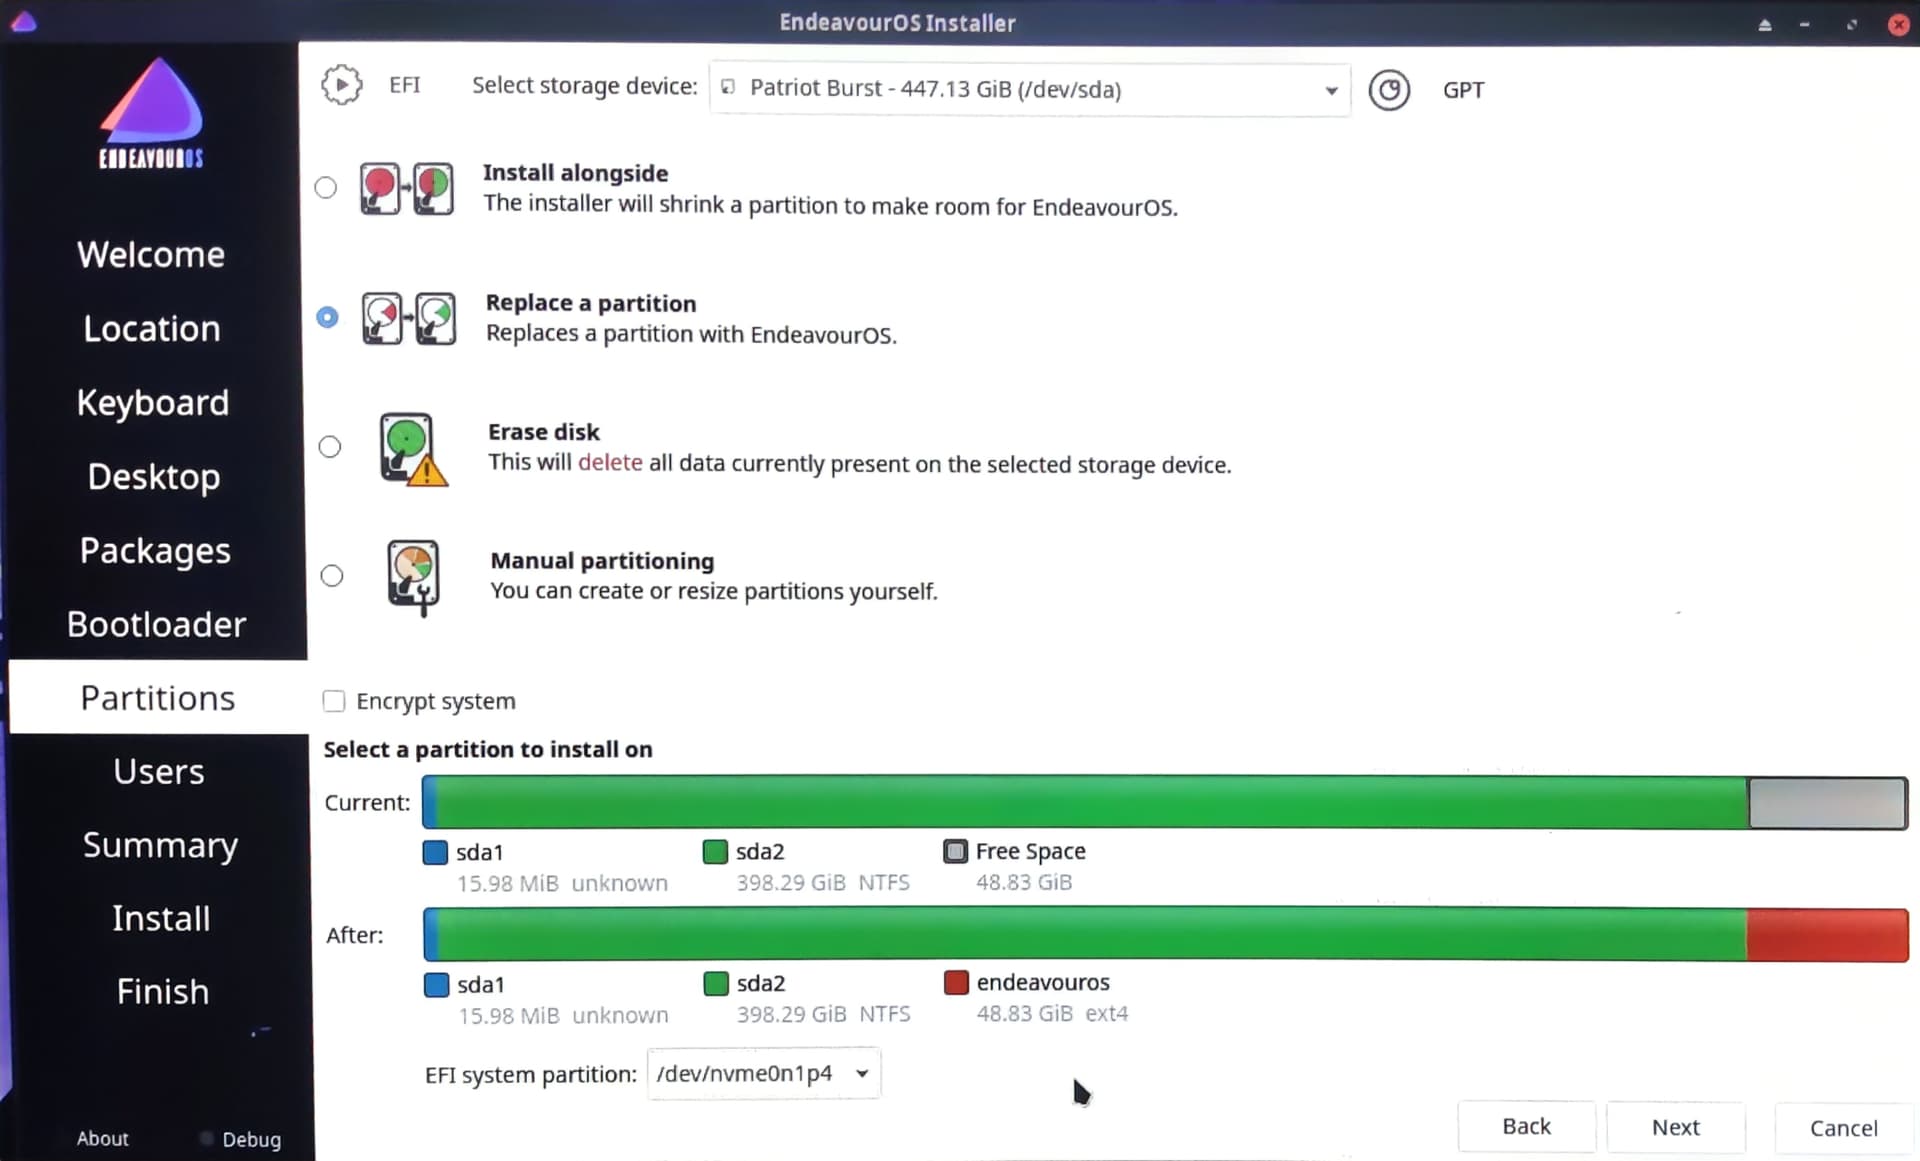
Install EndeavourOS: Follow the installation instructions and manually partition your second drive.
Set Up Dual Boot: The GRUB bootloader should help you set up dual booting between Windows and EndeavourOS.
Test It Out: Reboot and choose between Windows and EndeavourOS to ensure everything is working as expected.
You’re on the right track, Whoman! Take your time to explore and enjoy your Linux adventure. If you ever need guidance or have questions, just drop a message here.
welcome to the forum
yes, it is possible and the sequence that VictiniFan360 described is correct.
Just wanted to stress two critical points:
back your data up, ALL important data
we are assuming in good faith that you have the skills to recover the state of the PC prior to the dual boot install attempt
I think it is general consensus on this forum to encourage newcomers to explore the awesome Linux (and EOS in particular) world with wisdom, because we love seeing happy smiles and successful installations and we are sad when things go south. When I first started with linux, dual booting wasn’t a thing, and even when lilo first (then grub) where later introduced, I was so scared to mess things up, that I just plugged and unplugged the pins on the HDDs manually every time I needed to boot either system.
Bootloaders are incredibly stable and efficient nowadays, but some basic safety measures will ensure a long and pleasant experience in the magical linux world.
Absolutely, Whoman! You have full control over your system, and if you decide that EndeavourOS isn’t for you, you can remove it and go back to a Windows-only setup. You don’t have to live with the dual boot configuration forever.
To uninstall EndeavourOS and remove the dual boot, you can follow these steps:
Back Up Your Data: As always, make sure your important data is safely backed up, just in case.
Boot into Windows: Restart your computer, and make sure to boot into your Windows installation.
Delete the EndeavourOS Partition: Open the Disk Management tool in Windows. You can do this by right-clicking on the Start button, selecting “Disk Management.” Locate the partition where you installed EndeavourOS and delete it. Please be extremely careful when doing this to avoid deleting any Windows partitions.
Remove GRUB Bootloader: You’ll also need to remove the GRUB bootloader, which is used for dual booting. Open a Command Prompt with administrator privileges (right-click on the Start button, select “Windows Terminal (Admin)” or “Command Prompt (Admin)”). Then, enter the following command to remove the GRUB bootloader:
This command sets the Windows bootloader as the default.
Reclaim the Space: After deleting the EndeavourOS partition, you can reclaim the space into your Windows partition or create a new partition as you prefer.
As for the issue you encountered when trying to boot from the USB, the error message you received can be a bit cryptic, but it’s typically related to the boot process. Here are a few things you can try:
Redownload the EndeavourOS ISO: Sometimes, the ISO file can become corrupted during the download. Try downloading it again from the EndeavourOS website.
Verify the USB Drive: Ensure that the USB drive you’re using is in good condition and has been properly prepared with the EndeavourOS ISO.
Check BIOS/UEFI Settings: Make sure your computer is set to boot from the USB drive. Access your BIOS/UEFI settings and ensure that the USB drive is the first boot option.
If the problem persists, provide more specific details about your computer’s hardware and any unusual configurations you might have, and the community can help troubleshoot the issue.
Feel free to ask if you have any more questions or run into any other issues. We’re here to help you get started with EndeavourOS and make your Linux experience a smooth one!
You might be onto something, Whoman! Secure Boot can sometimes cause issues when trying to boot from a USB drive with Linux. Here’s what you can do:
Disable Secure Boot: You can try temporarily disabling Secure Boot in your BIOS/UEFI settings. This should allow you to boot from the USB drive without issues.
Restart your computer.
Access the BIOS/UEFI settings (usually by pressing a key like F2, F12, or Del during the boot process, but it varies depending on your computer).
Find the Secure Boot option and set it to “Disabled” or “Off.”
Save your changes and exit the BIOS/UEFI settings.
Keep in mind that disabling Secure Boot temporarily won’t affect your Windows installation. It’s just for the installation process.
Install with Secure Boot Disabled: Once you’ve successfully installed EndeavourOS, you can often re-enable Secure Boot after the installation is complete. This way, you can have both Secure Boot and EndeavourOS without any issues.
If you encounter any issues with your Windows installation due to Secure Boot, you can usually find an option in the BIOS/UEFI settings to re-enable it.
Give it a shot and see if disabling Secure Boot allows you to boot from the USB and install EndeavourOS. If you run into any more questions or concerns, feel free to ask. We’re here to help you make this transition as smooth as possible!
“pebacak” has brought up an important point regarding Secure Boot. Arch Linux and EndeavourOS don’t natively support Secure Boot, mainly due to the complexities of managing signed bootloaders and kernel modules.
However, if you’re determined to implement Secure Boot and are comfortable with advanced command-line work, you can follow the instructions in the provided ArchWiki link. This guide will walk you through the process step by step.
Just remember that Secure Boot is primarily a security feature designed to protect the boot process from unauthorized software. While it’s essential for Windows, many Linux users choose to run their systems without it. EndeavourOS should work perfectly fine without Secure Boot, as long as you follow good security practices, such as keeping your system and software up to date.
If you have any more questions or need further assistance, feel free to ask. We’re here to help you navigate this and make your Linux experience a smooth one!
If you didn’t have Secure Boot enabled in the first place, and you’re still encountering issues with booting from the USB, there could be another factor at play. It might be related to the way the USB drive was prepared or some other BIOS/UEFI settings.
Here are a few steps you can take to troubleshoot this:
Redownload the EndeavourOS ISO: Sometimes, the ISO file can become corrupted during the download. Try downloading it again from the EndeavourOS website to ensure it’s not the source of the problem.
Verify the USB Drive: Ensure that the USB drive is in good condition and has been properly prepared with the EndeavourOS ISO. You can use a tool like Rufus or balenaEtcher to create a bootable USB drive.
Check BIOS/UEFI Settings: Double-check your BIOS/UEFI settings to ensure that the USB drive is set as the first boot option. Also, verify that your computer is configured to boot in UEFI mode, which is recommended for modern systems.
Secure Boot Status: Even though you didn’t have Secure Boot enabled, it might be useful to review your BIOS/UEFI settings and confirm that it’s indeed turned off.
If you’ve covered all these bases and still experience difficulties, providing more details about your hardware and any unusual configurations you might have can be helpful for the community to assist you more effectively.
Remember, the community is here to support you, so don’t hesitate to reach out if you encounter any more issues or have questions. We’ll get this sorted out together!
BalenaEtcher is a simple tool for creating bootable USB drives and it is known for its simplicity. It minimizes the risk of accidentally changing settings that could affect the boot process, making it a great choice, especially if you’re new to installing Linux.
Flashing EndeavorOS ISO with BalenaEtcher must ensure that the USB drive is prepared correctly and without unnecessary complications. Try it out and if you’re lucky, you’ll have a smooth installation process.
If you have any further questions or encounter any problems along the way, please contact us. The community is ready to help you on this path. Wishing you a successful installation of EndeavorOS and enjoying your Linux journey!
The windows bootloader isn’t safer, it’s a matter of choice which to use. If you really want a failsafe option, use both. Depending on your boot order, you can always jump from Windows boot to Linux or vice versa. So if one bootloader gets faulty, you can still use the other.
Great to hear that you were able to boot successfully after using BalenaEtcher, @Whoman!
Now, regarding your question about the bootloader, both the Windows bootloader and GRUB have their pros and cons, and it’s more a matter of preference and use case. The key thing to know is that neither option is inherently safer than the other; it’s about what works best for your needs.
Using the Windows bootloader and a tool to add a Linux entry to it can work well. This allows you to manage your boot options through the familiar Windows interface. However, it might be slightly less flexible when it comes to handling various Linux distributions and updates.
GRUB, on the other hand, is a widely used and versatile bootloader for Linux systems. It’s designed to work seamlessly with different Linux distributions and can automatically detect new kernels and update your boot menu accordingly.
As “emk2203” mentioned, using both bootloaders is also a valid approach. It gives you a failsafe option. Depending on your boot order, you can switch between Windows and Linux if one bootloader experiences issues.
Ultimately, the choice between the two bootloaders depends on your comfort level, personal preference, and specific requirements. Both can work effectively, so feel free to go with the option that suits you best. If you ever decide to explore GRUB, the community can provide guidance on its configuration.
No matter which path you choose, the community is here to support you. If you have more questions or need further assistance, don’t hesitate to ask. Enjoy your dual-boot system!