Hi,
I have read the forums and a few web sites and have gotten pretty far on my own I believe.
I have samba enabled and running
I have a share set up
the shared drive is owned by root and mounted at boot using fstab
On the client side, I can see the Media “server” in Dolphins Network and I can double click it and see the media folder.
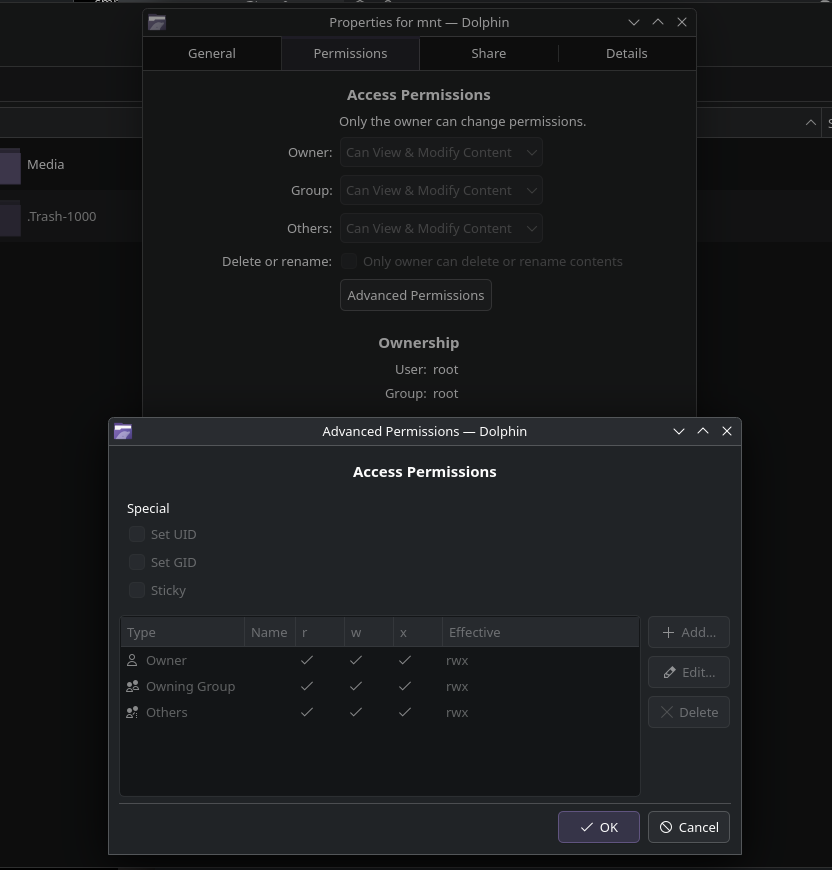
When I double click the Media folder I get access denied permission error’s.
Here is my smb.conf which I have placed in /etc/samba (I copied it from another thread-I believe it was posted by pug? There was a wget link to download it…). I get access denied errors using smbpasswd or tdbsam so I believe the issue is with the drive and file permissions, although I am not even sure about that. The share permissions are at 0777 because I changed then to get full access in the smb.conf file. I then tried to change the permissions on the folder and when I check it says owner/groups and users can change and modify content but still getting access denied when trying to mount the share on my desktop.
# This is the main Samba configuration file. You should read the
# smb.conf(5) manual page in order to understand the options listed
# here. Samba has a huge number of configurable options (perhaps too
# many!) most of which are not shown in this example
#
# For a step to step guide on installing, configuring and using samba,
# read the Samba-HOWTO-Collection. This may be obtained from:
#  http://www.samba.org/samba/docs/Samba-HOWTO-Collection.pdf
#
# Many working examples of smb.conf files can be found in the
# Samba-Guide which is generated daily and can be downloaded from:
#  http://www.samba.org/samba/docs/Samba-Guide.pdf
#
# Any line which starts with a ; (semi-colon) or a # (hash)
# is a comment and is ignored. In this example we will use a #
# for commentry and a ; for parts of the config file that you
# may wish to enable
#
# NOTE: Whenever you modify this file you should run the command "testparm"
# to check that you have not made any basic syntactic errors.
#
#======================= Global Settings =====================================
[global]

# workgroup = NT-Domain-Name or Workgroup-Name, eg: MIDEARTH
   workgroup = LOCAL.LAN
   ntlm auth = true

# server string is the equivalent of the NT Description field
   server string = Samba Server

# Server role. Defines in which mode Samba will operate. Possible
# values are "standalone server", "member server", "classic primary
# domain controller", "classic backup domain controller", "active
# directory domain controller".
#
# Most people will want "standalone server" or "member server".
# Running as "active directory domain controller" will require first
# running "samba-tool domain provision" to wipe databases and create a
# new domain.
   server role = standalone server

# This option is important for security. It allows you to restrict
# connections to machines which are on your local network. The
# following example restricts access to two C class networks and
# the "loopback" interface. For more examples of the syntax see
# the smb.conf man page
   hosts allow = 127. 192.168.0.

# this tells Samba to use a separate log file for each machine
# that connects
   log file = /var/log/samba/log.%m

# Put a capping on the size of the log files (in Kb).
   max log size = 100

# Backend to store user information in. New installations should
# use either tdbsam or ldapsam. smbpasswd is available for backwards
# compatibility. tdbsam requires no further configuration.

   passdb backend = tdbsam

#============================ Share Definitions ==============================
[homes]
   comment = Home Directories
   valid users = %S, %D%W%S
   browseable = No
   writable = yes
   inherit acls = Yes

# NOTE: If you have a BSD-style print system there is no need to
# specifically define each individual printer
[printers]
   comment = All Printers
   path = /usr/spool/samba
   browseable = no
# Set public = yes to allow user 'guest account' to print
   guest ok = no
   writable = no
   printable = yes

# A private directory, usable only by fred. Note that fred requires write
# access to the directory.
;[fredsdir]
;   comment = Fred's Service
;   path = /usr/somewhere/private
;   valid users = fred
;   public = no
;   writable = yes
;   printable = no

# The following two entries demonstrate how to share a directory so that two
# users can place files there that will be owned by the specific users. In this
# setup, the directory should be writable by both users and should have the
# sticky bit set on it to prevent abuse. Obviously this could be extended to
# as many users as required.
[MediaShare]
   comment = Media Share
   path = /mnt/Media/
   valid users = myusername
   public = yes
   read only = no
   writable = yes
   printable = no
   create mask = 0777
and here is the drive permissions and then the folder on the drive that contains all my media files
drive permissions (format nfts)
sudo systemctl start smb nmb
[yodamin@reyjik Desktop]$ ls -al /mnt/Media
total 932
drwxrwxrwx 1 root root   4096 Aug 11 18:05  .
drwxrwxrwx 1 root root   4096 Aug 28 20:05  ..
drwxrwxrwx 1 root root  12288 Apr  7  2023  Documentaries
drwxrwxrwx 1 root root 524288 Aug 27 19:32  movies
drwxrwxrwx 1 root root 393216 Aug 23 12:02  Music
drwxrwxrwx 1 root root      0 Aug 11 17:07  .Trash-1000
drwxrwxrwx 1 root root  12288 Apr 12 09:01  TV
and here is a screen shot of what I see in Dolphin.
I also see this in Dolphin
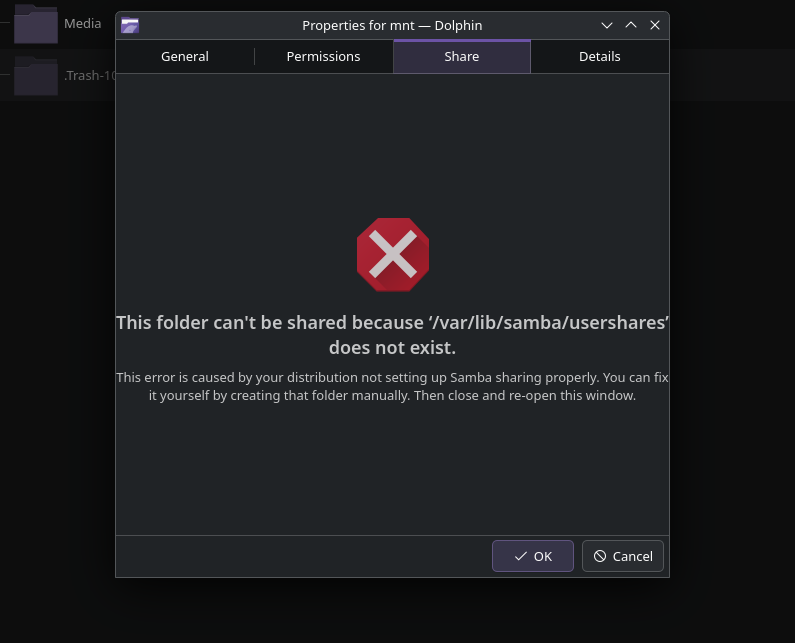
I have tried creating that directory and/or file (I tried to touch filename usershares and I tried mkdir usershares) and whichever one I did I then closed and re-opened the folder property sheet and then I saw “you must be a member of the root group to share this folder. Would you like to be added to the root group? Or something like that with a line under it saying a restart would be required. I did not do that because I want my normal user to be able to access the share and manipulate the files–for sync and maintenance purposes. I will backup from the master drive to that share drive not the other way around.
I have another Media drive in which I load new media. The I sync it with the drive on my Jellyfin server using grsync. The new media master drive is located on my desktop so I simply need to create the samba share and mount it on my desktop then start grsync to sycn the new content to the Jellyfin server’s media drive.
Any help would be appreciated.
If I can get the share setup so I can access it with RW permissions I believe that’s all I need.
I already have a tool to mount shares when I need them.
(I know I can do it manually, quickly but I can’t remember the dam command when I need it)
I already have grsyc setup I’d just need to change the folder path to reflect the new Media server for the media backup routine and I am set.
The very last piece is to get samba working properly and I am at a loss for the moment.
Any help would be greatly appreciated.